pH300 V1.0 7/09
5
pH Measurement Mode
Preparation for Measurement
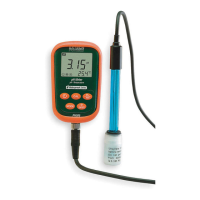
1. Turn the meter ON using the power key
2. Press the MODE key momentarily to switch to the pH mode, if necessary
3. Unscrew the protective cap on the probe jack located on the bottom of the meter (store
the protective cap in the carrying case for later use)
4. Carefully connect the pH probe to the meter’s probe jack. The probe can only be
inserted in one orientation. Once it is firmly connected, screw the probe collar onto the
meter to secure the probe.
3-Point Calibration (7.00pH, 4.00pH and 10.01pH)
Note: Calibrate the unit once per day for best results.
1. Press the CAL key to enter the Calibration mode. The meter’s display will show a
blinking ‘Cl’
2. Rinse the probe in distilled water, allow it to dry, and submerge it into a pH 7.00 buffer
solution. Stir the solution briefly and allow it to stay in the buffer solution until a stable
reading is reached
3. Press CAL again and the display will show a blinking ‘7.00’
4. This portion of the calibration procedure is complete when the display stops blinking
and shows the ‘C2’ icon. The unit will automatically switch to the second point of the
calibration
5. Rinse the probe in distilled water again, allow it to dry, and submerge it into a pH 4.00
buffer solution. Stir the solution briefly and allow it to stay in the buffer solution until a
stable reading is reached
6. Press CAL again and the display will show a blinking ‘4.00’
7. This portion of the calibration procedure is complete when the display stops blinking
and shows the ‘C3’ icon. The unit will automatically switch to the third point of the
calibration
8. Rinse the probe in distilled water again, allow it to dry, and submerge it into a pH 10.01
buffer solution. Stir the solution briefly and allow it to stay in the buffer solution until a
stable reading is reached
9. Press CAL again and the display will show a blinking ‘10.01’
10. After the display stabilizes the 3-point calibration icon will appear
1-Point and 2-Point Calibration
Note that the user can calibrate one or two points only, if the expected measurement is
known.
For example, if the expeced pH is 4pH, it is acceptable to perform only a 1-Point
Calibration (4pH). If the expected measurement is between 4.00pH and 7.00pH, the user
can perform a 2-Point Calibration (4.00 and 7.00pH), and so on.
For a 4pH calibration, only the circled L will appear on the LCD. For a 7.00pH, only the
circled M will appear on the LCD. For a 10.01pH Calibration, only the circled H will appear
(Low, Medium, and High).
For all other applications, a 3-Point Calibration is recommended. Always perform a 3-Point
Calibration on new probes and probes that have been in use for long periods. This
maximizes measurement slope linearity.
www.burntec.com
 Loading...