7
Coupler Installation (301100)
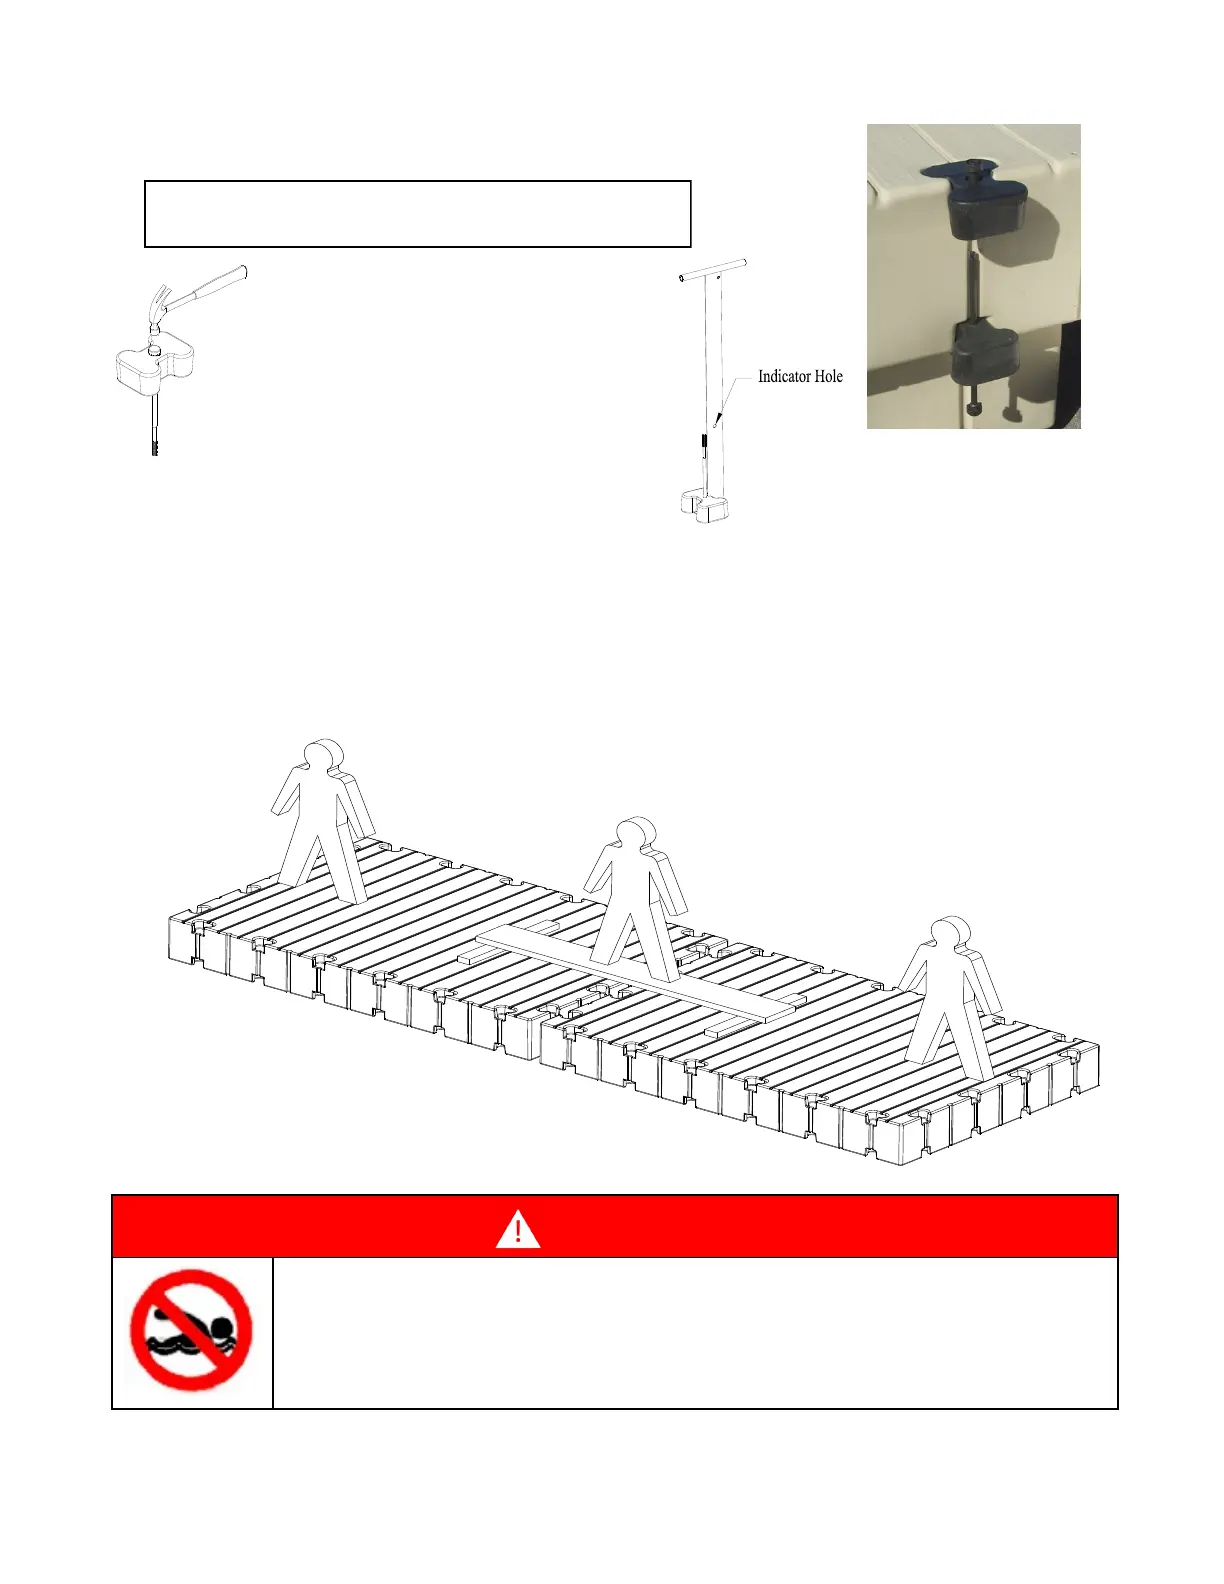
1. Insert the composite coupler bolt into
coupler. Align the mark on the head of
the bolt so the splines line up into the
notched pockets in the coupler.
2. Using a hammer, seat the bolt into the
coupler.
3. Install coupler with seated bolt on the in-
water installation tool.
4. Align dock sections so coupler pockets
are adjacent to each other, and using the in-water in-
stallation tool, insert the coupler and bolt assembly
into the bottom pocket with the bolt pointing upward.
DO NOT OVER TIGHTEN THE NUT!
Torque to 15 ft. lbs.
Helpful Hint: To make assembly and disassembling easier,
rub a bar of hand soap on the coupler rods to lubricate them.
5. Pull up on the in-water installation tool to seat the bottom coupler. (NOTE: The dock sections must be
sitting level on the water and at the same elevation for the coupler to properly seat into the bottom
pocket. Sometimes it is helpful to ballast the opposing ends of dock sections to keep the adjoining
ends from dipping. This can be done by having someone stand on the opposite ends of each dock
section, or by standing on an elevated beam or board (as shown) placed perpendicular to the dock
section to span the seam being connected. When coupling seams together, it is recommended to start
at the center of the seam and work to the edges.
Drowning Hazard
Swimming under and/or attempting to breathe in cavities under EZ Dock docks and ports while
performing in-water installation of docks, ports and couplers can result in accidental drowning
and death.
Do not attempt in-water installation without EZ Dock in-water coupler installation tools.
DANGER
Note:
All empty or un-used coupler pockets should
be filled with an EZ Dock pocket filler (201030); see page 38.



 To Next Page