8
Anchoring
Once you have selected your site and assembled the dock, the next step is to select the anchoring
method best suited for your location. Since no two installations are ever exactly the same, each and
every EZ Dock installation must be designed and configured for your specific application. Your local
dealer can help you select the anchoring system that is right for your location. EZ Dock offers a wide
variety of anchoring components which are simple to install and safe to use. Constructed of either poly-
ethylene, galvanized steel, or stainless steel (all of which are long lasting, durable materials that can
range from standard to heavy duty) they both provide a wide range of reliable options to construct a
dock for nearly any use and waterscape.
Selecting your Anchoring Method
EZ Dock provides a wide range of anchoring components to accommodate most water conditions and
bottoms (deep, shallow, rough, or sandy). EZ Dock anchoring methods are simple to install and safe to
use. Our anchoring products are made from long-lasting, durable materials that can accommodate from
standard to heavy-duty demands.
Pipe anchoring is typically used in most private and some light duty commercial applications.
The deadweight method of anchoring is used with deeper water or rocky bottoms.
Piling anchoring is very similar to pipe anchoring in that the pilings are used to prevent the lateral
movement of the dock. This method of anchoring is used in heavy duty commercial applications.
Stiff-arm anchoring is a method of supporting the dock system by attachment to the shore or some
other type of rigid structure by poles or arms.
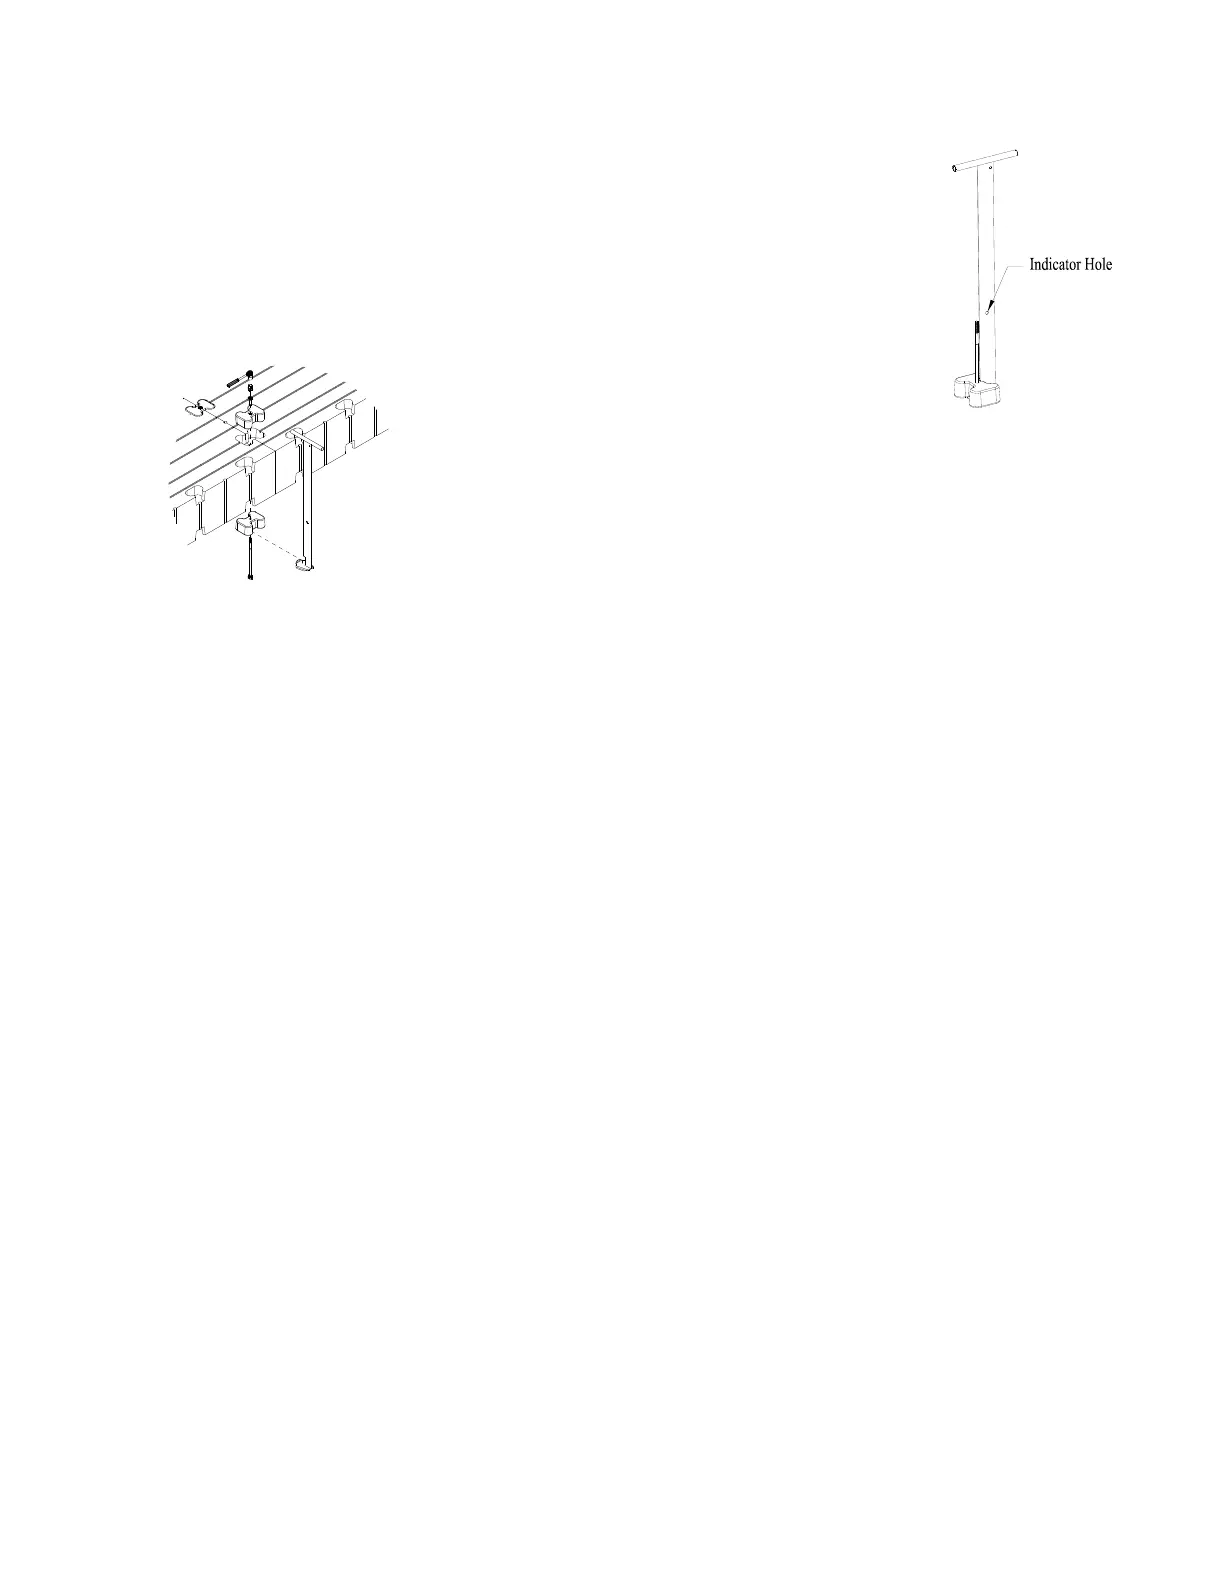
In-Water Coupler Installation Tool (9000010)
1. Align and abut the adjoining ends of the dock sections .
2. Insert the bottom coupler and bolt assembly into installation tool and firmly pull up to
seat coupler.
3. Hold the top handle and lower the tool with coupler into the water until the rod is
completely below the bottom surface of the dock section. (If the rod hits the dock
section the coupler may fall off the tool).
4. While maintaining the proper depth, slide the tool
between the dock sections until you reach the pocket to
be connected.
5. Lift the tool upward while aligning the rod to come up
between the opening through the pockets. The tool has
a 1/2‖ hole on the long flat part of the handle that may be
seen above the deck area and will indicate that the bottom coupler is
properly in position. Insert a rod or screwdriver into this hole to hold
the tool and coupler in place while connecting top coupler.
6. Place top coupler into position, thread on coupler nut, and draw the
connections together tightly.
7. To release the installation tool, remove pin from hole and push down
tool, sliding it between the docks and begin your next coupler
installation.
For help contact your dealer or distributor at 800-654-8168.



 To Next Page