1
EN
Setup
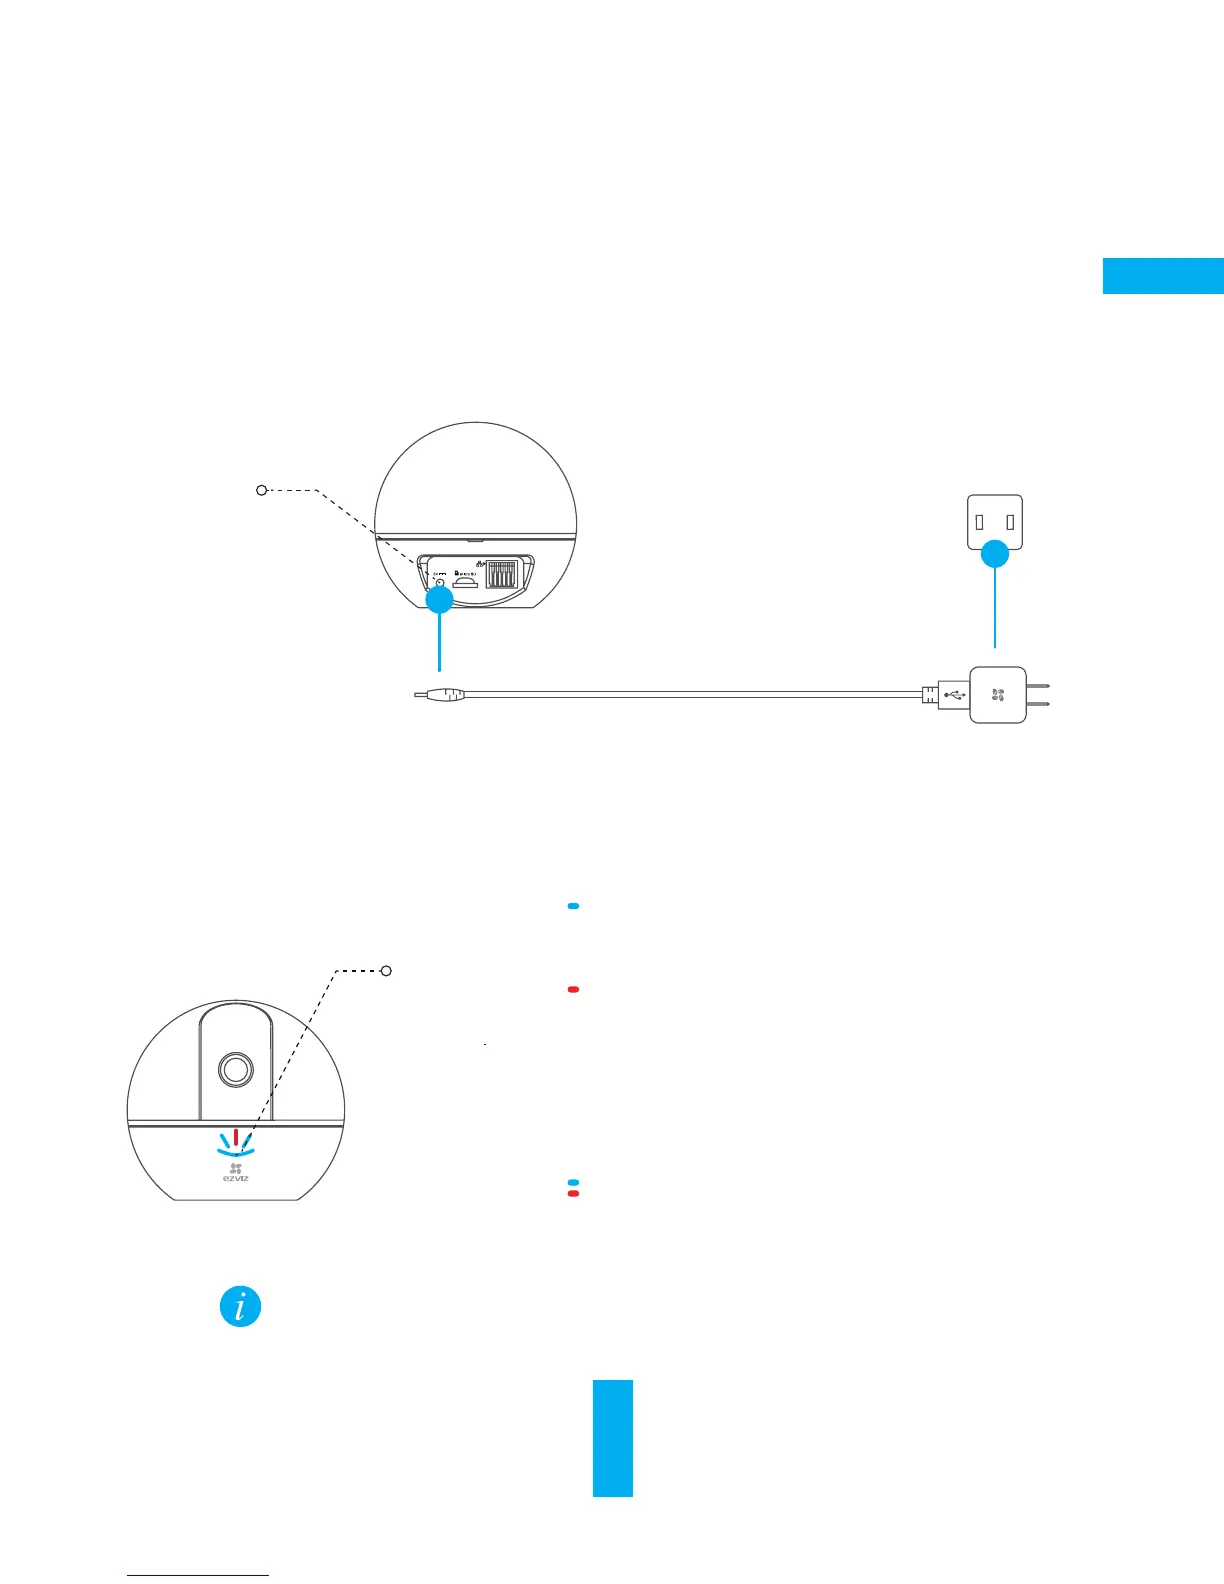
Step 1 Power-on
Plug the power cable into the camera, and then plug the power adapter into an outlet as shown in
the figure below. The LED indicator will flash red and blue when the camera is ready for setup.
LED Indicator Status
Power Cable
Power Outlet
Power Interface
Blue Flicker: The network is properly connected.
Solid Red: The device is activating.
Slow Red Flicker: Invalid network connection.
Fast Red Flicker: MicroSD card or other error
occurred.
Alternating Blue and Red Flicker: Camera is ready
for Wi-Fi setup.
LED Indicator
Turn on the Mini 360 Plus and let it power up. The camera will completely rotate side-
to-side and tilt up-and-down once.