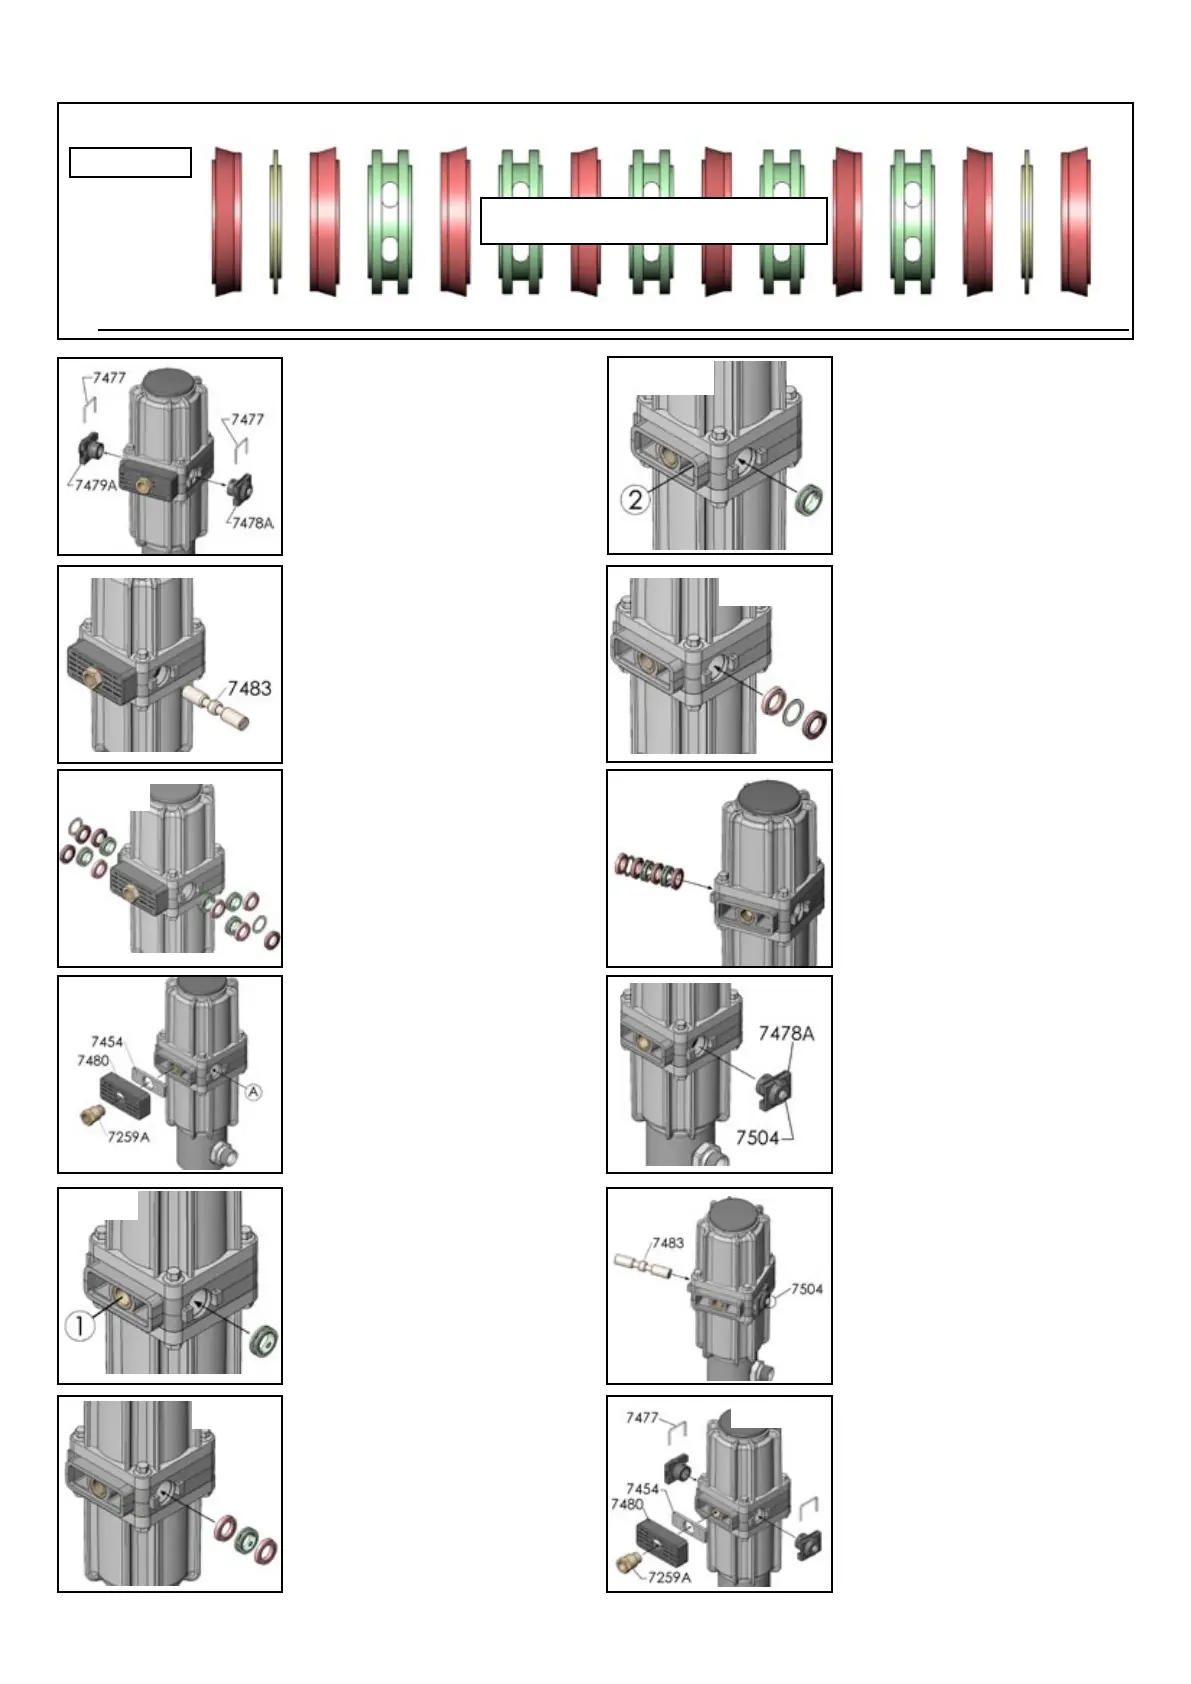
7 - Seals replacement
Pull out the two clips (cod.
7477) using a screw driver like
a lever and a pair of pliers.
Take off the two plugs (cod.
7478A-7479A) manually.
Push the slider (cod.7483)out
by a screw driver.
Pushing by a finger, take
off, one by one, all lip seals,
spacers and washers. By a 17
mm wrench unscrew the brass
tting (cod. 7259A) that locks
the silencer plastic cap (cod.
7480).
Hold by left hand the spacer in
its position and by right hand
insert on the right side of the
spacer a lip seal, then one
more spacer and a lip seal
again.
Insert the last ring spacer and
check it is in line with the right
side slot (2) of the pneumatic
distributor.
Insert then a lip seal, a plastic
washer and the last lip seal (N.B.
last seal must be turned in the
opposite direction of other seals).
Proceed to insert left side
spacers, seals and washers
in simmetric way of previous
instructions (from VI to VIII).
Wh e n lip s e als p a cke t i s
completed, reassemble the right
side plug. This plug must be
provided with a RESET button
(cod. 7478A+7504)
Insert the slider (cod. 7483) from
the left side of the pneumatic
distributor and push it, in order
that the reset button (cod. 7504)
comes out completely.
SEALS PACKET
Fig.II
Fig.XI
Fig.X
Fig.IX
Fig.IV
Fig.V
Fig.III
Fig.I
Fig.VI
Fig.VII
Fig.VIII
N.B. The seals must be mounted respecting strictly the direction indicated on the drawing.
cod.7482
Fig.XII
Insert now the left side plug (cod.
7479A+7505) and lock both
by using a pair of pliers. Then
reassemble the silencer and
the plastic cap; tigthten them by
screwing the brass tting (cod.
7259A) with a 17 mm wrench.
Remove the silencer (cod.
7454) and the plastic cup in
order to get a better vision
during mounting operation of
the new seals packet. Clean
up the cylinder (A) from any
possible impurity.
Grease the cylinder (A) and
proceed to the assembly of
the new lip seals packet (cod.
7482). First take a ring spacer
and set it in the centre of the
cylinder (A) as it can be seen
in line with the brass tting (1).
- 9 -
 Loading...