NOTE: When installing V110 Level Railing Kit with Square or Turned
Balusters use Installation Guide and Template included with kit.
Step 1
Review all local building codes.
Wear proper safety equipment.
Step 2
Plumb all posts or mounting surfaces, install optional post trim at this time.
Determine required bottom rail height from deck surface to bottom of rail based on
local building codes.
Deduct 1/8" and mark post with a pencil.
Place bottom of bottom bracket on this line, centered on post.
Install bracket with three (3) #8 x 1-1/2" screws.
Repeat this step on other post.
Step 3
Measure distance between nished posts or mounting surfaces.
Deduct 3/4" from total length to allow for mounting brackets.
Mark bottom rail to correct length.
Ensure there is equal & maximum distance from baluster holes on both ends.
Cut bottom rail and aluminum ll to length.
Cut top rail the same, ensuring baluster holes line up.
NOTE: Ensure bottom aluminum channel is inserted into rail with the DEEP SIDE of
channel facing the BALUSTER SIDE of rail.
Step 4
Place bottom rail, crush block down, into bottom brackets on posts.
Ensure crush block is the correct height, making contact with the deck.
Install two (2) #10 x 3/4" self-drilling screws through holes in both sides of each bracket,
securing bottom rail in place.
Step 6
Insert balusters into bottom rail.
Place top rail onto balusters, starting from one end.
Step 7
With top rail seated on balusters, slide a bracket into position on end of top rail and
mark position. Remove bracket and push top rail to the side and install top bracket
with three (3) #8 x 1-1/2" screws. Repeat on other side.
Step 8
Set top rail into brackets and install two (2) #10 x 3/4" self-drilling screws through holes in
both sides of each bracket, securing top rail in place.
Carefully bend bracket cover and install cover over brackets.
Adjust post height, if necessary, and install post caps with PVC glue.
NOTE: For additional security of your railing, you may elect to use the two (2) remaining
#10 x 3/4" color matched screws (supplied) using the following steps. Make certain balusters
are inserted against aluminum inserts. At the center baluster, measure up from bottom of
Top Rail 1/2" at center of baluster and install one (1) #10 x 3/4" color matched screw through
side of rail into baluster. Next, measure down, from top of the Bottom Rail 1/2" at center of
the same baluster and install one (1) #10 x 3/4" color matched screw through side of rail into
the baluster.
909927-01
Equal & maximum spacing
Balusters
Rail Bottom
Step 2
Step 3
Step 3
Step 5 & 6
Step 6
Step 7
Step 8
It is the responsibility of the installer to meet or exceed all code and safety requirements, and to obtain all required building permits. These instructions
are only a guide and may not address every circumstance. The installer should determine and implement appropriate installation techniques for each
situation. Fairway Building Products shall not be held liable for improper or unsafe installations.
www.FairwayRailing.com
FAIRWAY ARCHITECTURAL RAILING SOLUTIONS ©2017
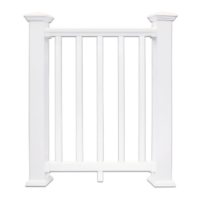
V110 Vinyl Railing
Level Installation Guide