EasyManua.ls Logo

Fancom IM.60 24V + CPS - Page 11

Default Icon
55 pages
Print Icon
To Next Page IconTo Next Page
To Previous Page IconTo Previous Page
Loading...
Gn
8
g
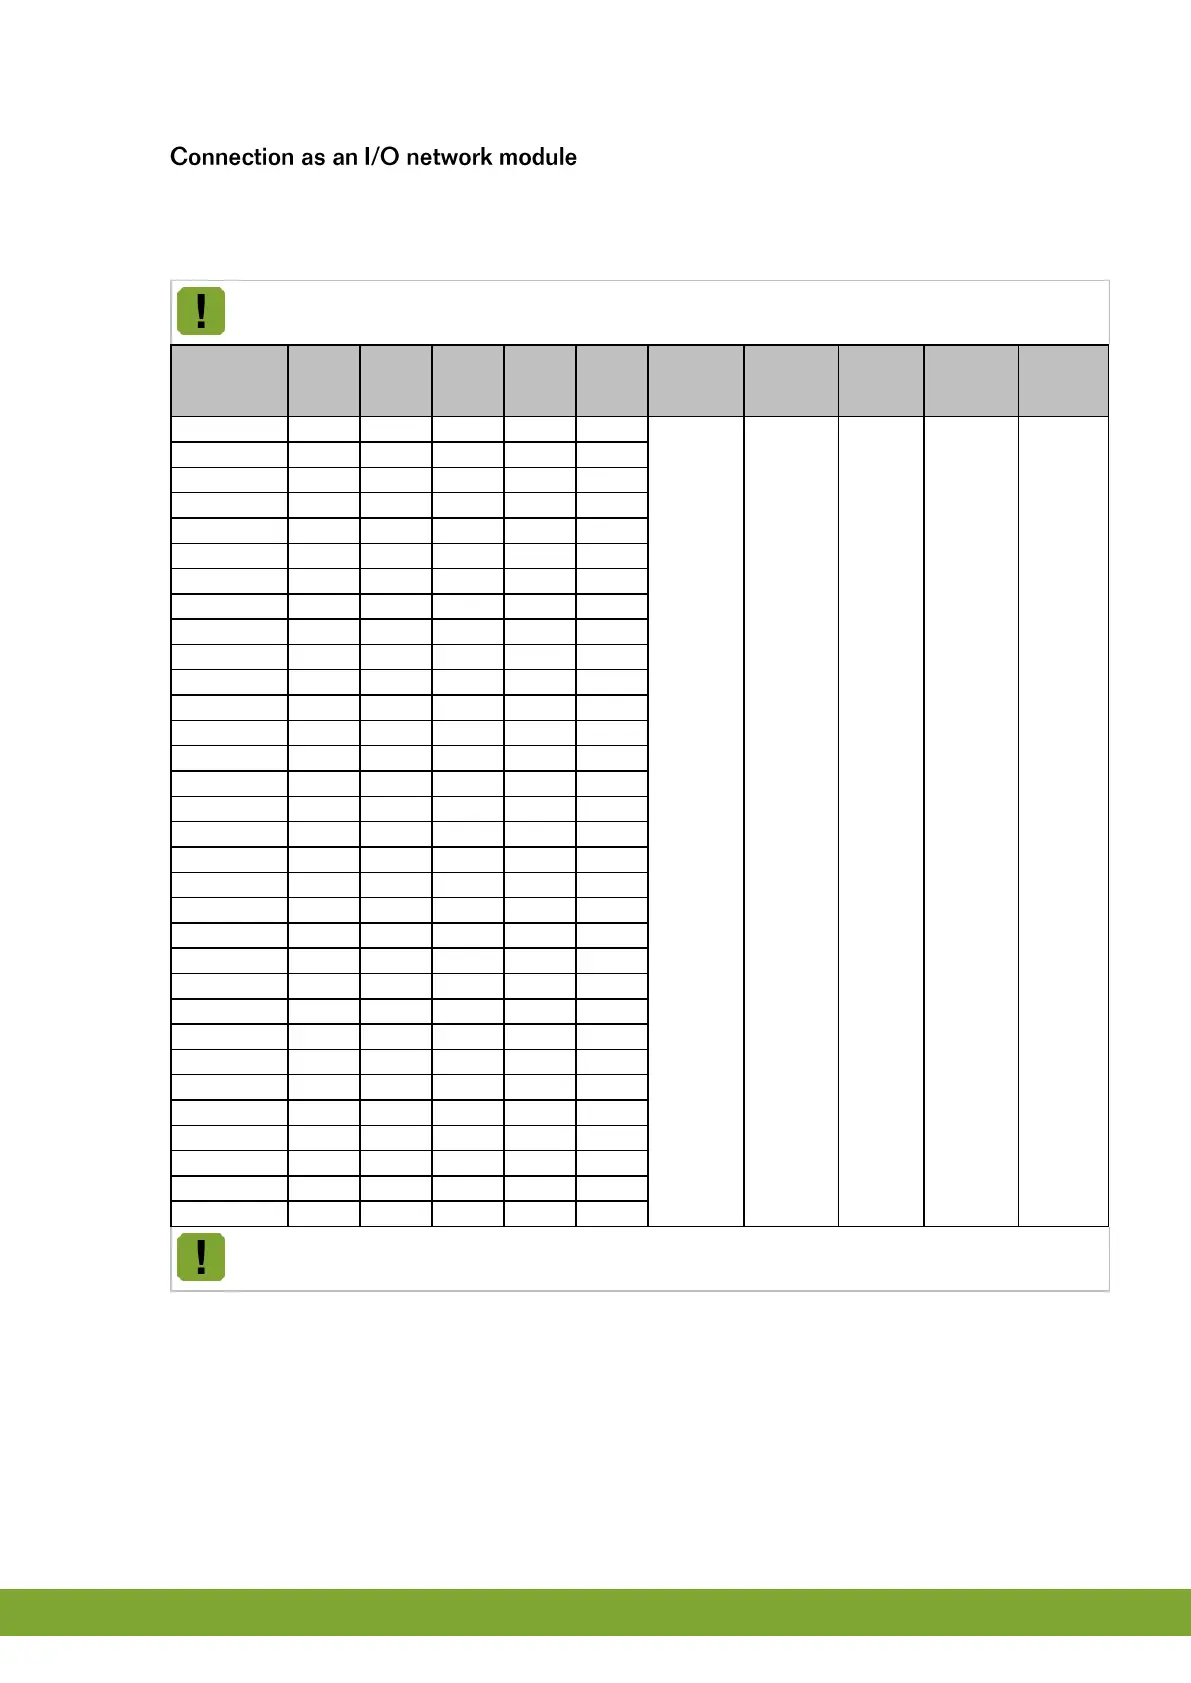
Set the I/O address
Using the table below, set the I/O address with the dipswitches 1 thru 5.
In an I/O network, all iM.60 units must have a unique address.
I/O
address
DIP 1
DIP 2
DIP 3
DIP 4
DIP 5
DIP 6
DIP 7
DIP 8
DIP 9
DIP 10
AN.
ON
ON
ON
ON
ON
ON =
iM.60
doesn’t
measure
the
temperatu
re itself
OFF =
iM.60
measures
the
temperatu
re itself
ON = Not
using
batteries
OFF =
Using
batteries
ON =
Default
direction
of
rotation
OFF =
Inverse
direction
of
rotation
ON =
CPS
OFF =
Potentiom
eter
Not used
1
OFF
ON
ON
ON
ON
2
ON
OFF
ON
ON
ON
3
OFF
OFF
ON
ON
ON
4
ON
ON
OFF
ON
ON
5
OFF
ON
OFF
ON
ON
6
ON
OFF
OFF
ON
ON
7
OFF
OFF
OFF
ON
ON
8
ON
ON
ON
OFF
ON
9
OFF
ON
ON
OFF
ON
10
ON
OFF
ON
OFF
ON
11
OFF
OFF
ON
OFF
ON
12
ON
ON
OFF
OFF
ON
13
OFF
ON
OFF
OFF
ON
14
ON
OFF
OFF
OFF
ON
15
OFF
OFF
OFF
OFF
ON
16
ON
ON
ON
ON
OFF
17
OFF
ON
ON
ON
OFF
18
ON
OFF
ON
ON
OFF
19
OFF
OFF
ON
ON
OFF
20
ON
ON
OFF
ON
OFF
21
OFF
ON
OFF
ON
OFF
22
ON
OFF
OFF
ON
OFF
23
OFF
OFF
OFF
ON
OFF
24
ON
ON
ON
OFF
OFF
25
OFF
ON
ON
OFF
OFF
26
ON
OFF
ON
OFF
OFF
27
OFF
OFF
ON
OFF
OFF
28
ON
ON
OFF
OFF
OFF
29
OFF
ON
OFF
OFF
OFF
30
ON
OFF
OFF
OFF
OFF
31
OFF
OFF
OFF
OFF
OFF
If the iM.60 is the first or last unit of the IO-net, switch the Termination resistor dipswitch on the ICM
board to ON.

Related product manuals