8
OPERATION
• When using the appliance for the first time, it is recommended to operate it for at
least 1 full cycle without a capsule ( Operation).
• Let the appliance cool completely.
• Clean the appliance ( Cleaning and Maintenance).
Using the appliance
This appliance can be used for brewing coee using K-cup capsules. Use only fresh
and cold water and do not use any other liquids.
NOTE:
- The appliance has a rated power of 600W. Before plugging it into the wall
outlet, ensure that the electrical circuit is not overloaded with other appliances.
This appliance should always be operated on a separate 120V ~ 60Hz wall
outlet.
- Make sure the appliance is assembled before connecting it to a wall outlet.
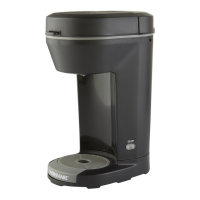
• Place the appliance on a clean, at and heat resistant surface (ill.
a
).
• Press the lid release lever (1) to unlock the lid (2) (ill.
b
).
WARNING:
- Do not touch the needle on the underside of the lid (2) or inside the capsule
holder (9), they are sharp.
- Only use suitable capsules. Do not place capsules directly into the insert
holder (11) (ill.
c
). Do not place other than the recommended capsules into
the capsule holder (9).
- Some capsules may not work with this appliance. If the capsule does not
properly t into the capsule holder (9), or leaks during the brewing cycle, do
not use that type of capsule again.
- Do not use ground coee without a capsule in this appliance.
- Do not remove the seal 1 (12) & seal 2 (13) & seal 3 (14).
• Insert a capsule in the capsule holder (9). Insert the capsule holder (9) in the
insert holder (11) (ill.
d
).
• Close the lid (2) and ensure it locks properly (ill.
e
).
• Place the drip tray (8) with cup holder (7) into the appliance (ill.
f
). Ensure they
sit securely in place.
• Fill the water reservoir (3) with fresh cold water by opening the water reservoir
lid (4) and pouring reservoir the water slowly into the funnel (ill.
g
).
• Fill the Water Tank to the desired level from 6 oz to 10 oz according to the
markings located on the Water Reservoir.
K Cup Coffee Maker_201762_FW_IM_US_180709_II.indd 8 7/9/18 15:02
 Loading...