Tracking the track left on the tractor center by markers is
both easy and mitigates the fault risk rather than the old
method which causes loss of attention and time as well
as increases the fault risk.
With this method, there is no right – left distinction since
the machine’s and tractor’s center is marked for the
next passage. Hence, the requirement of adjusting the
front wheels according to the track width is eliminated.
C.4.2 Changing Marker Disc Angles and Track Position
If marking a different point than the
tractor’s center is desired as the
marker tracking position (e.g. if
conventional tracking method is to be
preferred for front wheel) the positions
of the discs can be changed.
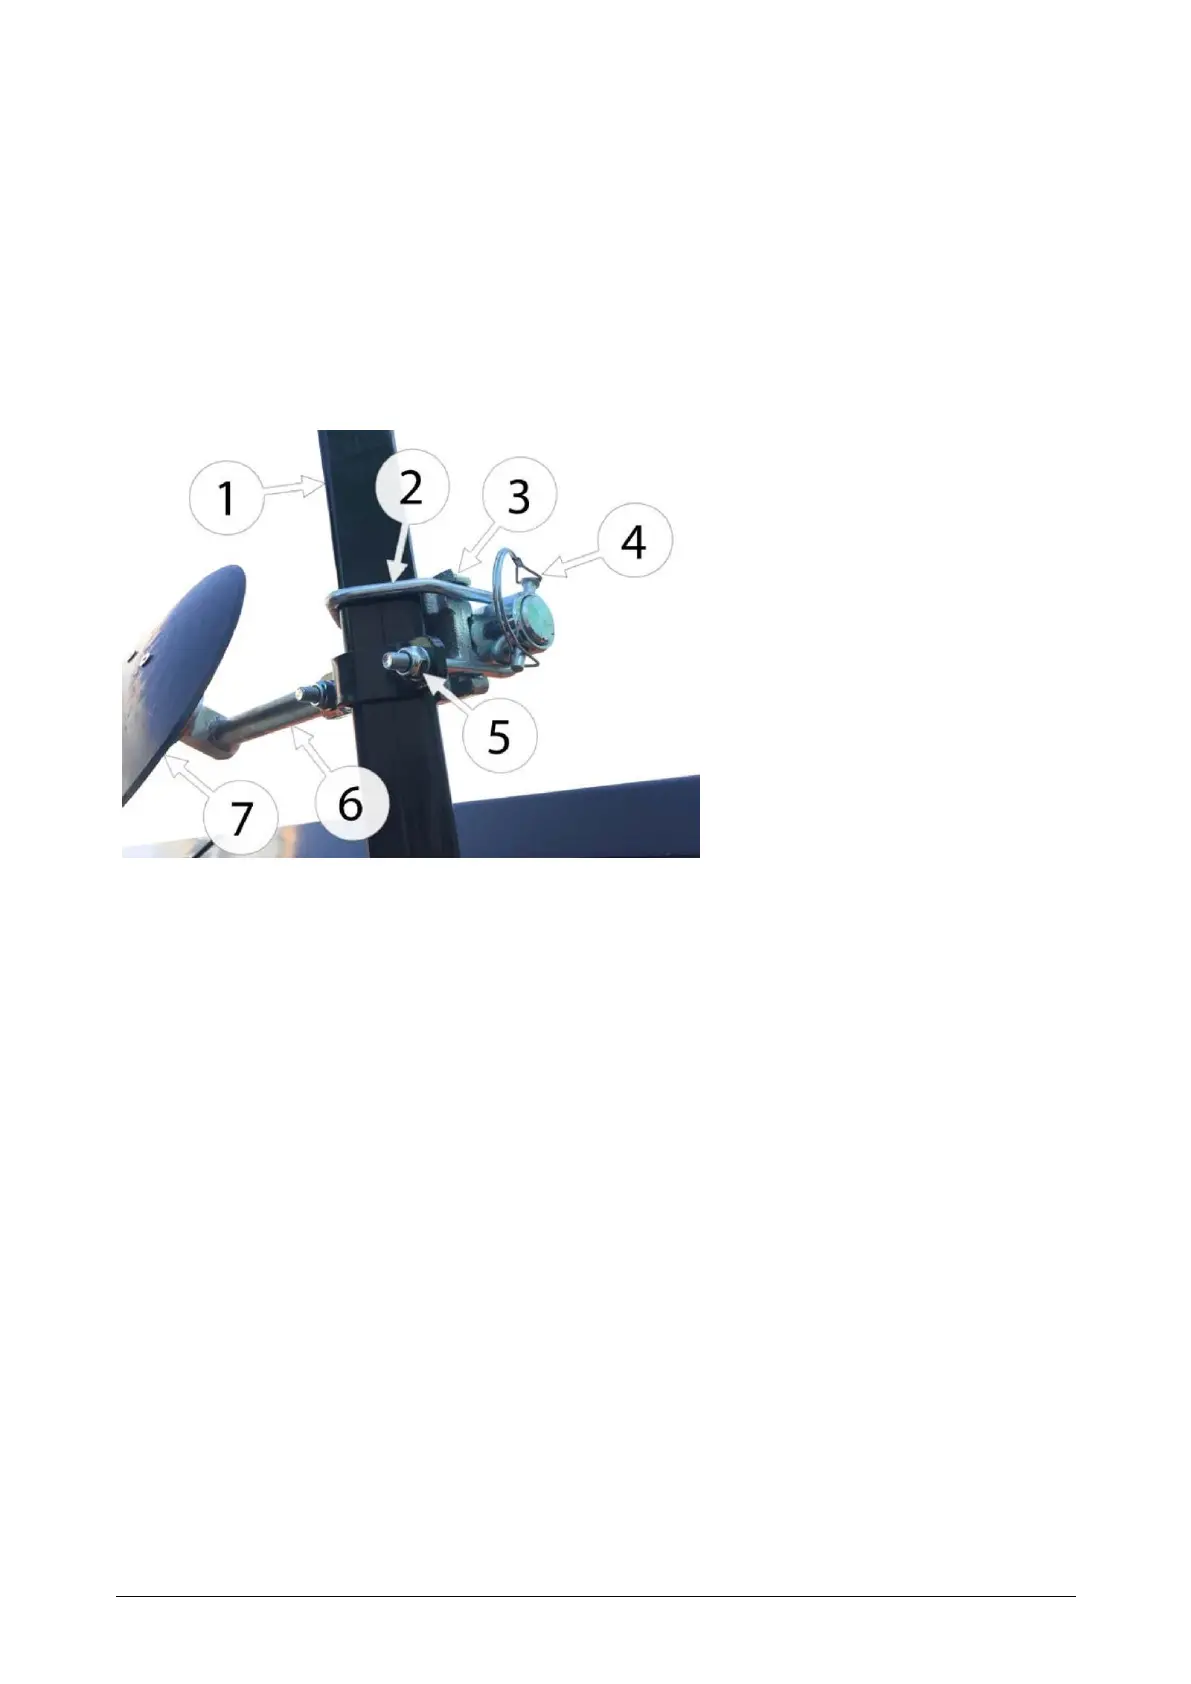
1.
Marker Arm
2.
Pruvant
3.
Pruvant Block
4.
Spring Catch
5.
Pruvant Bolt
6.
Disc Connecting Shaft
7.
Marker Disc
Market Disc and Connectors
Follow the procedure steps below to change the location of
the marker disc:
1.
Step: Loosen the pruvant bolts (5).
2.
Step: Change the track position by sliding the
pruvant block (3) and the disc angle by rotating the
disc connecting shaft (6).
3.
Step: Tighten the pruvant bolts (5).
Note: An increase in the disc angle of up to 45 degrees
increases the width and depth of the track left. After this
angle the clearance decreases since the disc track will
become too large. Therefore, do not adjust the disc to
angles above 45 degrees towards the moving direction.
Check whether the bushing to which the disc connecting
shaft is attached is in correct position after the
adjustment.
 Loading...