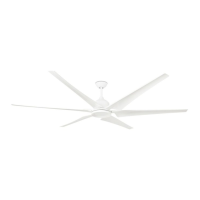
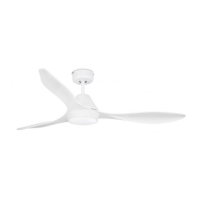
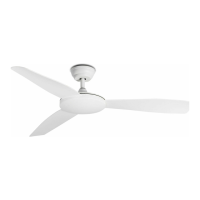
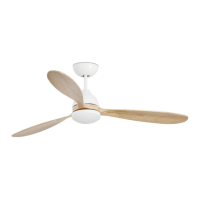
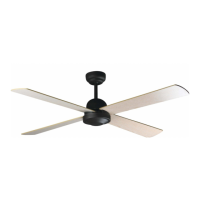
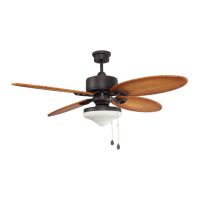
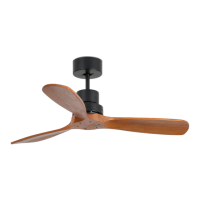
This document is an installation guide for a ceiling fan from FARO Barcelona, specifically the "Lantau" model, which appears to come in different sizes (Ø168, Ø132, and Ø107). The guide provides instructions for installation, usage, and maintenance, along with contact information and support details.
Function Description
The Lantau ceiling fan is designed to provide air circulation and cooling in indoor spaces. It features multiple fan speeds (High, Medium, Low, OFF) and can be controlled via a remote control. The fan is intended for residential and commercial use, offering both aesthetic appeal and functional performance.
Important Technical Specifications
While specific electrical ratings (voltage, wattage) are not explicitly detailed in the provided pages, the installation steps indicate standard electrical wiring (L, N, and ground) and the use of a receiver for remote control functionality. The remote control for models Ø168, Ø132, and Ø107 requires a 9V DC battery (not included). The fan blades are made of wood, and the motor housing appears to be metallic (stainless steel or similar finish). The installation process involves mounting the fan to the ceiling, connecting electrical wires, and assembling the fan components.
Usage Features
- Remote Control Operation: The fan is operated using a dedicated remote control, allowing users to adjust fan speeds (High, Medium, Low) and turn the fan ON/OFF.
- Multiple Speed Settings: Users can select from three distinct fan speeds to suit their comfort preferences and room conditions.
- Model-Specific Remote Pairing: The guide illustrates different remote controls and pairing procedures for the Lantau Ø168 model versus the Lantau Ø132 & Ø107 models, suggesting a dip switch configuration for code selection on the latter.
- Seasonal Operation: Although not explicitly detailed in the provided snippets, the presence of a snowflake/sun icon on one of the usage diagrams (page 9) suggests the fan might have a reversible function for summer cooling and winter heat distribution, a common feature in modern ceiling fans.
Maintenance Features
The manual emphasizes the importance of proper installation and regular checks to ensure safe and efficient operation. While a dedicated maintenance section is not fully visible, the general advice provided across multiple languages highlights:
- Regular Inspection: Users are encouraged to periodically check the fan for any signs of wear or damage.
- Professional Assistance: For any issues or doubts regarding installation, maintenance, or repair, users are advised to contact FARO Barcelona's technical support or a qualified professional.
- Environmental Responsibility: The manual stresses the importance of reducing paper consumption and encourages users to consult the digital version of the manual on www.faro.es. It also promotes responsible disposal and recycling of the product and its components.
- Cleaning: Although not explicitly shown, general ceiling fan maintenance typically involves cleaning the blades and motor housing to prevent dust buildup, which can affect performance and aesthetics.
Installation Process Overview
The installation guide provides a step-by-step visual and textual guide for setting up the Lantau ceiling fan:
- Unboxing and Component Identification: The first steps involve unboxing the fan and identifying all components, including the motor housing, downrod, canopy, blades, mounting bracket, and remote control. Tools required for installation are also listed (ladder, pliers, screwdrivers, drill, hammer, measuring tape).
- Mounting Bracket Installation: The mounting bracket (g) is secured to the ceiling using appropriate fasteners (screws and anchors), after ensuring the power is OFF at the circuit breaker.
- Downrod Assembly: The downrod (a) is attached to the motor housing (d), and the safety screw (c) is tightened.
- Wiring: Electrical connections are made, connecting the fan's wires to the household wiring (L, N, and ground) and integrating the receiver (h) for remote control functionality. The guide shows a plug connector for easy connection.
- Canopy Installation: The canopy (e) is slid up the downrod and secured to cover the wiring and mounting bracket.
- Blade Attachment: The wooden fan blades (f) are attached to the motor housing using screws (f.l).
- Final Checks: After assembly, the guide instructs to turn the power ON and test the fan using the remote control.
- Remote Control Setup: Instructions are provided for setting up the remote control, including battery insertion and, for some models, selecting the correct dip switch code to pair with the fan's receiver.
The manual emphasizes safety throughout the installation process, particularly regarding electrical connections and ensuring the power is off before handling wiring. It also provides contact information for support and encourages users to visit their website for FAQs and further information.