Step 1: Removing Fuel Sending Unit
Some of the photo’s are of a different application, refer to the photos that resemble your application.
Possible Variations
Clamps will be located at both ends
Clamps will be located at the tank. Some applications have an inte-
grated overflow/inner tube assembly. If so, then make sure the
inner tube does not hang-up in the tank.
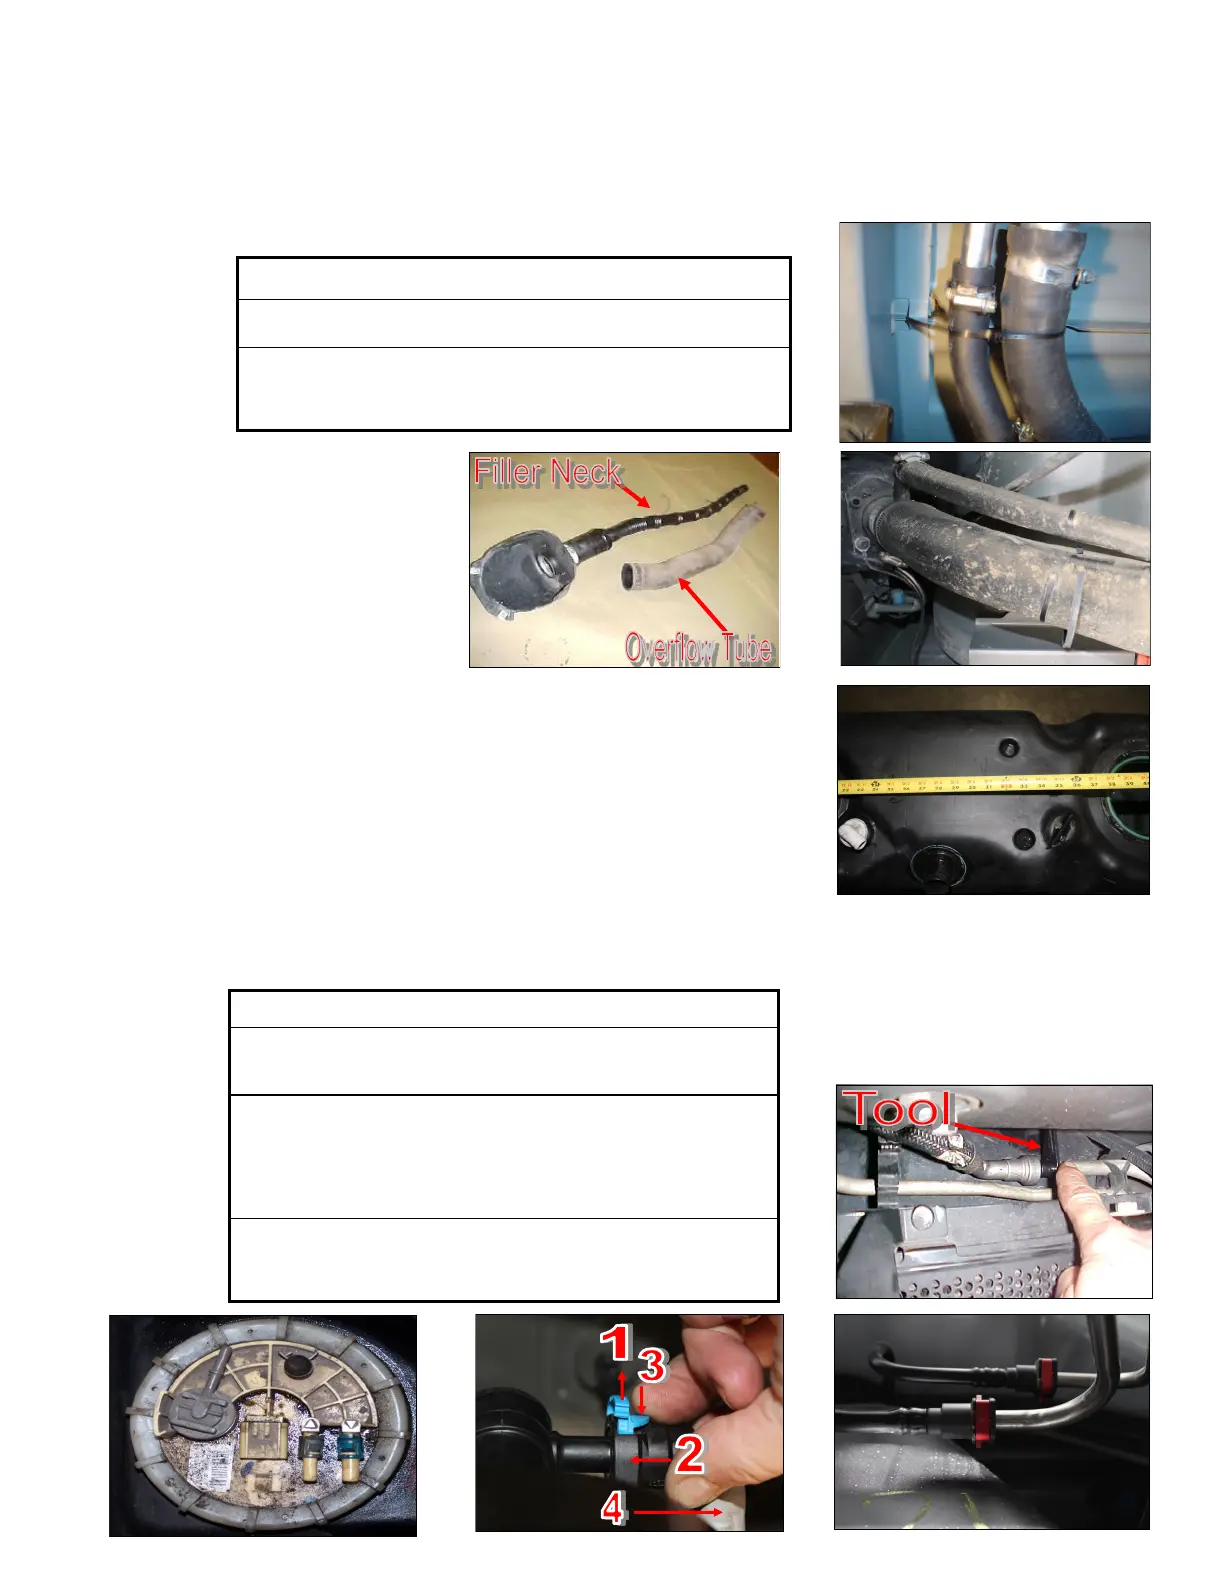
C. Disconnect the factory suction and return line. If more space is required to access the top of the fuel tank,
loosen the strap nuts to the end of the stud. This will gain you about 3” more working room.
Possible Variations
Press in on the 2 blue tabs and pull off the black fuel connector.
The blue tabs will stay on the factory ports.
1. Pull up on the locking tab (either blue or yellow),
2. Push in slightly on the connector,
3. Press down on the release tab,
4. Pull the connector straight off,
Pinch in red tabs, pull out locking collar. You may have use a
Fuel Line Disconnect tool and lower the Fuel Cooler to access the
Suction line.
A. Disconnect the vehicles battery. Remove the filler neck and overflow tubes from the truck by loosening the
clamps.
B. Before tank is removed or moved, identify ALL areas of clearance be-
tween the tank and the truck’s bed for the best location to install the BHF
assembly. With proper clearance, you want to install it as close to the
Fuel sending unit as possible.
 Loading...