Back Panel
ESD grounding for ESD protection. The screws and washer are included.
Connect to external DC power,48V-57V DC. The PoE powered switch can work with
external power supply unit.
Hardware Installation
Place the PoE Powered Switch on the flat, horizontal surface or mount it on the wall. There are two wall-mounted
spots at the bottom of the switch.
Connecting the Switch
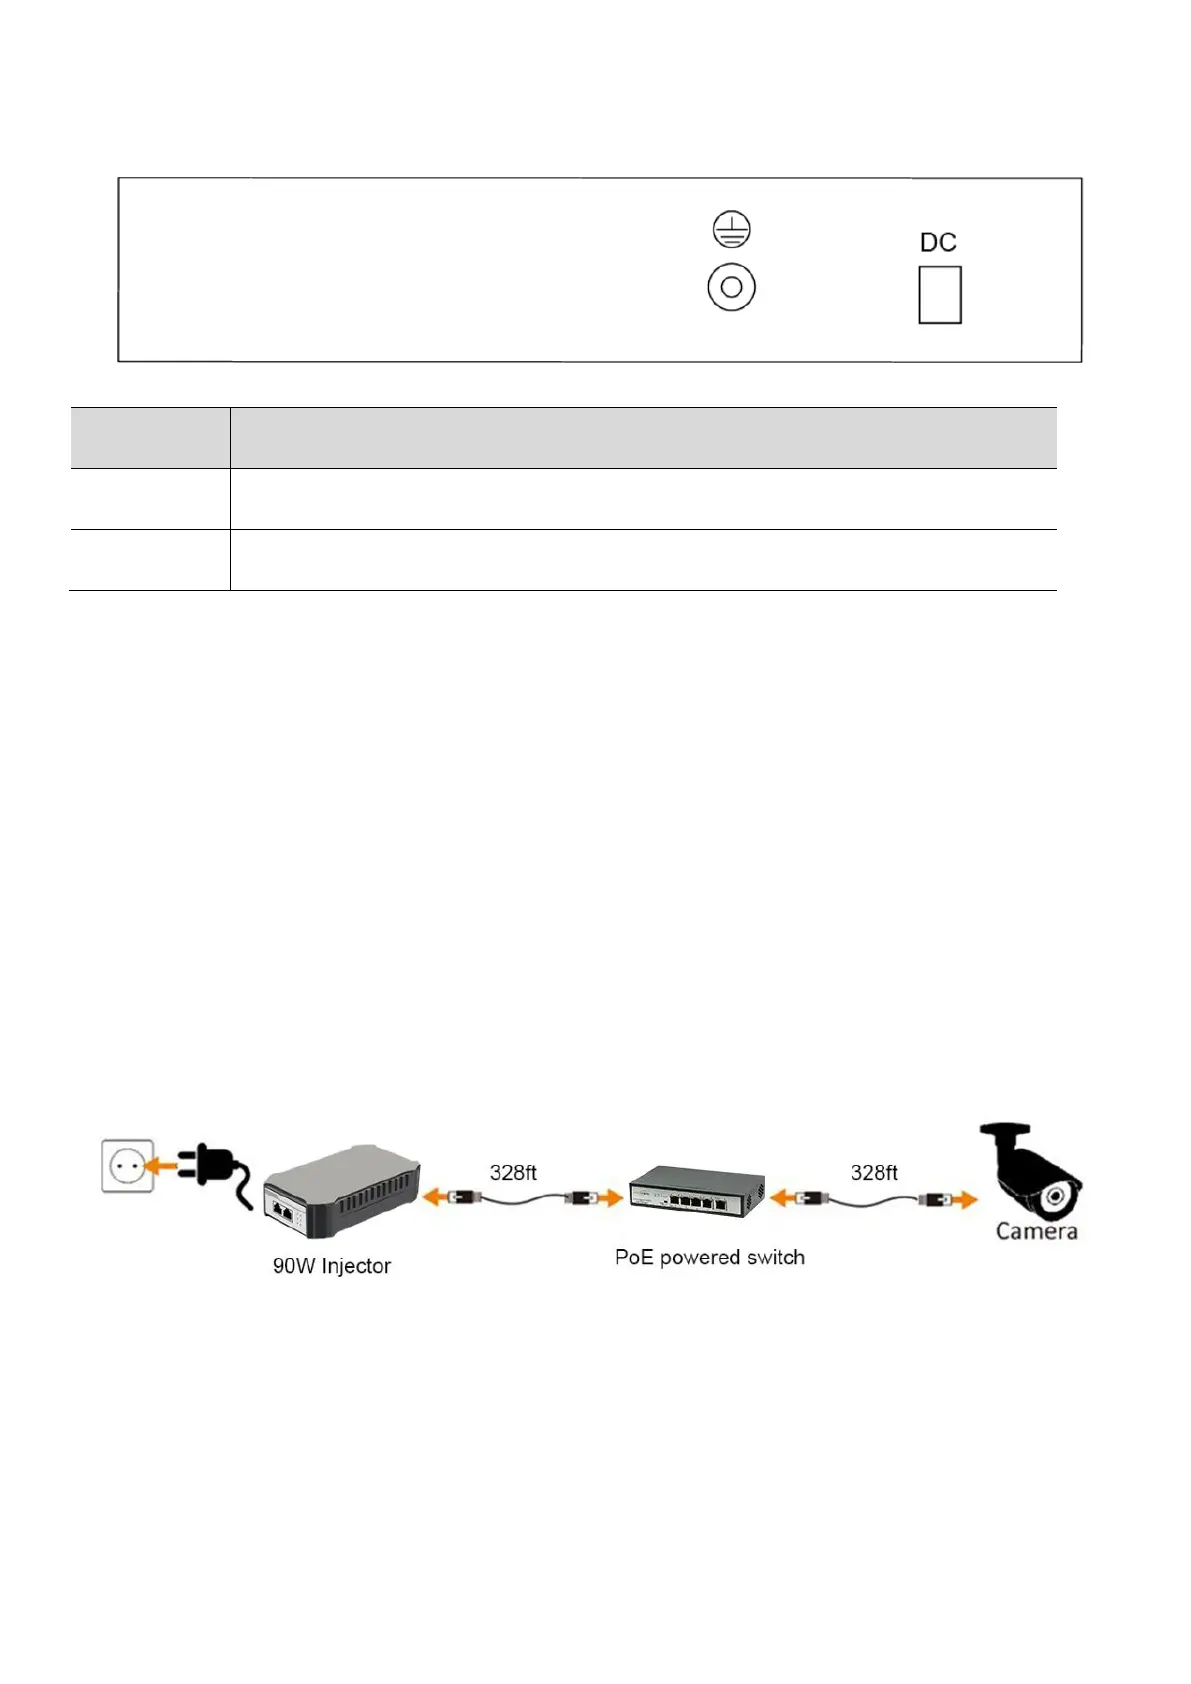
The PoE Powered switch accepts PoE power from another PoE switch/injector or external power input (Power
Supply Unit is not included) from DC48V to DC57V. As the conventional PoE switch only can supply IEEE802.3at
(PoE+), the PoE Powered Switch will have 20W power budget if you connect to conventional PoE switch. However,
this PoE Powered Switch also supports the latest IEEE802.3bt standard which employs all 4 pairs Ethernet cable to
transport the power and data, you can use Fastcabling 90W PoE injector to send the power to this switch which will
has 65W available power budget eventually.
NOTE: Be sure you never connect two uplink ports to the same core switch or router which will create ring network
and block all the network accessing.
1. First, connect one end of Ethernet patch cord to port #5 of PoE powered switch.
2. Next, connect the other end to PoE switch or PoE injector
3. Now Plug PoE IP device to one of ports in PoE Powered Switch.
Once the PoE Powered Switch has been connected to the another PoE switch or PoE injector, the power LEDs will be
turned on. In a short while, you can connect your IP device to one of the PoE port, the corresponding LINK/ACT LEDs
will be turned on in Red, then start flashing. All these means your IP device has been powered up and started
exchange data with PoE Powered switch.
 Loading...