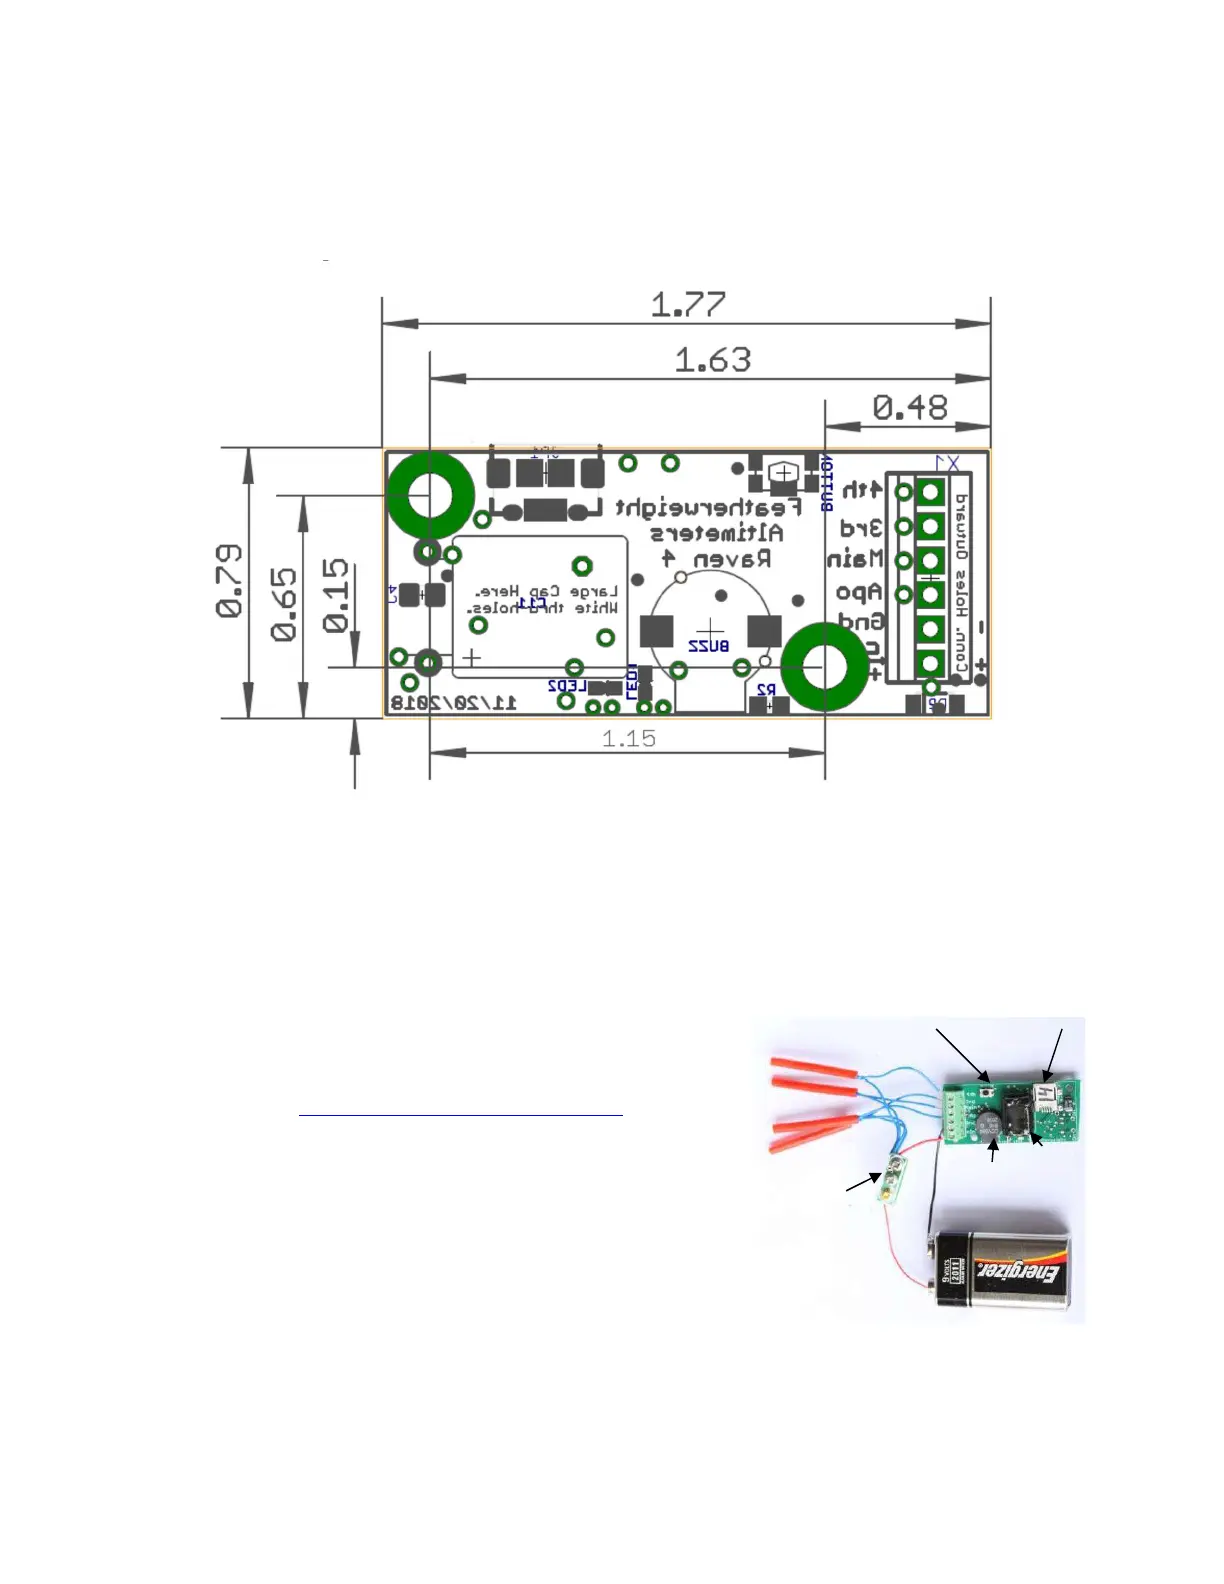
Mounting and Installation:
The Raven is mounted with its long axis parallel to the direction of flight. Either end can
be up; the altimeter senses the orientation while on the pad and will work either way. The
mounting holes accommodate #4 size screws. Two #4-40 screws, two spacers and two
#4-40 nuts are provided. The dimensions of the board are shown below, in inches:
Deployment Connections:
The following diagram and picture show how to connect the Raven for deployments,
using a single switch that turns on the unit and arms the deployment charges:
A description of the default program for the 4 outputs is
given in the deployment programming section of this
document.
Caution:
Do not use this or any other altimeter for
deployments until you have performed a ground
test to verify that the Raven will work correctly in
your rocket and with your pre-launch procedures.
(See ground test section) Flying the Raven in a
rocket with motor ejection or another altimeter you are familiar with is
recommended for your first Raven flights. Each Raven has passed a basic
functional test before shipment, but you alone are responsible for ensuring that
your altimeter works for your application and that your rocket will fly safely.
Featherweight
Screw switch
(sold separately)
Button
USB