Chapter One: Setting Up FSMS
FedEx Ship Manager
®
Server User Guide, Version 7.6 83
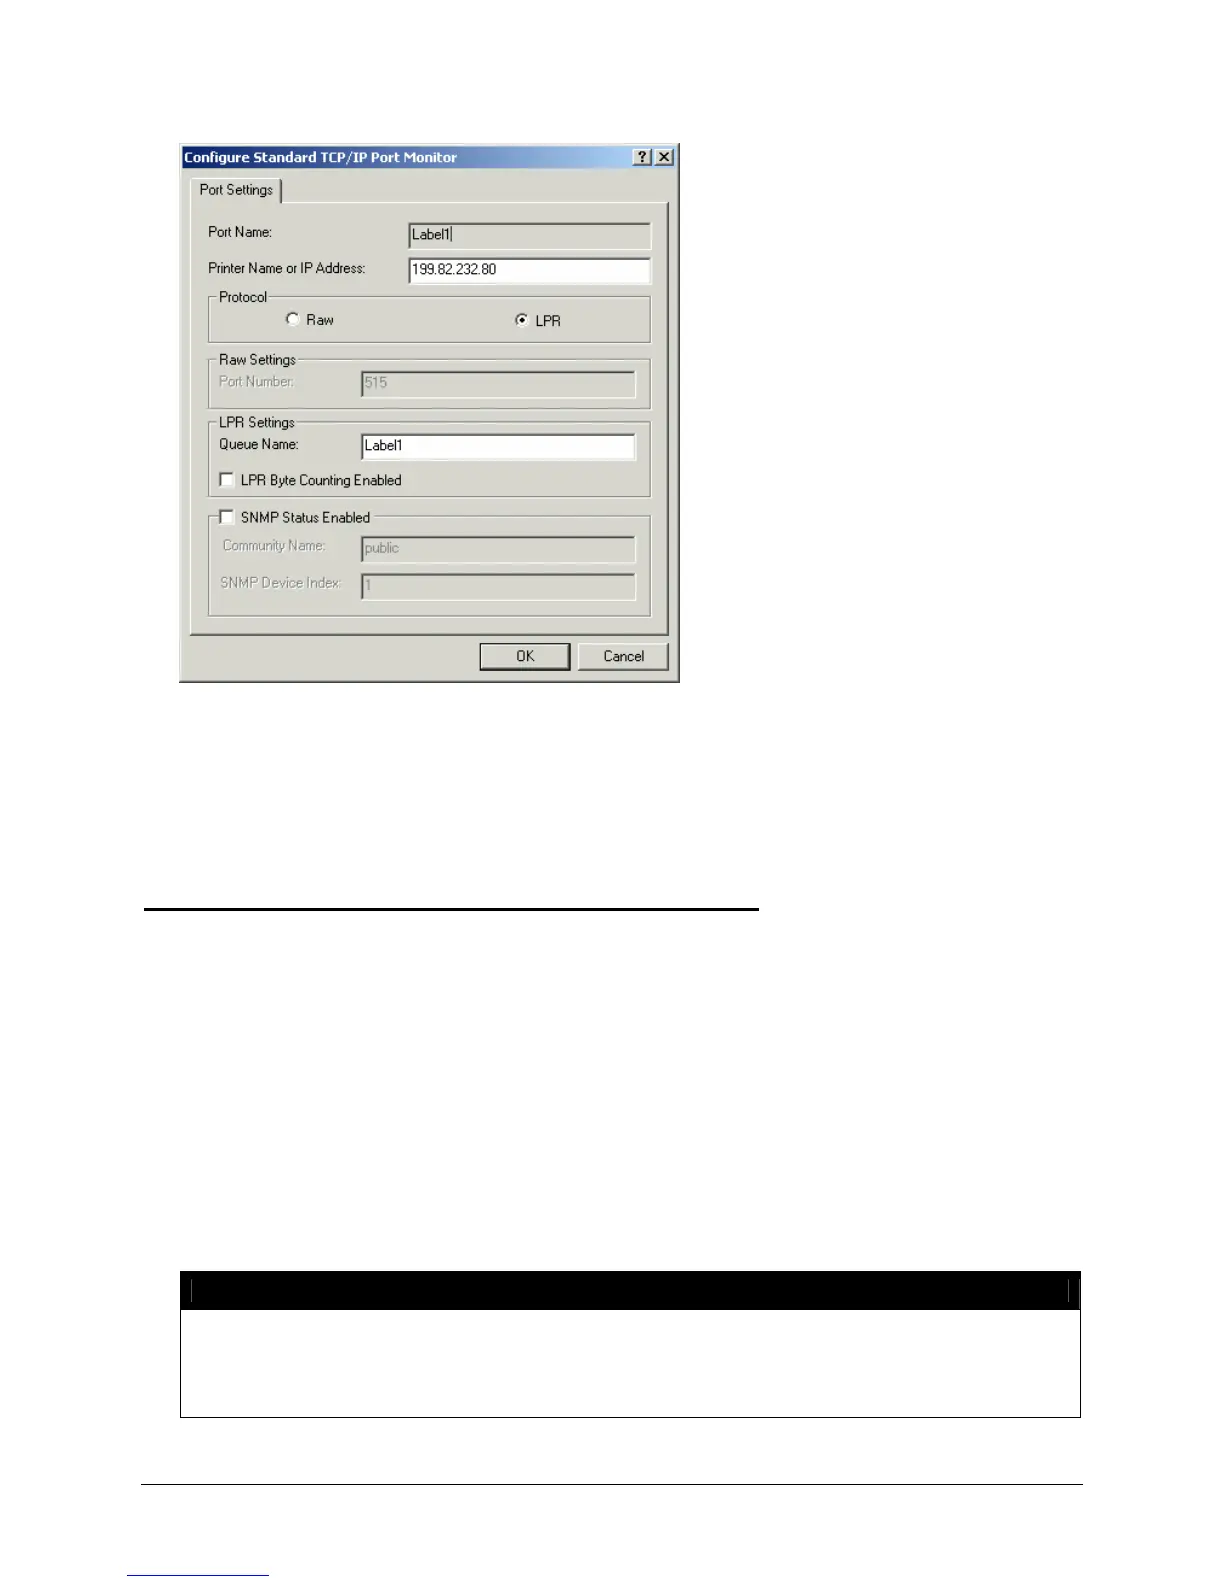
4. In the Port Settings window, select LPR in the Protocol section.
5. Enter the Queue Name in the LPR Settings section. Click OK to continue. You are returned to the
Printer Properties tab.
6. Click Close to save your entries. This action completes switching the printer to LPR.
Printing to a Windows-Based Print Share Network
If your label printer is connected to a Windows-based PC, you can print a label to the printer without
adding the printer driver to your FSMS server. This action will require a field to be added to your FSMS
transactions. Below are the steps for this print feature.
1. Connect the label printer to the Windows-based system.
2. Configure the printer using the standard Windows steps for printer configuration.
3. Share the printer.
4. If your server is running Windows NT, 2000, or XP, you will need to add the FEDEXUSER account to
this system. The password must be the same as it is on the FSMS Server.
5. Add the FEDEXUSER rights to this printer.
6. In the 020 shipping transaction, for either field 544 (Laser) or field 537 (Thermal), enter code as
follows: 5XX (indicates the printer type fields – either 544 or 537),
\\x.x.x.x\label3.
NOTE:
‘x.x.x.x’ is the IP address of the Windows-based system and ‘label 3’ is the share name for
this printer. Adding this field allows the labels to be sent over the network and printed on
the printer. Instructions for adding the FEDEXUSER account and access rights are provided
below.
 Loading...