Do you have a question about the Fellowes Lotus and is the answer not in the manual?
Keep hands clear of support bars during operation to prevent serious injury.
Do not exceed the maximum stated weight capacity to avoid injury or property damage.
Two people are required to move the workstation to prevent serious injury.
Keep cables clear of support bars to prevent equipment damage or personal injury.
Do not lean on the keyboard platform; adjust counter balance only after placing equipment.
Use both hands to push levers for spring-assisted operation; use with minimum weight.
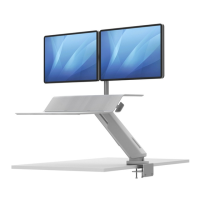
Use only compatible monitor arm kits and ensure a level surface that supports combined weight.
Remove all equipment before moving; use Velcro for single use if not using monitor arms.
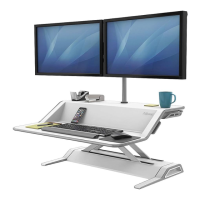
Use two people to place the workstation on the desk, aligning the front edge with the desk edge.
Place monitor, keyboard, mouse; secure monitor with Velcro. Keep cover plate unless using arm kit.
Use both hands to push down slightly and engage levers to raise the workstation to the highest position.
Route cords through keyboard platform opening and anchor with the underside clip.
Route cords through channel to rear. Insert cord funnel in one of three locations on the channel.
Route all cords, including monitor cords, through the cord funnel.
Gather all cords and apply cable zip using the provided tool for secure management.
Slide the end of the cable zip into the cord funnel to lock it securely into place.
| Swivel angle | 180 ° |
|---|---|
| Product color | Black |
| Frame material | Steel |
| Country of origin | China |
| Table top material | Wood |
| Number of cable clips | 5 |
| Height adjustment range | 12 - 432 mm |
| Maximum weight capacity | 15.8 kg |
| Number of displays supported | 1 |
| Maximum weight per keyboard tray | 2.27 kg |
| Maximum weight capacity (per display) | 13.61 kg |
| Mounting type | Desk |
| Wrench type | Hexagonal wrench |
| Number of screws | 12 |
| Harmonized System (HS) code | 94038900 |
| Depth | 603.3 mm |
|---|---|
| Width | 901.7 mm |
| Height | 222.3 mm |
| Weight | 19500 g |
| Working surface area | 720 - 210 mm |
| Keyboard tray (W x D) | 738 x 267 mm |