6
G
f
f
e
e
n
n
d
d
e
e
r
r
.
.
c
c
o
o
m
m
G
F
F
FF
e
e
ee
a
a
aa
t
t
tt
u
u
uu
r
r
rr
e
e
ee
s
s
ss
6
F
F
FF
M
M
MM
2
2
22
5
5
55
D
D
DD
S
S
SS
P
P
PP
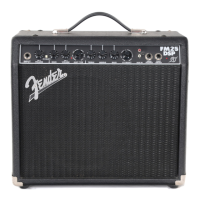
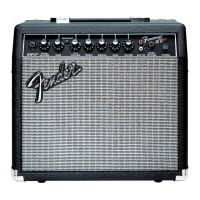
Your new FM25 DSP amplifier delivers world–class
Fender
®
tone and world–standard Fender
®
DSP
t
echnology:
• 25 Watts into 8 ohms
•
Digital Signal Processing
• 15 Effects “FX” settings
• 16 Amplifier “TYPE” settings
• 1 Classic Fender
®
clean tone (Channel 1)
• 2 Channels—independent settings and sounds
•
Push-button or Footswitch channel switching
• Headphones jack—for silent practice
• Auxiliary Input—connect your MP3/CD player or drum
machine for accompaniment
T
hank you for choosing Fender
Thank you for choosing Fender
®
®
—T
—T
one, T
one, T
radition and Innovation—since 1946
radition and Innovation—since 1946
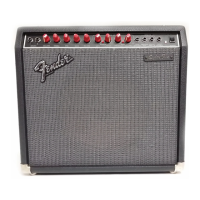
A. INPUTS - Plug your guitar in here.
B. CHANNEL SELECT - Press to switch between
channels (see Footswitch {L}):
CH 1
CH 2
C. CHANNEL LED - Indicates the active channel:
CH 1
CH 2
D. CH1 VOLUME - Adjusts the loudness of Channel 1.
E. GAIN - Adjusts distortion level of Channel 2 (except
when Acoustic is the selected Amp Type {G}).
F. CH2 VOLUME - Use to adjust the loudness of
Channel 2 after you have set the Gain {E} level.
G.
AMP TYPE
- Selects the cor
e amplifier cir
cuitry of
Channel
2 (see next page).
H. TREBLE/MIDDLE/BASS - Adjusts the tone in the
high/mid/low fr
equency bands r
espectively.
I. FX SELECT - Selects the active effect (see next page).
J. AUX IN - Input jacks for connecting your MP3/CD
player or drum machine. Use the volume control on the
external device to adjust the loudness of this input.
The Auxiliary input accepts “RCA” type plugs.
K. HEADPHONES - Output jack for connecting
headphones. This jack can also be used as a line
output to mixer or other equipment. The FM25 DSP
speaker is disabled when this jack is used.
/ The Headphones jack accepts a
standard 1/4" mono or stereo plug.
L. FOOTSWITCH - Connect a 1-button Fender
®
footswitch (optional) to enable remote channel
selection. NOTE: Connecting a footswitch will disable
the front panel Channel Select button.
M.
POWER LED
- Indicates when the amplifier is ON.
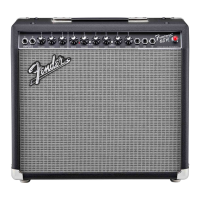
Rear Panel
N. POWER SWITCH - Switches the
amplifier ON–OFF.
O.
POWER CORD SOCKET
- Connect the
included power cord in accordance with
the voltage and frequency ratings
specified on the r
ear panel of your
amplifier
.
Channel 1 Channel 2