Do you have a question about the Fermax Wi-BOX and is the answer not in the manual?
Instructions to connect the cable, identifying red as '+' and white as 'F1'.
Warning to avoid shorting cables while power is on to prevent system failure.
Guidance on creating a cable pathway through the unit if not using the rear.
Details on connecting wires (+, L, M, V, Ct, F1) to corresponding terminals.
Observation of the LED blinking slowly in red upon power-up after re-connection.
Press the button once to start the VDS programming process.
Press door lock release within 10 seconds; LED turns solid green.
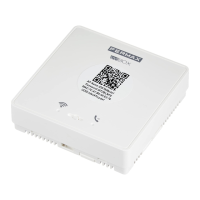
Indicates the position of the QR code on the Wi-BOX device.
Get the FERMAX Wi-BOX App from the Play Store or App Store.
Press and hold the button until the LED blinks red, then release.
The LED will turn solid blue upon successful Wi-Fi network pairing.
Press the button once to turn on the call divert function.
The LED will turn solid blue when call divert is active.
Troubleshooting for no Wi-Fi, pairing router, and server connection problems.
Troubleshooting for no power, unprogrammed VDS, and call divert statuses.
The Fermax Wi-BOX is a device designed to integrate with Fermax VDS (Video Door System) monitors, enabling call diversion to mobile devices via a Wi-Fi network. This allows users to receive calls from their door entry system on their smartphone or tablet, providing remote access and control.
The primary function of the Wi-BOX is to act as a bridge between a Fermax VDS monitor and a Wi-Fi network, facilitating call diversion. When a visitor presses the call button at the door panel, the call is routed to the connected VDS monitor and simultaneously diverted to the user's mobile device through the Wi-BOX and the associated FERMAX Wi-BOX App. This allows users to see and speak to visitors, and even open the door remotely, from anywhere with an internet connection.
The device supports a minimum requirement of connecting to the +, L, and - terminals of the VDS system. For video functionality, it also connects to the V and M terminals. Optional connections include Ct and F1 for additional features.
+ wire (red) and F1 wire (white) are identified for this initial connection.+ (Wi-BOX red) to connector +L (Wi-BOX yellow) to connector L- (Wi-BOX brown) to connector -V (Wi-BOX blue) to connector VM (Wi-BOX black) to connector MCt (Wi-BOX green) to connector CtF1 (Wi-BOX white) to connector F
It is crucial to turn off power to the monitor before wiring to prevent short circuits and system failure. If routing cables through the front, some plastic may need to be cut from the Wi-BOX housing.+, L, -, V, M, Ct, F1).The Wi-BOX features several LED indicators to help diagnose issues:
WIFI LED (Left LED):
CALL DIVERT LED (Right LED):
The Fermax Wi-BOX is a user-friendly device designed to enhance the functionality of existing VDS door entry systems by bringing them into the realm of smart home connectivity, offering convenience and peace of mind through remote access.