► Follow the instructions provided in the Fes
tool app.
6.5 Remote control (MINI I / MIDI I)
Connecting the remote control and mobile
dust extractor
To be able to connect a remote control to a mo
bile dust extractor, the remote control must be
reset (see "Resetting the remote control").
Remote controls that have not been connected
previously can be connected directly.
A connection that has been created
between remote controls and the mo
bile dust extractor will persist even
after the mobile dust extractor has
been manually switched off or the
mains plug has been disconnected.
The mobile dust extractor can be con
nected to as many as five remote con
trols at the same time. The mobile
dust extractor can only be connected
to one cordless power tool at a time.
► Hold down the connection button [1-20] on
the mobile dust extractor for three seconds
in standby mode.
The connection display [1-19] flashes rapid
ly.
For a period of 60 seconds, the mobile dust
extractor is ready for connection.
► Press the MAN button on the remote con
trol.
The remote control is permanently stored in
the mobile dust extractor.
Switching on/off
Once the remote control is connected to the
mobile dust extractor, the mobile dust extractor
can be switched on and off with the remote con
trol.
► Press the MAN button on the remote con
trol to switch the device on and off.
Resetting the remote control
Resetting deletes the connection between a re
mote control and the mobile dust extractor.
► Hold down the connection button and the
MAN button for 10 seconds.
The LED indicator lights up purple, if the re
set has taken place.
6.6 Delete all saved devices. (MINI I / MIDI
I)
► Press and hold the connection button [1-20]
for at least three seconds.
The connection display [1-19] flashes rapid
ly.
► Press and hold both the plus and minus
button [1-18] for at least three seconds.
The mobile dust extractor confirms the com
mand by rapidly flashing three times.
7 Settings
7.1 Adjusting the suction power
► Press the plus or minus button [1-18] while
extracting.
7.2 Temperature cut-out
A temperature cut-out switches the mobile dust
extractor off when it reaches a critical tempera
ture to prevent overheating. The bottom
LED [1-18] indicates a fault.
LED lights up red Excessive temperature
► Switch off the mobile dust extractor, let it
cool down.
► Switch on the mobile dust extractor again
after approx. five minutes.
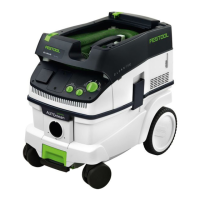
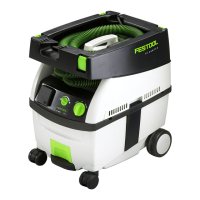
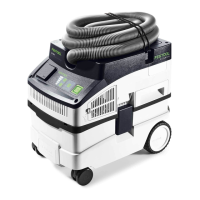
7.3 Locking the brake [1A]
► Raise the front of the mobile dust extractor
slightly.
► Push down the brake [1-13] until it engages
into position.
► Actuate the button [1-12] to release it.
7.4 SysDoc
WARNING
Risk of injury
► Do not stand on the storage area of the
mobile dust extractor.
CAUTION
Risk of injury
► Ensure that the T-Loc or the four SysDoc
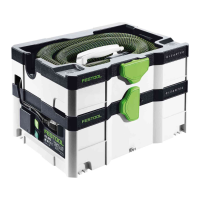
locks are closed during transport.
A Systainer can be fastened to the storage
area [1-7] with the T-Loc lock [1-8]. Systainers
without T-Loc can be secured with the four Sys
Doc locks [1-3].
English
16