COMFORT - Tech
4
DE
EN
FR
ES
IT
Bitte kontrollieren Sie, dass alle Einzelteile einwandfrei sind und nicht während dem Transport beschädigt
wurden. Im Zweifelsfall oder bei Fragen zur Montage, Verwendung oder zu Einschränkungen des Produkts
wenden Sie sich bitte an Ihren Händler. Wir empfehlen die Anbringung durch Fachpersonal in
Übereinstimmung mit den geltenden lokalen Vorschriften vornehmen zu lassen.
Check that nothing has been damaged or deformed during transport.
In the event of doubts or questions concerning the installation, use or limitations of the product, contact
the dealer. We recommend that the installation is carried out by qualifi ed personnel and in
compliance with current local regulations.
Contrôler le contenu du colis et vérifi er qu’aucune pièce n’ait été cassée ou déformée durant le transport.
En cas de doutes ou de questions relatives à l’installation, l’utilisation du produit, contactez votre
concessionnaire. L’installation doit être réalisée par des personnes dûment qualifi ées et
conformément aux normes en vigueur dans le pays d’installation.
Controlar que ningún detalle se haya roto o deformado durante el transporte.
En caso de dudas o si tiene alguna pregunta sobre el montaje, uso y limitaciones del producto,
póngase en contacto con el distribuidor. Recomendamos que la instalación se realice por
personal cualifi cado en conformidad con las regulaciones locales.
Controllare che nessun particolare sia rotto o deformato a causa di errori di trasporto.
In caso di dubbi o domande relative al montaggio, utilizzo e limiti del prodotto, contattare il rivenditore.
Consigliamo di far eseguire l’installazione da parte di personale qualifi cato ed in conformità
alle vigenti normative locali.
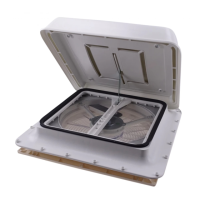
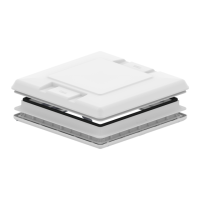
1) Decide where the roofl ight should be installed and make a square hole of 50cm.
The roofl ight can be installed on roofs with thickness between 30 and 70mm. For thickness lower
than 30mm set a suitable frame to be positioned on the roof inside the vehicle between the roof and
the inside frame.
2) Remove the inside frame and spread water-proof sealant over greater part of the
bottom of the outside frame to a minimum thickness of 3mm. Recommended sealant:
SIKALASTOMER-710 / THEROSTAT II / DEKALIN 1512.
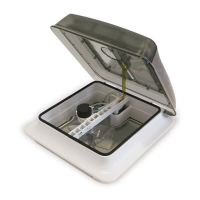
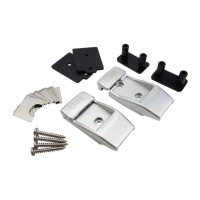
3) Clean the bearing surface on the roof, put the outside part of the roofl ight on the
roof, insert the inside frame in the provided square hole and from inside the vehicle
screw the two frames together with 12 ø4,8mm UNI EN ISO 7049 wood screws. To fi x with security
the roofl ight external part, the screw must be tightened at least 15mm.
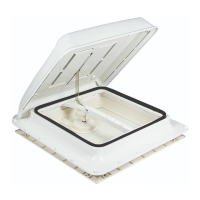
4) Apply sealant to the whole perimeter of the outer frame and fi ll any gaps between
the frame and the roof. Finally insert the inside frame with the mosquito net and the blind and fi t them
with screws ø3,5x15mm UNI EN ISO 7049.
Remove the protective plastic applied to the cover (do not expose the product to sunlight for too long
to avoid to make this operation diffi cult).
EN
 Loading...