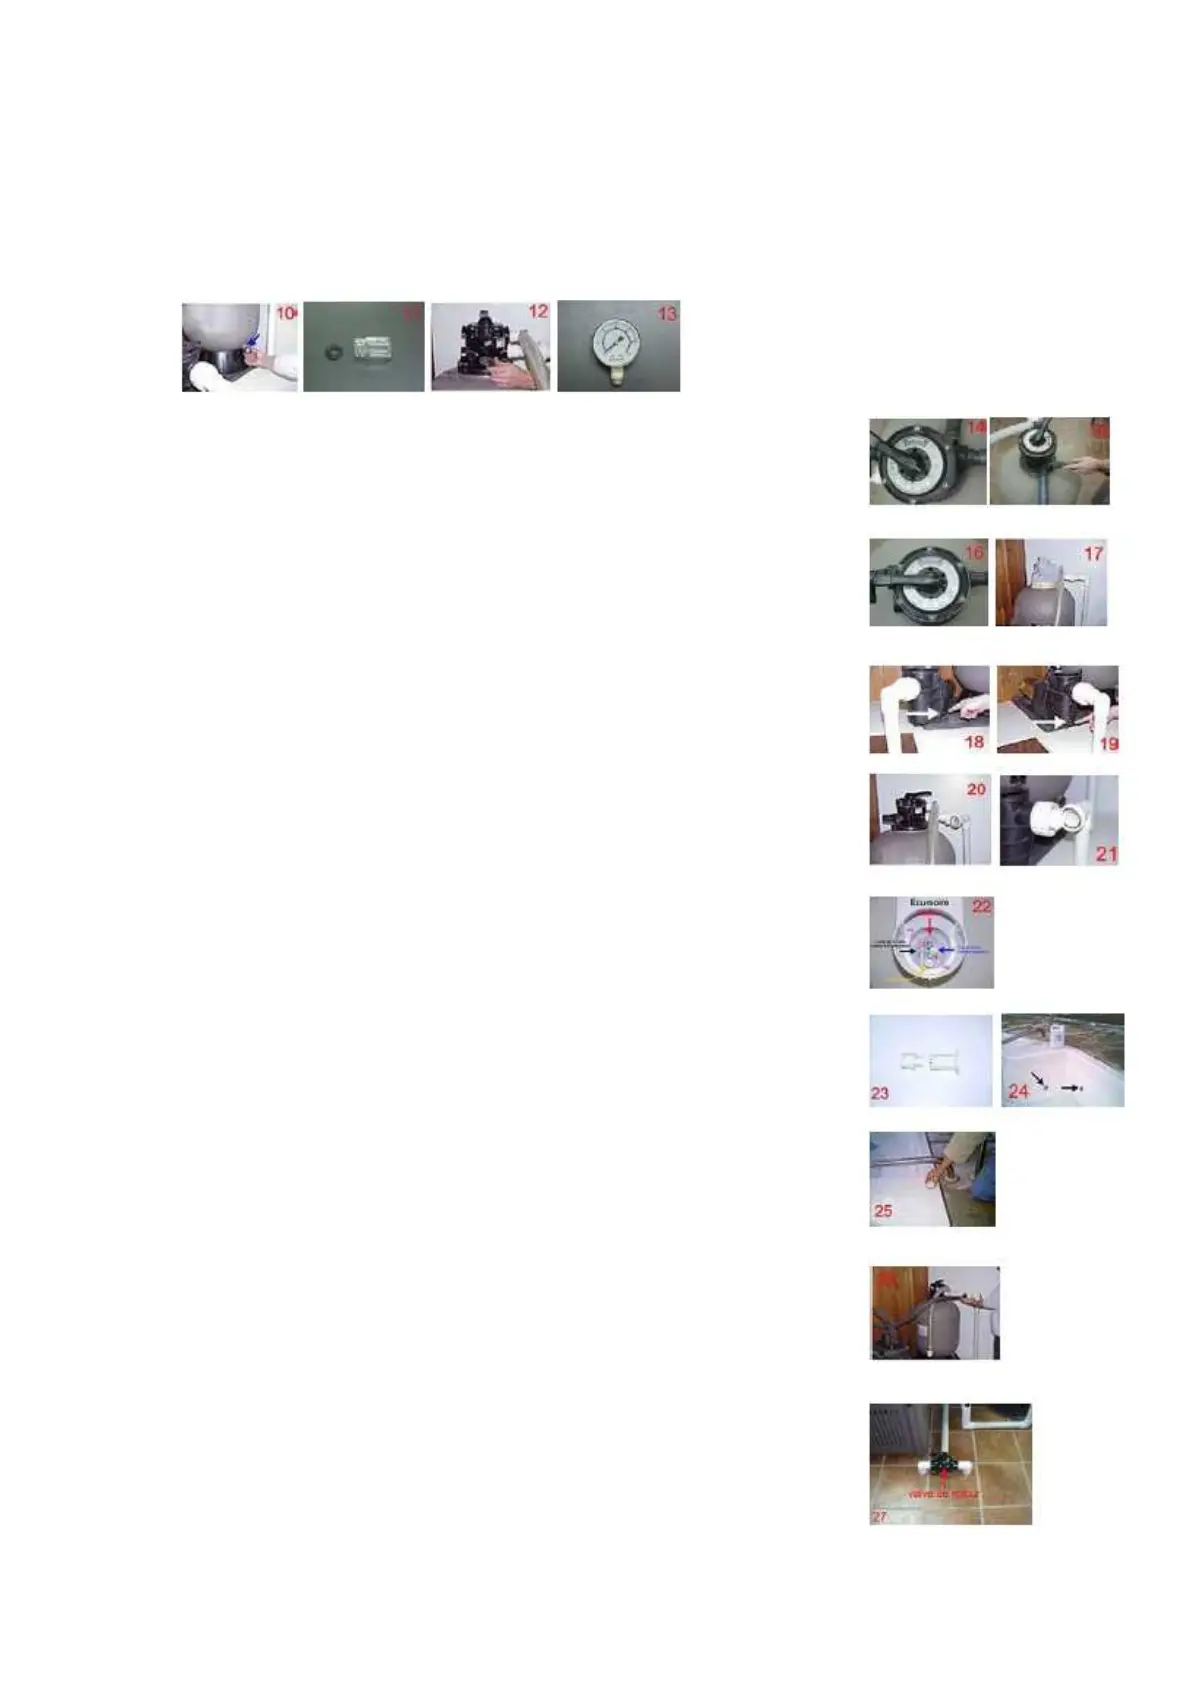
9. Empty your filter's tank by unscrewing the plug at its base (img.10). Then, remove the
sight-glass and its "gasket" (img.11) at the top of the filter (img.12) as well as the
gauge (img.13)
** For those with a permanent backwash pipe. To empty the pipe, put the lever at the
top of the filter in the Closed position (img.14), then blow air from the opening of the
sight-glass (img.15).
9.1. Put the lever at the top of the filter in the Winter position (img.16). Then, cover
the top of the filter to protect it against winter weather (img.17).
10. Remove the 2 drain plugs from the bottom of the pump (img.18-19).
11. Detach the suction pump (img.20) and the filtration system's return lines (img,21).
12. Remove the valve from the skimmer by unscrewing the 2 screws (img.22/purple).
13. With your jet tools, unscrew the pool's return jets (img.23-24), as well as the spa
jets.
14. Shut the air controls (img.25) on the side of the pool, if necessary.
15. With a Shop-Vac or air compressor, blow air into both plumbing lines from the
filter system to the pool (img.26).
15.1. Start with the pool area. Place the air relief valve's lever to the "Pool" position
and blow air until all the water is purged from the 3 return jets located inside the pool
and from the single return jet inside the spa. (Please note, if applicable, you must
drain the water from all accessories at this point (waterfall, solar system, heater). All
valves connected to each of your options must be opened in order for the purging
process to take place).
15.2. Then, drain the spa section. Put the air relief valve's lever to the "Spa"
position (img.27) and blow air until the water no longer flows through the 5 jets
located inside the spa section.
 Loading...