Do you have a question about the Field Tuff AS-125ATV12 and is the answer not in the manual?
Covers personal protective equipment, safe handling, load limits, and awareness of moving parts.
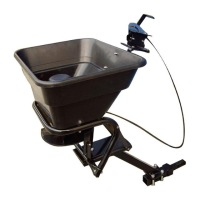
Step-by-step guide for attaching, filling, adjusting, operating, and cleaning the spreader.
Guidelines for calculating optimal spread rates based on material and test runs.
Detailed steps for conducting a test run to determine the actual spread rate.
An illustrated list of all parts included in the product packaging with quantities.
Connects deflector plate, crossbeam tube, connecting rod, and hopper assemble tube.
Attaches connecting tube assembly and extension tube to the receiver hitch.
Connects hopper assemble tube to the spacer plate using bolts and washers.
Joins the connecting tube assembly to the hopper tube assembly.
Installs the switch box, connects the cable to the motor, and secures the gauge base plate.
Connects hopper assembly to tubes and attaches gauge base plates with notes on bolt insertion.
Final step to tighten all fasteners and notes on receiver hitch compatibility.
Visual representation of all parts and their assembly relationships.
Comprehensive list of all parts with reference numbers, descriptions, and quantities.
Provides customer support phone number and details of the one-year limited warranty.
| Model | AS-125ATV12 |
|---|---|
| Category | Spreader |
| Type | Broadcast Spreader |
| Capacity | 125 lbs |
| Mount Type | ATV Mount |
| Power Source | 12V |
| Material | Steel |
| Hopper Material | Poly |