10 di 24
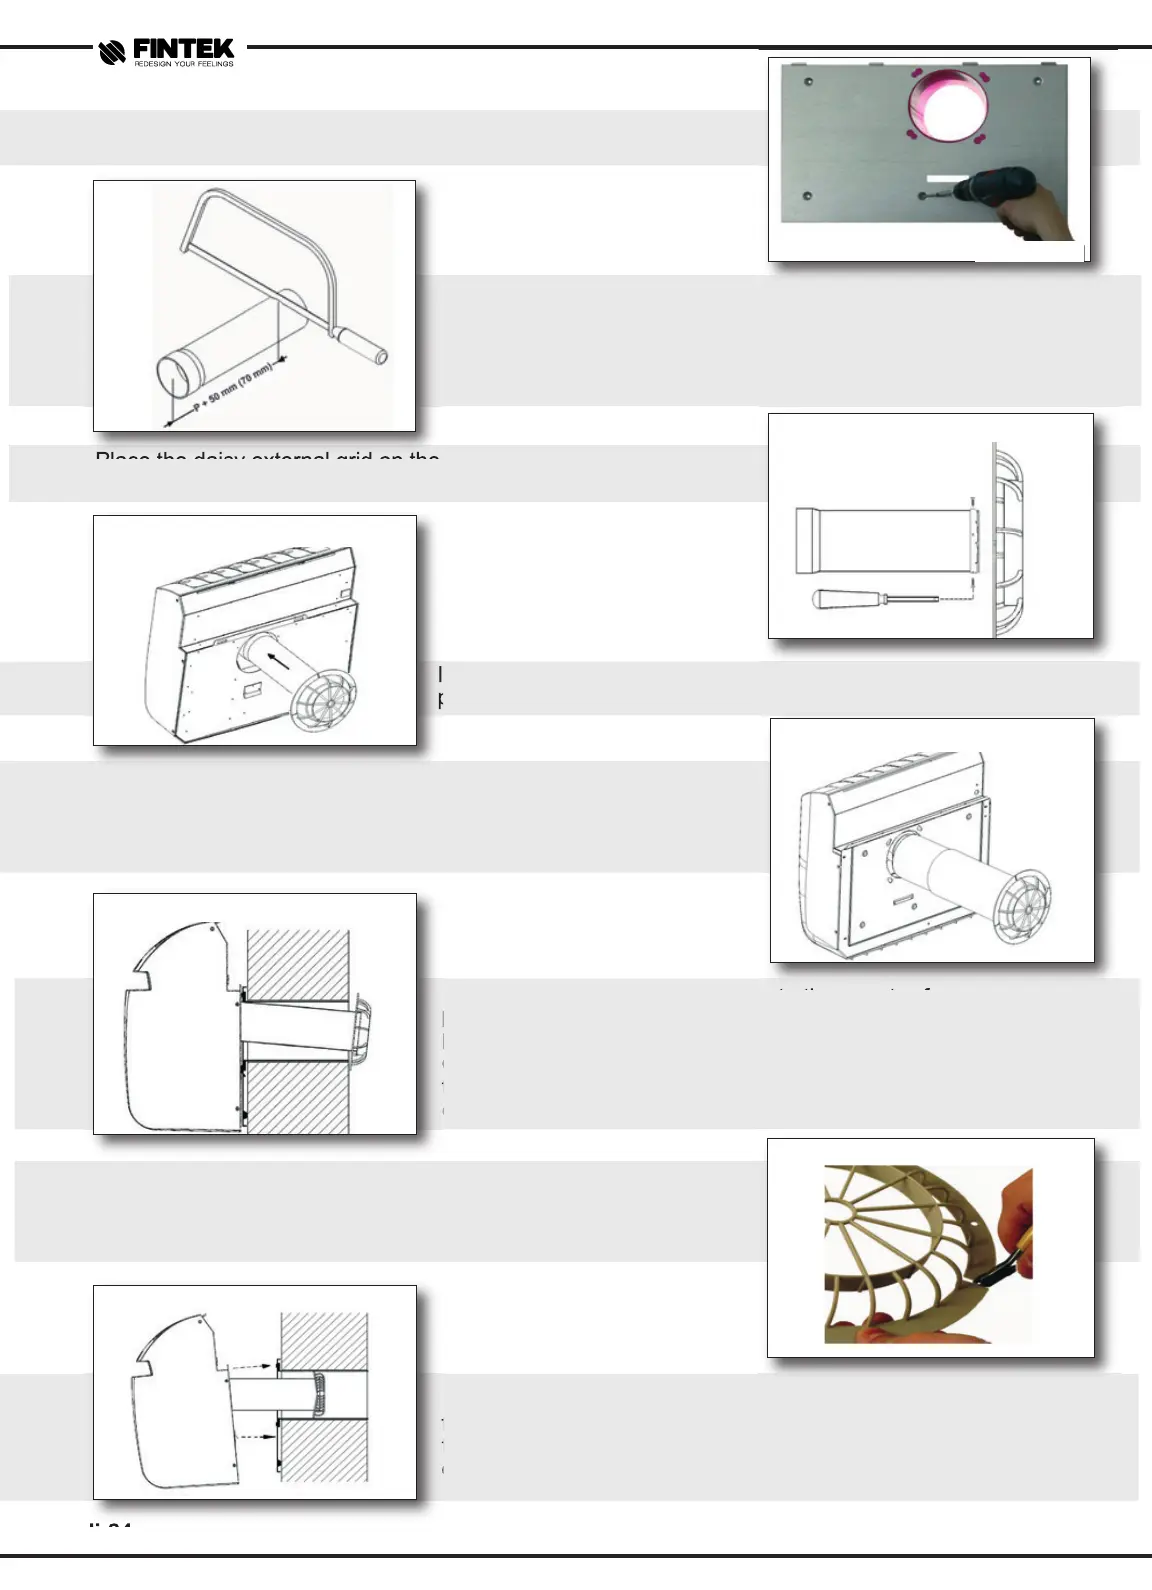
Fix the counter-frame with the tube assembled and inserted
in the hole, using expansion tassels.
Cut the internal tube with a small saw to a length equal to the length
previously measured (Fig 5), plus 50mm
WARNING: In case of the mounting from the inside of the air intake
grid (“daisy”), the length of the cut must be P+70mm.
Place the daisy external grid on the cut-off end of the internal tube
and fix it by the proper screws (at least two).
Insert the assembled tube on the internal fan of the airconditioner,
pushing and rotating it slightly
Insert the assembled tube on the internal fan of the airconditioner,
pushing and rotating it slightly
Fix the assembled air-conditioner to the counter-frame
by the 4 upper fixing hooks and the lower fixing hook.
N.B. The in braket quotes refer to the inside fixing of the grid (fig 18-19).
Connect the air-conditioner to the mains, according to
the regulations (please refer to: Electrical connection).
(please refer to paragraph ‘Electrical Connection’).
Should it be impossible to fix it from the outside, the grid can be
fixed from the inside, previously cutting the joining pieces (see
picture) and fixing the grid on the air delivery pipe, then proceed as
shown in picture 19.
Fix the assembled air-conditioner to the counter-frame
by the 4 upper
fixing hooks and the lower fixing hook. Connect the air
-conditioner to
the mains, according to the regulations (please refer to
: Electrical
connection). (please refer to paragraph ‘Electrical Con
nection’).
Fig.17
W3-3HP W4-4HP W5-5HP
Fig.12
Fig.13
Fig.16
W5-5HP
Fig.18
W3-3HP W4-4HP W5-5HP
Fig.19
W3-3HP W4-4HP W5-5HP
Fig.14
W3-3HP e W4-4HP- W5-5HP
Fig.15
W3-3HP e W4-4HP


 To Next Page