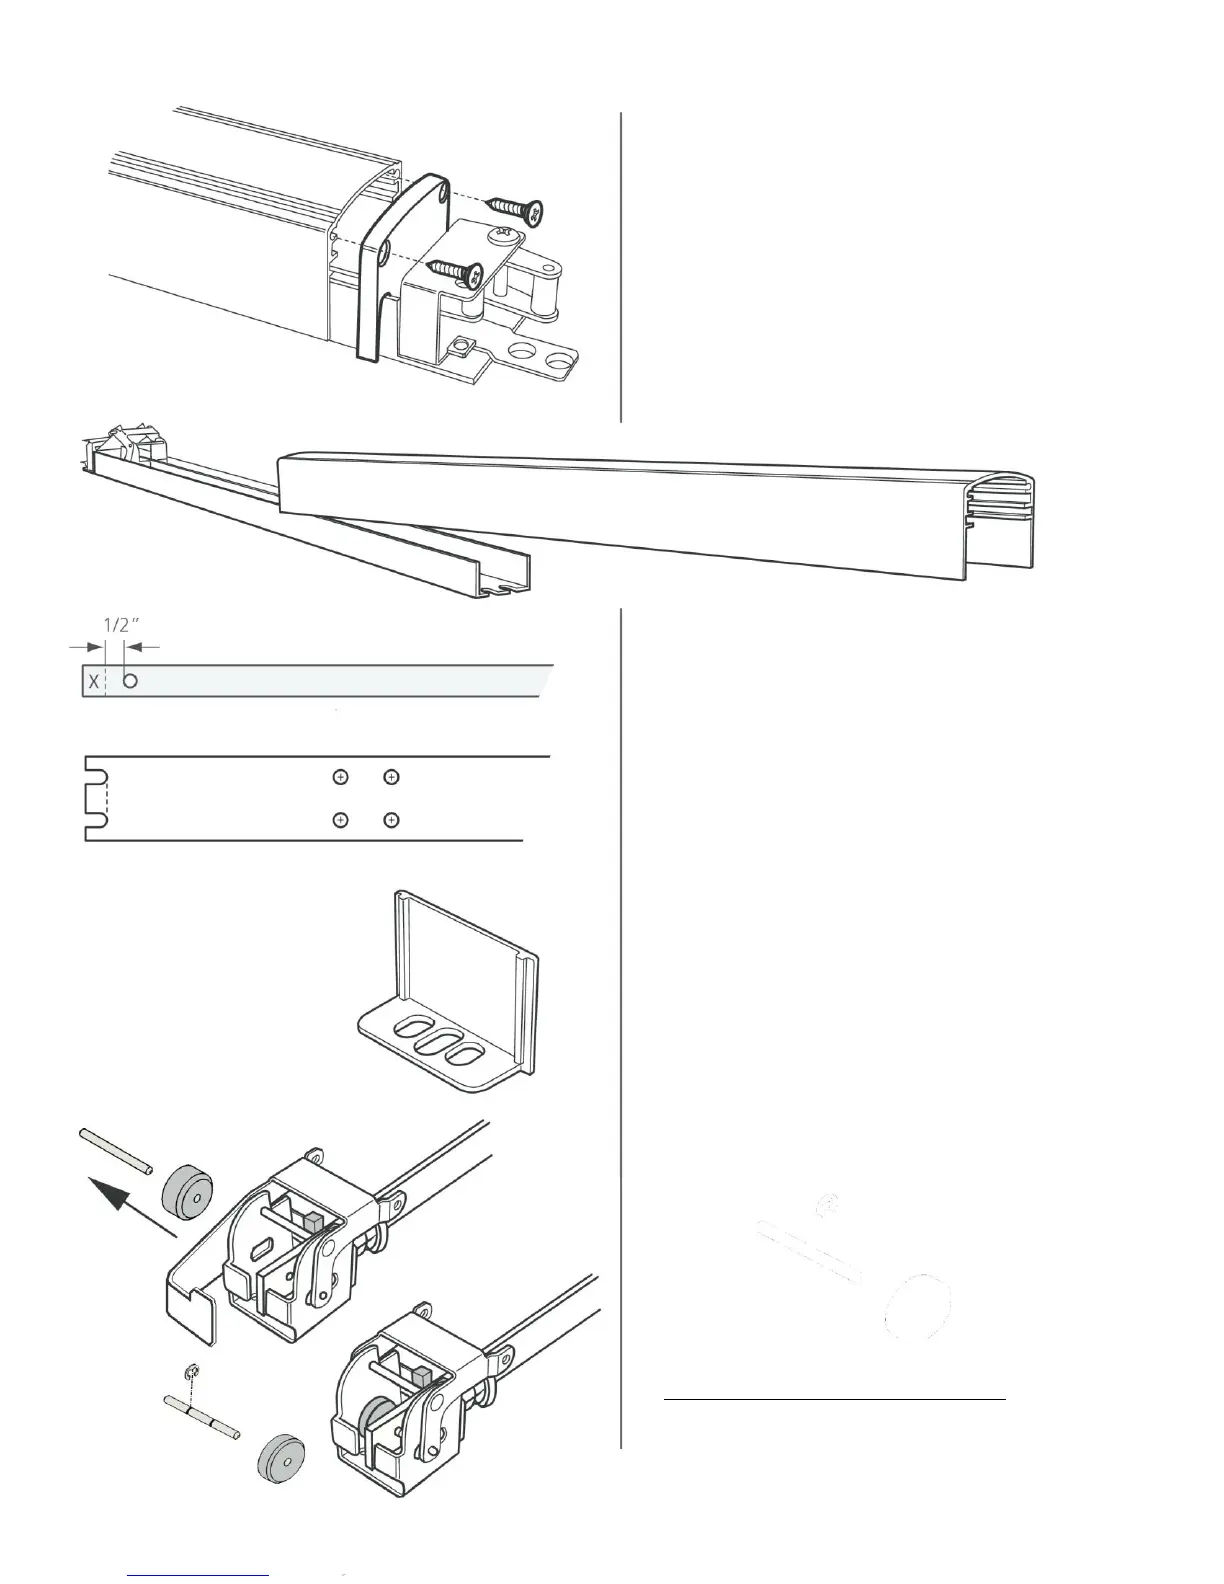
Step 1 - Preparation (continued)
C. Remove pushbar.
1.C.1 - Remove lock stile end cap.
1.C.2 - Slide push bar toward hinge stile.
1.C.3 - Remove dogging assembly from the
channel by removing two (2) screws on channel.
Discard old dogging assembly but keep axle pins.
Step 2 - Shorten the connecting rod
2.1 - Remove rear activating (dogging) bracket by
removing 2 screws on back of channel.
2.2 - Remove activating bracket axle pin to disconnect
connecting rod. Remove other parts as necessary to
access connecting rod.
2.3 - Trim connecting rod as shown, allowing 1/2” from
axle hole to remain.
Step 3 - Provide wiring access
3.1 - Cut notch or drill hole in back of channel to
permit routing of connector that is on end of wire
harness.
3.2 - Remove and replace hinge stile mounting bracket
on door with new bracket provided. Do not tighten
screws. Discard old bracket.
Step 4 - Activating hardware assembly
4.1 - Assemble new rear activating bracket to
shortened connecting rod with notched axle pin and
narrow bumper.
4.2 - Install E-clip onto notch of axle pin (AFTER
assembled with connecting rod), next to bumper, to
restrict bumper from moving along axle.
4.3 - Apply grease to bumper and notched axle pin to
provide lubrication for movement inside bracket.
Do not yet secure bracket to channel.
 Loading...