5
FILTER DISASSEMBLY /
ASSEMBLY PROCEDURE
BEFORE DISASSEMBLING FILTER:
1. STOP PUMP.
2. OPEN air release valve and drain tting.
3. WAIT until all pressure is released and water drained from
lter tank and system before loosening lter ring.
DISASSEMBLY:
1. Stop the pump.
2. Open air release valve on top of lter tank to release all pressure from
inside of tank.
3. Remove the drain cap and drain all water from the tank.
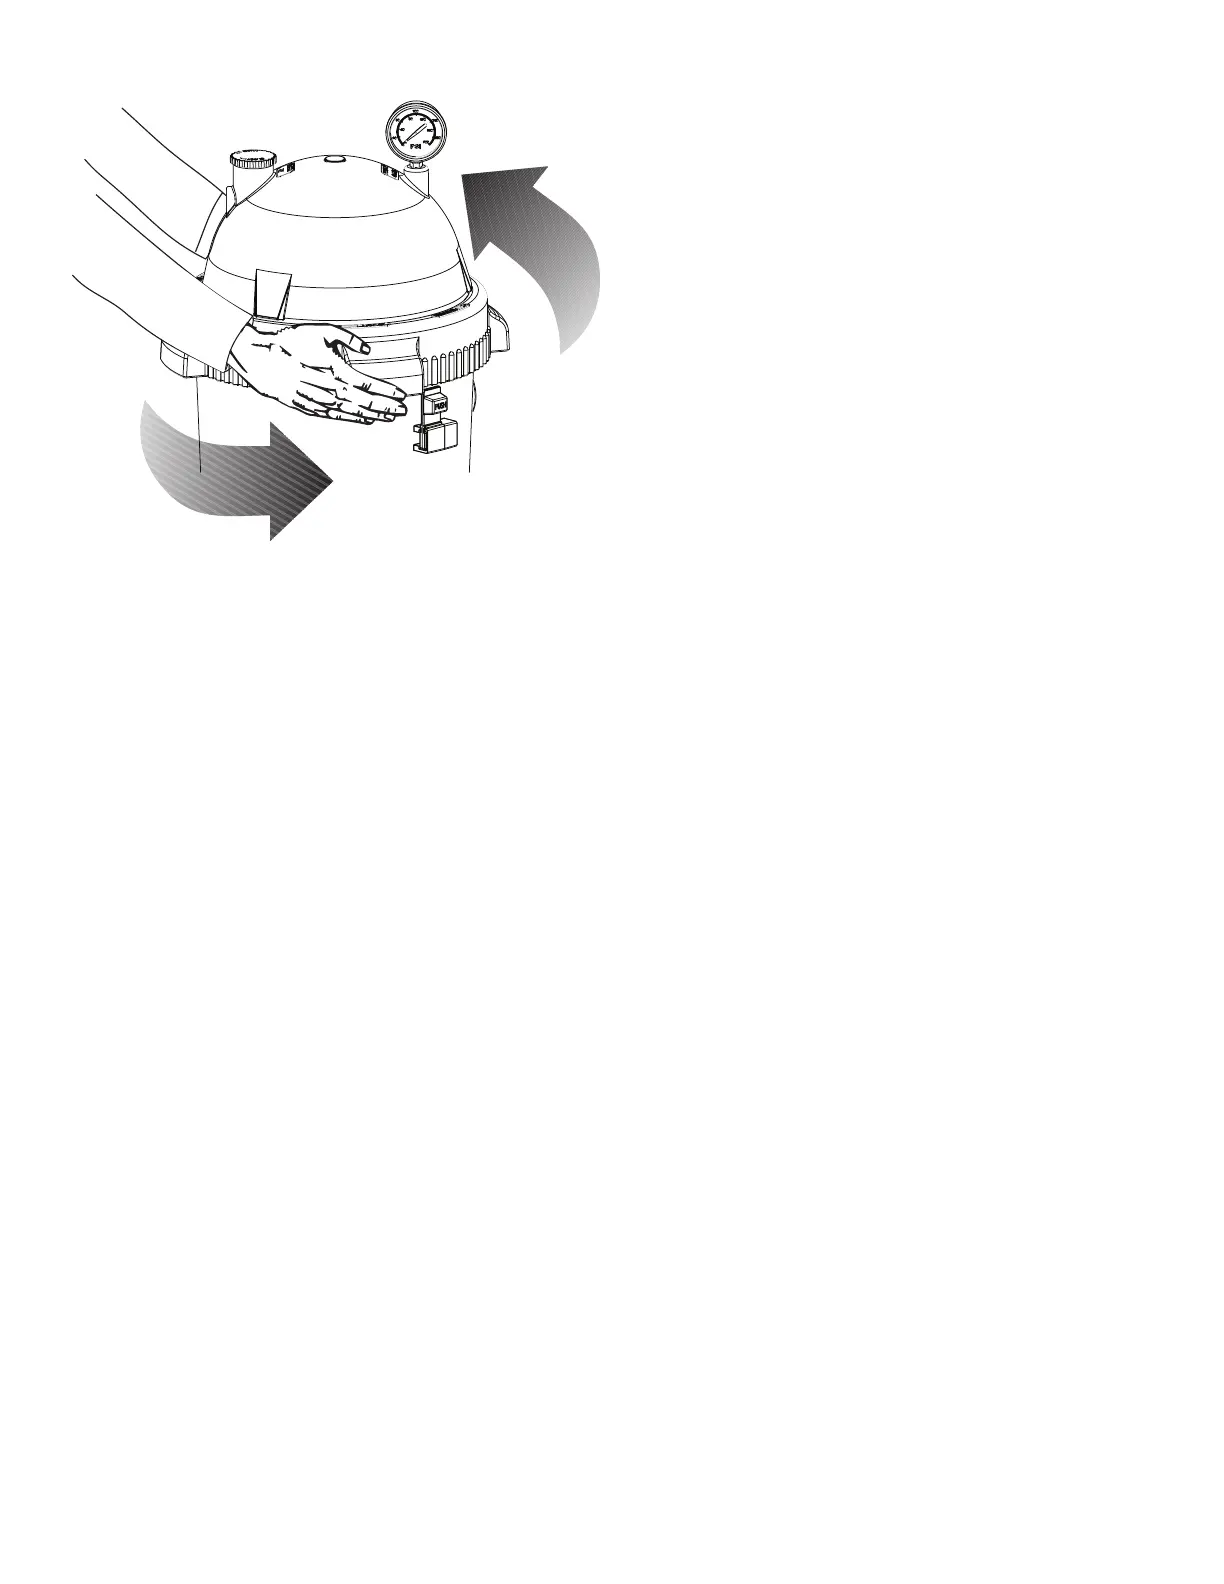
4. Remove lter lid assembly as follows:
A. Press the safety latch (below the ring) toward the tank to
release it (see Figure 3).
B. Hold the latch in the release position and rotate the ring
COUNTERCLOCKWISE to remove it. If the ring is dicult to
turn, tap it gently with a rubber mallet to overcome initial
resistance.
5. Inspect the O-ring for cuts, cracking, deformation or signs of wear;
replace if necessary.
NOTICE: Do not remove the O-ring unless you need to replace it. To
remove it, hook it out of its groove with a sti curved piece of wire
inserted through the small access slot in the bottom of the tank lid
assembly.
Figure 3
ASSEMBLY:
1. Inspect and clean the tank, ring threads and O-ring groove. Replace
damaged parts as necessary.
2. Install the lter cartridge in the tank. Push down rmly to seal it.
NOTICE: Lubricate the O-ring sealing area inside the upper tank lip
with silicone base grease, as other lubricants may cause the ring to
swell. DO NOT lubricate the lter ring or the threads on the tank
shell as this may collect grit and make removal dicult.
3. Install the O-ring in the tank lid assembly O-ring groove. Be sure that
the O-ring is clean and not twisted.
NOTICE: Do not remove the O-ring unless you need to replace it.
4. Place the lter ring squarely over the tank shell threads and
rotate it CLOCKWISE until it is securely latched.
5. Follow instructions in the “Initial Startup” section of this manual.
SAFETY LATCH
The purpose of the safety latch is to hold the lter ring in the locked
position. If the latch is damaged, replace it as follows:
1. Press up on the small catch on the bottom of the safety
latch and press or tap the latch out of the slot in the tank.
2. Slide the new latch into position until it latches in place.
NOTICE: DO NOT operate the lter if the safety latch is damaged or will
not hold the lter ring in the locked position.