9
FIVE OCEANS PACIFIC SERIES
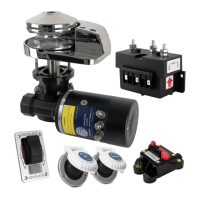
4. Using a 5/16" (8mm) diameter drill, make the
four (4) holes for the mounng studs. With a
2 1/2” (44 mm) diameter hole saw, make the
hole for the rode to pass throughwith a 4 1/2”
(52 mm) diameter hole saw, make a hole for
the motor gearbox to pass through. When
all the holes have been made, remove the
template. To help avoid water absorpon by
the deck, apply an appropriate marine sealant
to the freshly cut hole edges.
5. Fully screw the four (4) mounng studs into the base
of the windlass. Screw the studs into the base nger
ght, with the ats towards the base as shown
(Fig 4.3-5).
6. Next, ghten the studs unl they boom out in their
holes. Do this to each of the studs in turn.
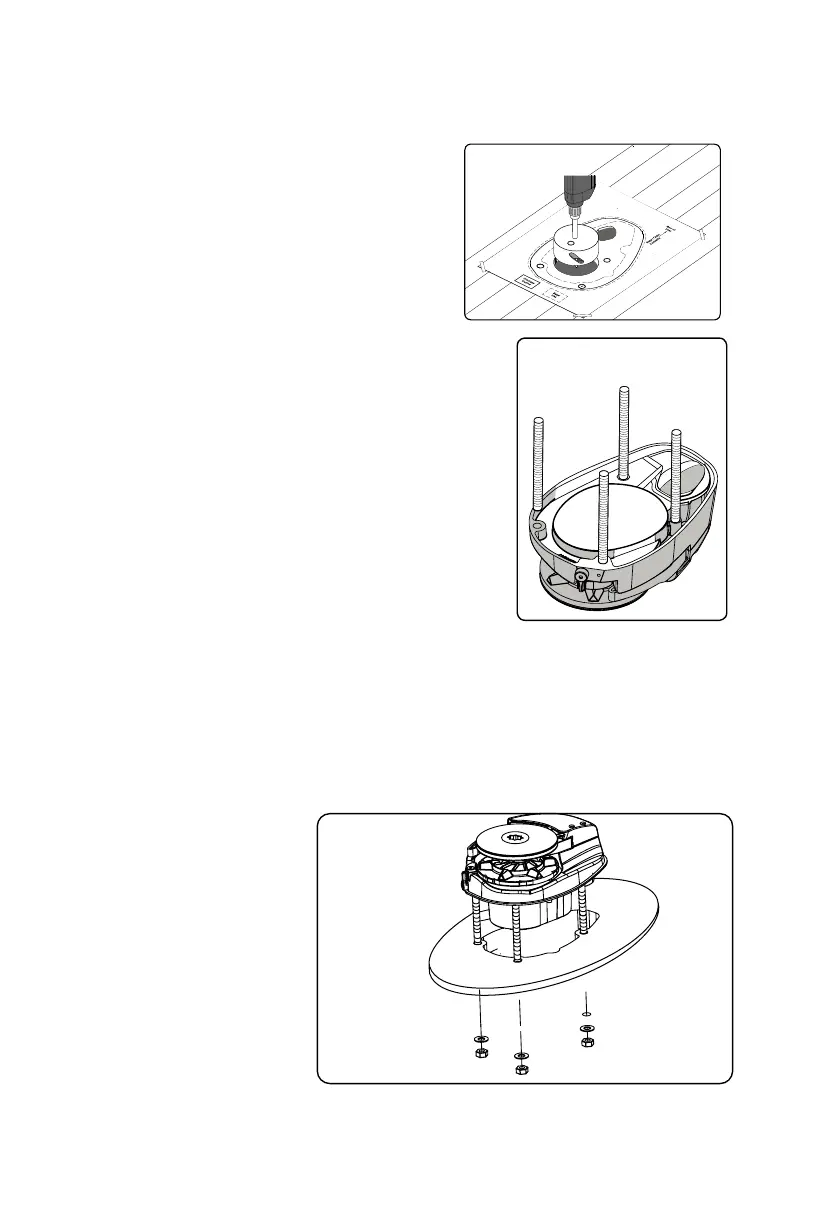
Pass all the studs through the
deck and t them security on
the motor piece which is on
the underside of the deck and
secure the unit with the xings
provided.
7. Place the base mat in posion on the deck, oponally, apply a suitable sea ant to the base
of the windlass, any mounng pad or around the studs.
NOTE: If using silicone or other rubbery type sealant, it is advisable to allow curing of the
sealant before nal ghtening of the mounng nuts.Trim the studs back to 6 mm (1/4”)
below the fully ghtened nuts.
4.3-4
4.3-5