1. Follow Instructions from Assembly and Installation but DO NOT insert batteries.
2. Drill a hole in the boot or duct near the vent, wherever convenient. The hole size should be
large enough for 20AWG Plenum Rated Solid (2 Conductor) wire.
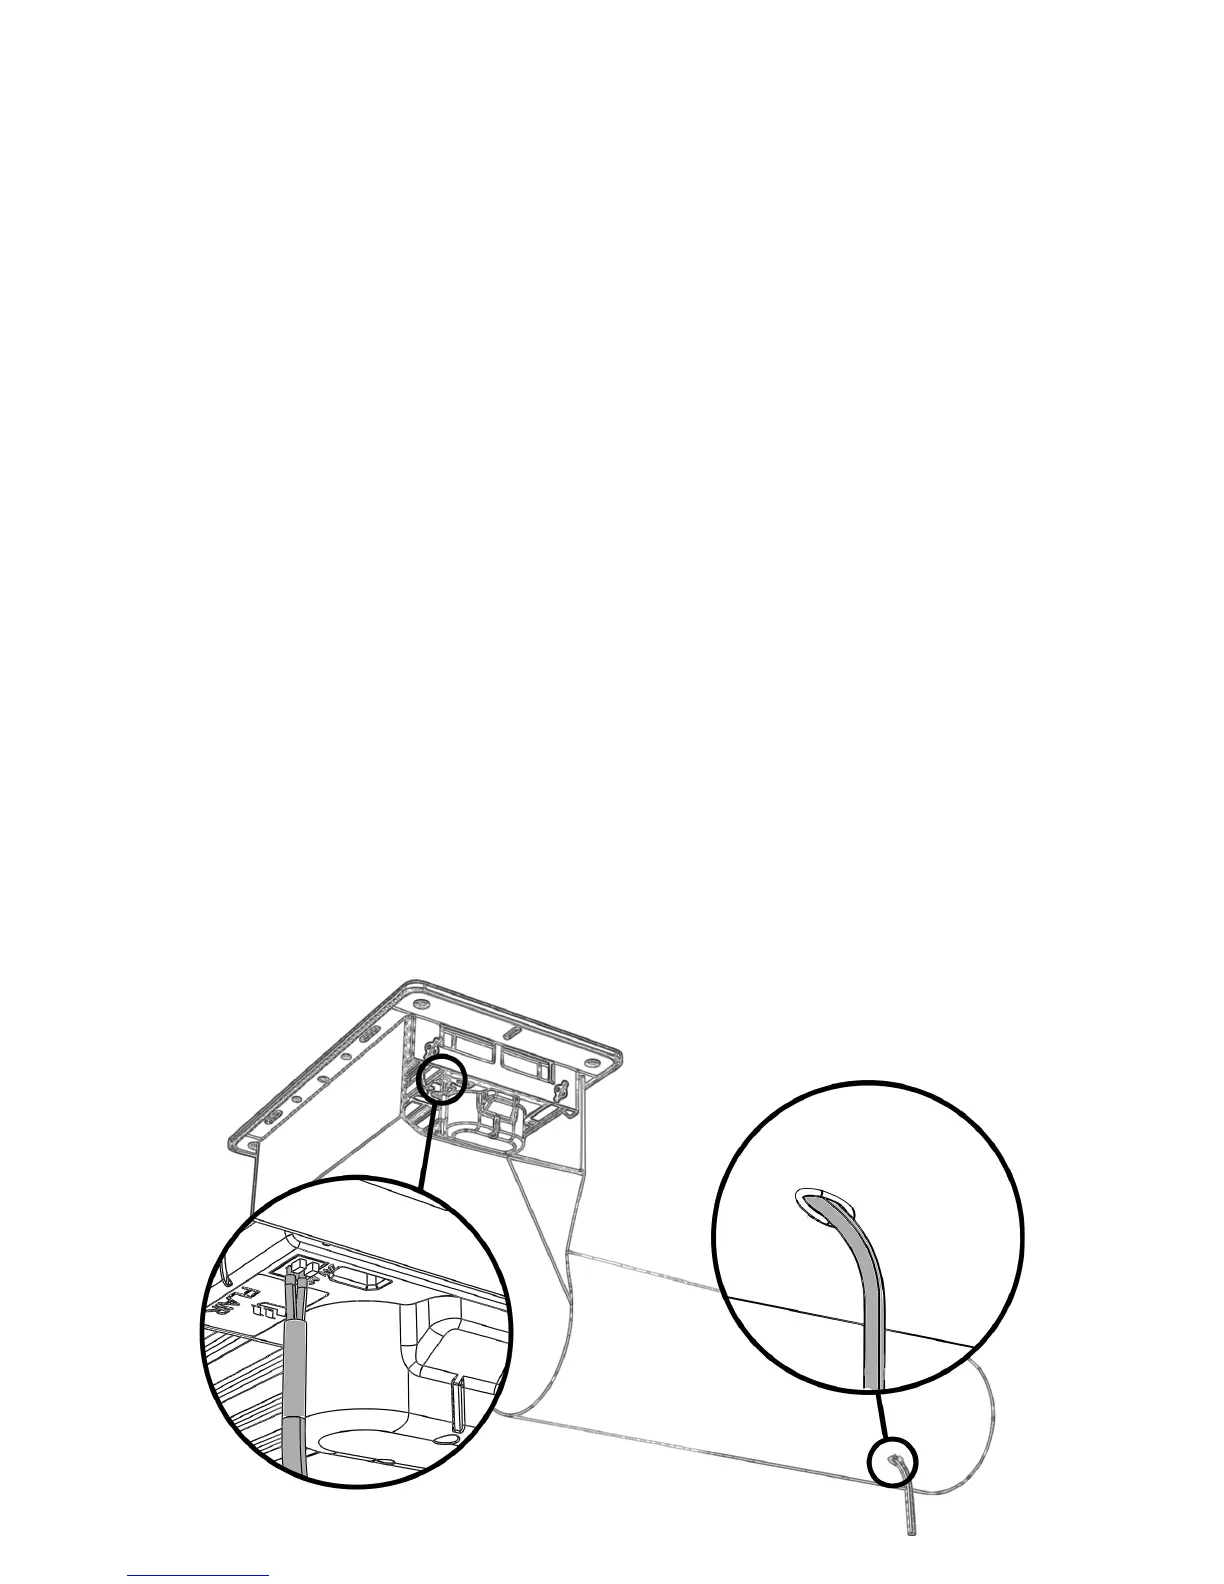
3. Slide 20AWG Plenum Rated Solid (2 Conductor) wire through the hole into the boot or duct.
4. Pull enough wire through to reach the back of the vent (boot dependent) - if you pull some
extra, you can trim it later. When pulling the wire through, be careful to avoid stripping the wire
on the metal boot or duct as this could lead to a short.
5. With the wire in place,use high quality Duct Tape or Mastic to seal the hole in the boot or duct.
6. Strip insulation, press the terminal block buttons, and insert each conductor into the 24VAC
port on the back side of Vent (either wire can go in either hole, polarity does not matter).
7. If there is excessive wire in the boot or duct, trim the wire repeat step 5. Ensure that the wire
doesn’t interfere with the Vent’s louvre movement. Also ensure the two wires are fully
separated and cannot short near the vent terminal block. In case of excess exposed wire at
the vent terminal block, press the release buttons on the terminal block and pull the wires out.
Trim exposed wire as needed and reinsert.
8. Connect the other end of wire to a 24VAC transformer/power supply (note that you will not
need to wire to the ground pin/terminal if one is available).
9. Continue with regular installation.
10.Plug in or power 24VAC power supply/transformer.
11.You can now continue with the Digital Installation.
Electrical Notes:
● Flair Vents operate with very low power requirements and operate at different times hence a
40VAC (@24VAC) will suffice for in excess of 10 vents. Beyond 10 Vents, it is recommended
that you consider additional power supplies due to the length of the wire runs becoming very
long.
● Grounding is not needed.
4
 Loading...