EasyManua.ls Logo

Flamerite Fires Arlo 400 Series - User Manual

Default Icon
12 pages
Print Icon
To Next Page IconTo Next Page
Loading...
1 | Page
Installation, Precautions
& Servicing
Arlo - 400 Series - Verada - Atlanta
Ennio/Raylia/Solace 1000/800 Blazer
IMPORTANT
This product is only suitable for well insulated spaces or occasional use
Carefully remove the fire from the packing checking neither the heater nor the power
cable has been damaged during transport. Do not operate the fire if damaged. Please
bear in mind the weight of the fire before removal from the packaging and installation.
Consider if help is required. Always read this manual first before attempting to install
or use and keep in a safe place. Any alteration to the power cable should only be done
by a qualified electrician.
Your fire is guaranteed for two years from the date of purchase. In the unlikely event
of a breakdown you have access to our customer services team, simply call 01543
251122 during office hours, 9am 5pm or e-mail on info@flameritefires.com The
accessories are found in a box that is packed at the side of the fire.
Question and Answer IconNeed help?

Do you have a question about the Flamerite Fires Arlo 400 Series and is the answer not in the manual?

Overview

This document is an installation, precautions, and servicing manual for Flamerite Fires' Arlo - 400 Series - Verada - Atlanta electric fireplaces, including models Ennio/Raylia/Solace (1000/800) and Blazer.

Function Description

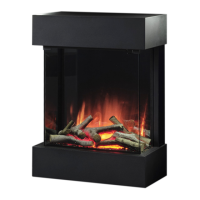
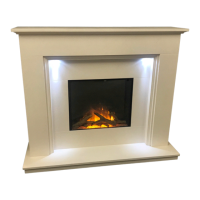
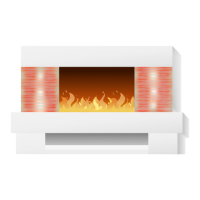
The Flamerite Fires electric fireplaces are designed to provide a log effect and heat, suitable for well-insulated spaces or occasional use. They feature an electric flame effect and a heater, with models available for wall-mounted or inset installation. The fireplaces are equipped with LED lamps for the flame effect and can include either Radia Flame or Nitra Flame technology.

Important Technical Specifications

General:

  • Power Supply: 230V 50Hz (AC Supply)
  • Guarantee: Two years from the date of purchase.
  • Safety: The glass used is toughened and designed to shatter if mishandled. A safety cut-out mechanism is included to prevent overheating.

Minimum Opening Sizes for Inset Installation:

Model H (Height) W (Width) D (Depth)
Arlo 565mm 410mm 85mm
400 560mm 410mm 165mm
Verada 565mm 530mm 165mm
Atlanta 565mm 530mm 165mm

Information Requirement for Electric Local Space Heaters (Radia Flame):

  • Model Identifier(s): Arlo, 400, Verada, Atlanta
  • Heat Output:
    • Nominal heat output (Pnom): 1.5 kW
    • Minimum heat output (indicative) (Pmin): 0.75 kW
    • Maximum continuous heat output (Pmax,c): 1.5 kW
  • Auxiliary Electricity Consumption:
    • At nominal heat (elmax): 0.032 kW
    • At minimum heat (elmin): 0.032 kW
    • In standby (elSB): 0.0005 kW
  • Type of heat output/room temperature control:
    • With display control option: Yes
    • Room temperature control, with open window detection: Yes
    • Adaptive Start: Yes
    • With electronic room temperature control plus week timer: Yes
  • Contact details: Flamerite Fires Ltd. Greenhough Road, Lichfield. Staffs. WS13 7AU

Information Requirement for Electric Local Space Heaters (Nitra Flame):

  • Model Identifier(s): Arlo, 400, Verada, Atlanta
  • Heat Output:
    • Nominal heat output (Pnom): 1.5 kW
    • Minimum heat output (indicative) (Pmin): 0.75 kW
    • Maximum continuous heat output (Pmax,c): 1.5 kW
  • Auxiliary Electricity Consumption:
    • At nominal heat (elmax): 0.026 kW
    • At minimum heat (elmin): 0.026 kW
    • In standby (elSB): 0.0005 kW
  • Type of heat output/room temperature control:
    • With display control option: Yes
    • Room temperature control, with open window detection: Yes
    • Adaptive Start: Yes
    • With electronic room temperature control plus week timer: Yes
  • Contact details: Flamerite Fires Ltd. Greenhough Road, Lichfield. Staffs. WS13 7AU

Replacement Lamps:

  • Radia Flame LED Lamps: Dimmable 240V 6W 3000k E14 LED lamps.
  • Nitra Flame LED Strips: LED Strips and driver.

Usage Features

Installation:

  • Safety First: Always read the manual before installation or use. Ensure the fire and power cable are undamaged upon arrival. Consider the weight of the fire and seek help if needed.
  • Placement: Must be installed in a well-supported structure; never secure to plasterboard alone. Recommended wall-mounting height is 350-450mm from the floor to the bottom of the fire opening.
  • Clearance: Ensure sufficient clearance for the fire to fit comfortably without forcing or squeezing, which could deform the case or impede glass movement.
  • Electrical Connections: The appliance comes with a fitted 13A plug. Fuse replacement requires a 13A fuse. Any alteration to the power cable should only be done by a qualified electrician.
  • Wiring: The mains lead wires are coloured according to standard: Green and yellow (EARTH), Blue (NEUTRAL), Red (LIVE).
  • Wall Mounting (Verada & Atlanta 4 side):
    1. Fix the rail to the wall with hooks facing upward and outward.
    2. Fold down the tag at the back of the case (bottom/centre).
    3. Lift and hook the fire onto the rail.
    4. Mark through the hole in the tag, remove the fire, and drill the hole.
    5. Hang the fire back and secure it with a 35mm screw and rawl plug to prevent lifting.
  • Inset Installation (Verada & Atlanta 4 side): Secure into place using the provided fixings through four larger countersunk holes on the side flange at each corner.
  • 400 Series - Wall Mounted with Fixed Fire Front:
    1. Determine the inset or bottom bracket position.
    2. Fit the top joggled bracket to the wall with 35mm screws and 34mm rawl plugs.
    3. Fit the right-angled bottom bracket to the fire with 15mm screws.
    4. Mark the holes for the bottom bracket on the wall, remove the bracket, drill holes, and refit with 35mm screws and rawl plugs.
  • Arlo, 400 Series & Atlanta 3 - Flamerite Suite or Fireplace: Be careful to protect the hearth and surrounding areas. Ensure the hearth is protected until the installation is complete.
  • The Fire Front (Arlo & 400 wall mounted already fitted): The front is held by four keyhole slots, one in each corner. Corresponding screws are attached to the case. Adjust screws for a tight fit. Lift the front over the screws, insert into keyhole slots, and push down.
  • Log Effect Positioning: Position logs according to images in the manual. Ensure enough room between logs and the glass channel for the glass to tilt open freely and trigger the micro switch.
  • Glass Fitting & Removal (400 Series - Verada - Atlanta):
    • Opening & Closing: Tilt the glass panel by placing an index finger on the handle and pushing it in. This triggers the internal switch to ready the heat.
    • Removal: Hold the glass panel across the top (either side of the heater), pull up and outward from the channel. Do not rest on a hard surface.
  • Glass Fitting & Removal (Arlo):
    • Insert: The top of the front glass slots into a gap under the heater grill.
    • Retention: It is retained on a ledge by a bar using three screws in front of the fuel bed.
    • Removal: Reverse the insertion process. Ensure the glass does not drop suddenly and is not rested on a hard surface.
  • Frame & Fret: Simply place the magnetic frame with the fret behind it onto the black surround. For cast frets, they will free-stand in front of the frame.

Safety Warnings:

  • Do not cover the heater.
  • Do not use near water (bath, shower, swimming pool) or in a dry laundry.
  • Never locate the heater directly below a socket outlet.
  • Do not use an extension lead.
  • Children aged 8 and above, and persons with reduced physical, sensory, or mental capabilities, or lack of experience and knowledge, can use the appliance if supervised and instructed safely. Children should not play with the appliance. Cleaning and user maintenance should not be performed by children without supervision.
  • Children under 3 years old should be kept away unless continuously supervised.
  • Children aged 3 to 8 years old should only switch on/off the appliance if it has been placed or installed in its intended normal operating position, and they have been given supervision or instruction concerning safe use.
  • Some parts of this product can become very hot and cause burns. Particular attention must be given where children and vulnerable people are present.
  • Caution should be applied to ensure that children do not play with the fuel effects.
  • Any electrical appliance must be installed according to relevant safety standards.
  • The heater is fitted with an automatic cut-out to prevent damage due to overheating. If the element continually cuts out, check for airflow obstruction. If the problem persists and the fire is inset, ensure the opening is 100% sealed from drawn air and draft.
  • In order to avoid a hazard due to inadvertent resetting of the thermal cut out, the appliance must not be supplied through an external switching device, such as a timer, or connected to a circuit regularly switched on and off by a utility.
  • Where a chimney is not blocked off completely, any draw will cause the heater to cut out during use. Care should also be taken when fitting into a cavity wall in case of damp or draft with external air vents fully sealed.

Maintenance Features

General:

  • Safety: Always disconnect the fire from the mains power supply before any maintenance or cleaning.
  • Cleaning: Clean the fire with a soft cloth and non-abrasive glass cleaner.

Replacement of Radia Flame LED Lamps:

  • Procedure:
    1. Allow lamps to cool.
    2. Remove the glass and fuel effect (refer to installation instructions).
    3. Remove the two screws from either side of the fuel bed and lift it out.
    4. Remove and replace the E14 LED lamps.
    5. Replace the fuel bed, fuel effect, and glass.
  • Recommendation: Lamp replacement should be undertaken by a Flamerite service engineer or similarly qualified persons to avoid a hazard.
  • Warranty: Replacement lamps are covered by a 2-year warranty. Available from Flamerite Fires Ltd.

Replacement of Nitra Flame LED Strips:

  • Recommendation: LED Strips and driver replacement must be undertaken by a Flamerite service engineer or similarly qualified persons to avoid a hazard.
  • Warranty: Replacement lighting is covered by a 2-year warranty. Available from Flamerite Fires Ltd.

Troubleshooting:

  • No power to the fire: Check the wall socket, plug, fuse, and lamps.
  • Heat turns off quickly after turn on: Set the thermostat to a higher temperature.
  • No illumination: Ensure the fire is turned on. Check if the heater is working, then check the lamps.
  • Heater blowing cold air: The safety cut-out may have operated. Check for obstruction around the heater. If continually a problem and fitted into a cavity wall or chimney breast, check with the installer that the inset opening has been 100% fully sealed from drawn air and draft.
  • Noise when illuminated: Due to moving parts, the electric fire will make a noise.
  • Noise from the heater when in use: The sound of rushing air is normal.

Customer Service:

  • For breakdowns, contact customer services at 01543 251122 during office hours (9 am - 5 pm) or email info@flameritefires.com.

Flamerite Fires Arlo 400 Series Specifications

General IconGeneral
BrandFlamerite Fires
ModelArlo 400 Series
CategoryIndoor Fireplace
LanguageEnglish

Related product manuals