EasyManua.ls Logo

FLEXIBLE FLYER Fun Fantastic II User Manual

FLEXIBLE FLYER Fun Fantastic II
24 pages
To Next Page IconTo Next Page
Page #1 background imageLoading...
Page #1 background image
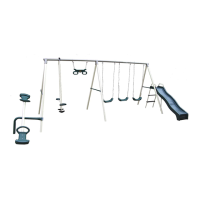
Fun Fantastic II
Part # 7MNL4257817 Rev. A February, 2018
Assembled dimensions: 213" wide x 130" deep x 72" tall
Allow 6' to 12' clearance around the perimeter of the Swingset.
OWNERS MANUAL - MODEL 42578T
Visit www.exible-yer.com
Or scan this QR Code to access our
website for additional information -
including proper use techniques
and a digital version of this manual.
How to request Missing or Damaged Parts:
ALL parts requests are processed online.
• Go to our website www.exible-yer.com/service.html
• Fill out the parts request form
• Wait one to two days for a conrmation email from cservice@exible-yer.com
Flexible-Flyer carries a 180 day manufacturer warranty from date of purchase. Flexible-Flyer
does NOT issue extended warranty plans beyond the 180 day manufacturer set in place.
Please retain sales receipt for warranty purposes. DO NOT RETURN SET TO THE STORE!
For Customer Service requests please visit our website at www.exible-yer.com,
or email us at cservice@exible-yer.com,
Or if no internet access, you may contact us directly at
1-888-350-3015 Monday - Friday 8:00 am - 4:30 pm Central
This gym is designed to be used safely by up to 9 children, with a maximum
weight of 81 pounds (36 Kg) each, simultaneously, not to exceed a
combined weight of 729 pounds (330 Kg). This product is designed for
normal residential use and not for use in day care centers, nurseries or
other places of public gatherings. This product is not to be used or
assembled in any other manner than described in this manual. This gym set
conforms to Consumer Safety Performance Specication for Home
Playground Equipment when assembled using the enclosed instructions.
Adult assembly required, contains small parts. Please retain this manual for
future reference. Manual contains assembly instructions, ordering and
replacement parts information, and safety and maintenance tips. For
stability and child safety this gym set should be anchored. Age Grading: 3-8
Years
Cómo solicitar piezas perdidas o dañadas:
Todas las solicitudes de piezas se procesan en línea.
• Visite nuestro sitio web www.exible-yer.com/service.html
• Llenar el formulario de solicitud de piezas
• Espere de uno a dos días para recibir un correo electrónico de conrmación de
cservice@exible-yer.com
Flexible-Flyer lleva una garantía del fabricante de 180 días a partir de la fecha de compra.
Flexible-Flyer NO emite planes de garantía extendida más allá del fabricante de 180 días
establecido en su lugar.
Guarde el recibo de venta para nes de garantía. ¡NO REGRESE REGISTRADO A LA TIENDA!
Para solicitudes de servicio al cliente, visite nuestro sitio web en www.exible-yer.com,
O envíenos un correo electrónico a cservice@exible-yer.com,
O si no hay acceso a Internet, puede ponerse en contacto con nosotros directamente en
1-888-350-3015 de lunes a viernes de 8:00 am a 4:30 pm Central
Este gimnasio está diseñado para ser usado de manera segura por hasta 9 niños, con un
peso máximo de 81 libras (36 Kg) cada uno, simultáneamente, sin exceder un peso
combinado de 729 libras (330 Kg). Este producto está diseñado para uso residencial
normal y no para uso en guarderías, guarderías u otros lugares de reuniones públicas.
Este producto no debe utilizarse o ensamblarse de otra manera que la descrita en este
manual. Este equipo de gimnasia cumple con la especicación de rendimiento de
seguridad del consumidor para el equipo de patio de recreo cuando se ensambla
utilizando las instrucciones adjuntas. Se requiere montaje adulto, contiene piezas
pequeñas. Guarde este manual para referencia futura. El manual contiene instrucciones
de montaje, información sobre pedidos y repuestos, consejos de seguridad y
mantenimiento. Para la estabilidad y la seguridad de los niños este conjunto de
gimnasio debe ser anclado. Clasicación por edad: 3-8 años
Comment demander des pièces manquantes ou endommagées:
Toutes les demandes de pièces sont traitées en ligne.
• Visitez notre site Web www.exible-yer.com/service.html
• Remplir le formulaire de demande de pièces
• Attendez un ou deux jours pour recevoir un courriel de conrmation de
cservice@exible-yer.com
Flexible-Flyer est livré avec une garantie de 180 jours à compter de la date d'achat.
Flexible-Flyer n'émet pas de plans de garantie prolongée au-delà du fabricant de 180 jours
mis en place.
Veuillez conserver le reçu de vente aux ns de la garantie. NE PAS RETOURNER AU MAGASIN!
Pour les demandes de service à la clientèle s'il vous plaît visitez notre site Web à
www.exible-yer.com,
Ou envoyez-nous un courriel à cservice@exible-yer.com,
Ou si vous n'avez pas accès à Internet, vous pouvez nous contacter directement au
1-888-350-3015 du lundi au vendredi de 8 h à 16 h 30 Centre
Ce gymnase est conçu pour être utilisé en toute sécurité par jusqu'à 9 enfants, avec un
poids maximum de 81 livres (36 Kg) chacun, simultanément, ne pas dépasser un poids
combiné de 729 livres (330 Kg). Ce produit est conçu pour un usage résidentiel normal
et ne doit pas être utilisé dans les garderies, les pépinières ou d'autres lieux de
rassemblement public. Ce produit ne doit pas être utilisé ou assemblé d'une manière
autre que celle décrite dans ce manuel. Cet ensemble de salle de gymnastique est
conforme à la spécication de performance de la sécurité des consommateurs pour les
équipements de terrain de jeux à domicile lorsqu'ils sont assemblés à l'aide des
instructions ci-jointes. Assemblage adulte requis, contient de petites pièces. Veuillez
conserver ce manuel pour référence ultérieure. Le manuel contient des instructions de
montage, des informations sur la commande et les pièces de rechange ainsi que des
conseils de sécurité et de maintenance. Pour la stabilité et la sécurité des enfants cet
ensemble de salle de gym devrait être ancré. Classement par âge: 3-8 ans
ASTM Compliant
Question and Answer IconNeed help?

Do you have a question about the FLEXIBLE FLYER Fun Fantastic II and is the answer not in the manual?

FLEXIBLE FLYER Fun Fantastic II Specifications

General IconGeneral
BrandFLEXIBLE FLYER
ModelFun Fantastic II
CategoryPlay Sets & Playground Equipment
LanguageEnglish

Summary

Product Overview and Support

Requesting Missing Parts

Process for ordering replacement parts online and via phone.

Warranty Information

Details manufacturer warranty coverage, limitations, and exclusions.

Safety and Capacity Guidelines

Specifies maximum child capacity, weight limits, and age range.

Tools for Assembly

Required Tools List

Lists and illustrates all tools needed for assembly.

Assembly Preparation and Resources

Before Starting Assembly

Advises reading all instructions and preparing parts before beginning.

Assembly Tips and Videos

Offers guidance on part alignment and accessing video tutorials.

Parts and Service Information

Explains how to obtain replacement parts and contact customer service.

Manufacturer's Limited Warranty

Warranty Coverage and Exclusions

Defines warranty scope, what's covered, and what's not.

Obtaining Warranty Service

Outlines the process for authorizing and receiving warranty repairs.

Residential Use Only

Product is for residential use; public use voids warranty and liabilities.

Safe Operation and Usage

Adult Supervision Requirement

Emphasizes the critical need for constant adult supervision for all children.

Safe Play Guidelines

Provides specific rules for safe play and equipment operation to prevent injuries.

Playground Surfacing Guidelines

Recommended Surfacing Materials

Details recommended surfacing materials and depth for safety and injury prevention.

Maintenance and Installation

Maintenance Schedule and Checks

Lists essential checks for seasonal and monthly maintenance to ensure safety.

Installation and Anchoring Instructions

Guides on proper placement, leveling, and anchoring of the gym set.

Frame Assembly Steps

Step 1: Join Top Bars to Center Fitting

Connects top bars to the central fitting using specific hardware.

Step 2: Attach Corner Fittings to Top Bars

Secures corner fittings to the top bars with provided hardware.

Frame Assembly Steps (Continued)

Step 3: Attach Legs to Corner Fittings

Connects the legs to the corner fittings, noting SeeSaw leg placement.

Frame Assembly Steps (Continued)

Step 4: Attach Chin Bars to Legs

Secures chin bars to legs, noting drain hole orientation and slide attachment.

Swing Set Assembly Steps

Step 5: Attach Swing Bearings to Top Bar

Mounts swing bearings to the top bar using specific nuts and holes.

Swing Set Assembly Steps (Continued)

Step 6: Attach Chains to Swings and Bearings

Connects swing chains to the seats and swing bearings.

Step 7: Attach Chains to Shoe Loop Swings

Connects chains to shoe loop swings and swing bearings.

Swing Set Assembly Steps (Continued)

Step 8: Attach Chains to Trapeze Bar

Attaches chains to the trapeze bar and swing bearings.

Air Glide Assembly Steps

Step 9: Mount Bracket to Top Bar

Mounts the bracket onto the top bar, aligning with dimples for stability.

Step 10: Attach Drops to Mounting Bracket

Secures drops to the mounting bracket, applying warning decals for safety.

Air Glide Assembly Steps (Continued)

Step 11: Attach Seat Bar to Drops

Connects the seat bar assembly to the drops using specific hardware.

Step 12: Attach Foot Rests to Drops

Attaches the foot rests to the drops, ensuring proper tightening of all hardware.

Wave Slide Assembly Steps

Step 13: Insert Ladder Rails into Slide

Inserts ladder rails into the slide, noting correct placement of the end cap.

Step 14: Insert Slide Leg into Ladder Rail

Inserts the slide leg into the outer ladder rail of the swing set.

Wave Slide Assembly Steps (Continued)

Step 15: Secure Outside Ladder Rail & Slide Leg

Fastens the outside ladder rail and slide leg to the slide structure securely.

Step 16: Secure Inside Ladder Rail & Brackets

Secures the inside ladder rail and mounting brackets to the slide structure.

Wave Slide Assembly Steps (Continued)

Step 17: Attach Ladder Rungs to Rails

Connects ladder rungs to the ladder rails to form the slide's access ladder.

Step 18: Attach Slide Assembly to Chin Bar

Mounts the completed slide assembly to the frame's chin bar.

See Saw Assembly Steps

Step 19: Assemble SeeSaw Arm Components

Attaches retainer sleeves, bushing, and cap cover to the SeeSaw arm.

Step 20: Join SeeSaw Seat Bars

Connects the two SeeSaw seat bars using a sleeve and U-bracket for stability.

See Saw Assembly Steps (Continued)

Step 21: Attach SeeSaw Seats to Seat Bar

Fastens the SeeSaw seats securely to the main seat bar.

Step 22: Attach SeeSaw Arm to Swing Set Leg

Connects the SeeSaw arm to the swing set leg, ensuring correct alignment and stability.

Comprehensive Parts List

General Parts Overview

Lists all parts with descriptions and quantities for various assemblies.

Air Glide Assembly Parts

Details parts specific to the Air Glider assembly.

Deluxe Trapeze Assembly Parts

Lists components for the Deluxe Trapeze assembly.

Kid Comfort Swing Assembly Parts

Lists parts for the Kid Comfort Swing assembly.

Shoe Loop Swing Assembly Parts

Lists components for the Shoe Loop Swing assembly.

See Saw Assembly Parts

Lists parts required for the See Saw assembly.

Wave Slide Assembly Parts

Lists parts needed for the Wave Slide assembly.

A-Frame Assembly Parts

Lists components for the A-Frame assembly.