EN-US English
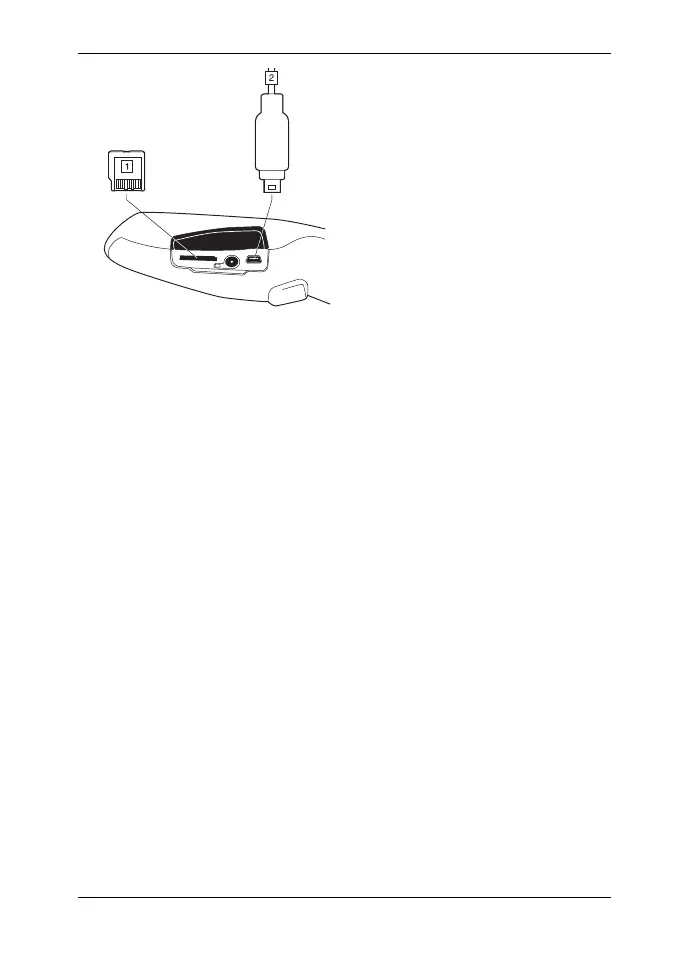
• (Fig. 1 above) Remove the
miniSD™ Memory Card and insert
it into a card reader connected to
a computer. A miniSD™ card
adapter is included with your
camera.
• (Fig. 2 above) Connect a
computer to the camera using a
USB Mini-B cable.
8. In Windows
®
Explorer, move the
image from the card or camera using
a drag-and-drop operation.
To keep in mind
• Blank objects may appear warm or
cold to the camera due to reflections of
other objects.
• Avoid direct sunlight on the details that
you are inspecting.
• Different types of faults, such as those
in a building’s construction, may result
in the same type of infrared images.
• Correctly analyzing an infrared image
requires professional knowledge about
the application.
© 2010, FLIR Systems AB. All rights reserved worldwide.
21
Publ. no. T559169, rev. 003
■ JOB NAME: T559169 ■ OUTPUT: Thursday 18 March 2010, (10:18AM) ■ BATCH FORMATTER VERSION: 7.4.25 ■ PAGE: 21 (of 74) ■ PAGINATION: This side=recto ■