3 EN-US English
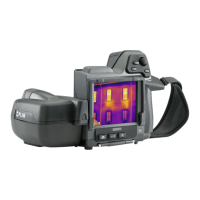
4. Memory card.
5. Video cable (composite video).
6. Tripod mount 1/4″-20.
7. Latch for the cover to the connector bay.
8. Battery compartment cover.
9. Latch for the battery compartment cover.
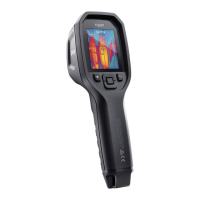
3.10 Screen elements
See Figure 2.4 Screen elements, page 3.
1. Measurement toolbar.
2. Measurement tool (e.g., spotmeter).
3. Result table.
4. Status icons.
5. Temperature scale.
6. Settings toolbar button.
7. Color toolbar button.
8. Measurement toolbar button.
9. Image mode toolbar button.
10. Measurement parameters toolbar button.
11. Recording mode toolbar button.
3.11 To keep in mind
• Adjust the focus first. When the camera is out of focus, the measurement will
be wrong.
• By default, most cameras adapt the scale automatically. Use this mode first,
but do not hesitate to set the scale manually.
• A thermal camera has a resolution limit. This depends on the size of the de-
tector, the lens, and the distance to the target. Use the center of the spot tool
as a guide to the minimum possible object size, and get closer if necessary.
Make sure to stay away from dangerous areas and live electrical components.
• Be careful when holding the camera perpendicular to the target—you may be-
come the main source of reflection.
• Select a zone of high emissivity, e.g., an area with a matte surface, to perform
a measurement.
• Blank objects, i.e. those with low emissivities, may appear warm or cold in the
camera, as they mainly reflect the environment.
• Avoid direct sunlight on the details that you are inspecting.
• Various types of faults, e.g., those in a building’s construction, may result in
the same type of thermal pattern.
#T810140; r. AB/33072/33072; mul 7
 Loading...