EasyManua.ls Logo

Flo-Master 24101 - User Manual

Flo-Master 24101
2 pages
Print Icon
To Next Page IconTo Next Page
Loading...
Instructions for Polyethylene Sprayer 24101 & 24102
871-511 Instruction
©2019 Manufactured by H. D. Hudson
Manufacturing Company
1-800-9-SPRAYER
ladybug@hdhudson.com
If you have any questions or concerns, or missing parts, do not return sprayer to the store.
Call or email Customer Service at 1-800-9-SPRAYER/ ladybug@hdhudson.com
ASSEMBLE HOSE TO TANK
HOW TO FILL
HOW TO PRESSURIZE
HOW TO RELEASE PRESSURE
HOW TO SPRAY
FOR YOUR SAFETY
This sprayer operates with liquid under pressure. Failure to observe cautions and follow instructions for use and maintenance can cause tank, hose or other parts to become corroded,
weakened, and/or burst. This can result in serious injury or property damage from forcible ejection of parts or high-pressure discharge of spray material. Do not use any ammables or
boiling liquids in this sprayer as it is not designed nor intended for such use. Not for use with acetone based products.
Some spray materials can ignite or explode. Do not spray in
an enclosed space, near an open ame such as found in a bbq grill or water heater, near an electric motor or open switch, or any source of heat. Do not smoke while spraying. Use of
ammables could result in serious injury or property damage from unintended ignition or explosion. Do not use any caustics or acids in this sprayer, since these can damage or weaken
the sprayer and its parts, resulting in serious injury or property damage. Keep out of reach from children and pets. Always read and follow directions on the spray material container,
including the need for protective clothing. Before using your sprayer, thoroughly inspect both inside and outside of the sprayer and do not pressurize sprayer if tank, hose or other parts
appear to be damaged, discolored, brittle, excessively soft or loose. Do not pressurize with any mechanical device such as an air compressor, since this can create dangerous pressure
and bursting of parts and result in serious injury. Wear long-sleeved shirt, pants, gloves, goggles or similar protective clothing when spraying. PROP 65 WARNING: This product can
expose you to one or more chemicals, including lead, known to the State of California to cause cancer and birth defects or other reproductive harm. Wash hands after handling. For
more information go to www.p65warnings.ca.gov.
LIMITED WARRANTY
H. D. Hudson Manufacturing Company warrants to the original consumer purchaser of this product at retail that it is free from problems in materials and workmanship for the period of 1
year from the original date of purchase. Visit hdhudson.com for speci c model warranty period.This warranty does not apply to damage to the product resulting from accident, misuse,
neglect, alteration, modi cation, tampering, or failure to follow instructions supplied with the product. This warranty does not cover normal wear and tear of o-rings or seals, and the
warranty shall be void if the product is used commercially. If the product or any part of it should malfunction within the warranty period, call 1-800-977-7293. Valid only in North America.
You must retain your sales receipt as proof of the date of purchase and include it with any return of
the product. H. D. Hudson Manufacturing Company excludes liablity under this warranty for any and all incidental and consequential loss or damages.
1. Insert supply tube into the small tank opening and screw the tank nut down.
2. Make sure the tank nut is tight, if loose, it may come off with force or spray may escape,
resulting in injury.
1. Pour measured amount of spray material into the open tank. Follow label
directions on spray material container for amount to use.
2. Add water as directed. Do not ll beyond the max ll line.
3. Insert pump and turn clockwise to seal. Do not over tighten.
1. Unlock the pump hand by pushing down and turning counterclockwise.
2. Using the handle, pump up and down. (the more you pump, the more pressure
you will build inside the tank. When it becomes dif cult to pump, your tank has
reached maximum pressure.)
3. Do not stand so your head is over the pump.
1. Squeeze the trigger on the handle to spray.
2. Push the trigger forward to lock on for continuous spray.
3. Then push the trigger back down to unlock.
Turn sprayer on its side and turn nozzle away from you. Squeeze shut off rigger to
let all the air escape. Turn sprayer upright and slowly unscrew pump from tank and
remove it.
Clean and dry your sprayer after every use to greatly prolong its useful service life. Many spray materials will harden if left in the sprayer and plug up the nozzle, shut-off valve or supply tube.
The soft parts, O-rings and gaskets, will ultimately wear out and need replacing, just like the oil lter on your car, for example. How often they need replacing depends on how much you
spray, the spray materials you use and whether or not the sprayer is regularly cleaned after use. Call 1-800-9-SPRAYER to obtain genuine Hudson® replacement parts. If you leave your
sprayer in the garage over winter, particularly in northern areas, the soft parts may dry out and need servicing before you use your sprayer for the rst time in the spring.
SERVICE AND MAINTENANCE
Question and Answer IconNeed help?

Do you have a question about the Flo-Master 24101 and is the answer not in the manual?

Summary

Assemble Hose to Tank

How to Fill Sprayer

How to Pressurize Sprayer

How to Spray

How to Release Pressure

Service and Maintenance

Safety Instructions

Prop 65 Warning

California warning about chemicals causing cancer, birth defects, or reproductive harm.

Limited Warranty Information

Troubleshooting Common Issues

Supply Tube Issues

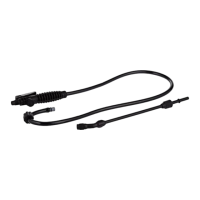
Addresses problems with air only spraying, indicating a detached or misattached supply tube.

Pressure Holding Problems

Covers issues with the sprayer not holding pressure, focusing on seals and lubrication.

Bad Spray Pattern

Solutions for poor spray patterns, likely due to clogs in the hose, wand, or nozzle.

Chemical Compatibility

Recommended Chemicals

Lists approved chemical types for use with the sprayer, including weed killers and cleaners.

Not Recommended Chemicals

Details chemicals and materials explicitly advised against due to potential damage or safety risks.

Overview

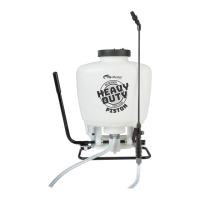
This document provides instructions for the Flo-Master Polyethylene Sprayer models 24101 and 24102, manufactured by H. D. Hudson Manufacturing Company. It serves as a comprehensive guide for assembling, filling, pressurizing, spraying, and maintaining the device, along with troubleshooting tips and chemical compatibility information.

Function Description

The Flo-Master Polyethylene Sprayer is designed for the application of various liquid materials, primarily for gardening and household tasks. Its core function is to store a liquid solution, pressurize it using a manual pump, and then dispense it through a nozzle in a controlled spray pattern. This allows users to efficiently apply chemical weed killers, insecticides, pesticides, and mild cleaning solutions to target areas. The sprayer is engineered to provide a consistent and adjustable spray, making it suitable for a range of applications from broad coverage to more precise spot treatments. The manual pumping mechanism ensures that the user has direct control over the pressure generated, allowing for adaptation to different spraying needs.

Usage Features

The sprayer is designed with several user-friendly features to ensure ease of use and safety.

Assembly:

  • Hose to Tank Connection: The assembly process begins by inserting the supply tube into the small tank opening and screwing down the tank nut. Users are advised to ensure the tank nut is tight to prevent it from coming off with force or allowing spray to escape, which could lead to injury. This simple, screw-on mechanism ensures a secure connection between the hose and the tank, which is crucial for maintaining pressure and preventing leaks during operation.

Filling:

  • Measured Filling: To fill the sprayer, users pour the measured amount of spray material into the open tank, following the label directions on the spray material container. This emphasizes the importance of accurate chemical mixing and adherence to manufacturer guidelines.
  • Water Addition: Water is then added as directed, ensuring that the liquid level does not exceed the "max fill" line marked on the tank. Overfilling can compromise the sprayer's ability to pressurize effectively and may lead to spills.
  • Pump Insertion and Sealing: After filling, the pump is inserted into the tank opening and turned clockwise to seal it. Users are cautioned not to overtighten, as this could damage the threads or seals. The clockwise turn creates a secure, airtight seal, which is essential for building and maintaining pressure within the tank.

Pressurizing:

  • Pump Unlock: To pressurize the sprayer, the pump handle is unlocked by pushing it down and turning it counterclockwise. This releases the handle from its locked position, allowing it to move freely.
  • Manual Pumping: The user then pumps the handle up and down. The more the user pumps, the more pressure builds inside the tank. Pumping continues until it becomes difficult to move the handle, indicating that maximum pressure has been reached. A safety warning advises users not to stand with their head over the pump during this process, highlighting a potential hazard if the pump were to dislodge or release pressure unexpectedly.

Spraying:

  • Trigger Operation: To initiate spraying, the user squeezes the trigger on the handle. This action opens the valve, allowing the pressurized liquid to be expelled through the nozzle.
  • Continuous Spray Lock: For continuous spraying, the trigger can be pushed forward to lock it in place. This feature is particularly useful for covering large areas, as it eliminates the need to constantly hold down the trigger, reducing user fatigue.
  • Trigger Unlock: To stop continuous spraying, the trigger is simply pushed back down to unlock it.

Releasing Pressure:

  • Safe Pressure Release: To release pressure safely after use, the sprayer is turned on its side, and the nozzle is pointed away from the user. The shut-off trigger is then squeezed to allow all the air to escape. This controlled release prevents sudden bursts of air or liquid.
  • Pump Removal: Once the pressure is fully released, the sprayer is turned upright, and the pump is slowly unscrewed from the tank and removed. Slow unscrewing ensures that any residual pressure is safely dissipated and prevents the pump from ejecting forcefully.

Chemical Compatibility:

The sprayer is recommended for use with most chemical weed killers, most chemical insecticides/pesticides, and mild cleaners such as dishwashing detergent and most disinfectants. This broad compatibility makes it a versatile tool for various household and gardening needs. However, the manual explicitly lists materials not recommended for use, including flammable products (gasoline, diesel fuel, hydraulic oil), hot or boiling liquids, products containing acetone/acetate/acetic acid (paint thinner, some concrete sealers), highly viscous materials (tar, high-solid paint or stain), paint and stains, products containing chlorine (bleach, pool water), strong acids or bases, strong solvents, lacquers or lacquer thinners, turpentine, Epsom salt, mineral spirits, vinegar, citrus-based cleaner, and products containing peppermint oil or peanut oil. This detailed list is crucial for preventing damage to the sprayer and ensuring user safety, as incompatible chemicals can corrode parts, weaken materials, or create hazardous reactions.

Maintenance Features

Proper maintenance is crucial for prolonging the life and ensuring the safe operation of the Flo-Master sprayer.

Cleaning and Drying:

  • Post-Use Cleaning: Users are instructed to clean and dry their sprayer after every use. This practice is vital because many spray materials can harden if left in the sprayer, leading to clogged nozzles, shut-off valves, or supply tubes. Regular cleaning prevents blockages and ensures consistent performance.

Part Replacement:

  • Wear and Tear: The manual acknowledges that soft parts, such as O-rings and gaskets, will eventually wear out and require replacement. This is compared to the oil filter in a car, emphasizing that these are consumable components. The frequency of replacement depends on usage, the types of spray materials used, and the regularity of cleaning.
  • Genuine Replacement Parts: Users are advised to call customer service to obtain genuine Hudson® replacement parts, ensuring compatibility and quality.

Winter Storage:

  • Cold Weather Care: For users in northern areas, particularly if the sprayer is stored in a garage over winter, the soft parts may dry out and require servicing before the first use in the spring. This highlights the impact of environmental conditions on the sprayer's components and the need for seasonal maintenance.

Troubleshooting:

The manual includes a troubleshooting section to address common issues:

  • Air Only Spray: If only air comes out when spraying, it indicates that the supply tube has fallen off or is not attached correctly. The solution involves unscrewing the hose and pump handle, retrieving the supply tube, reattaching it to the hose, and reassembling the unit.
  • Loss of Pressure: If the sprayer is not holding pressure, the seals on the pump need to be checked and lubricated. This often involves lubricating the cylinder O-ring at the top of the pump and the check/mono valve at the bottom of the cylinder. The final seal inside the pump also requires attention. The process involves unlocking the pump handle, pulling it out, using a flat-head screwdriver to release the locking cap, pulling out the plunger assembly, lubricating the gasket on the end of the plunger, and reassembling. Petroleum jelly is recommended for lubrication.
  • Bad Spray Pattern: A bad spray pattern suggests clogs in the hose, wand, or nozzle. The solution is to clean all these parts properly.

Safety Warnings:

The manual includes extensive safety warnings to prevent injury and property damage:

  • Pressure-Related Risks: The sprayer operates with liquid under pressure. Failure to follow instructions can lead to corrosion, weakening, or bursting of parts, resulting in forcible ejection of parts or high-pressure discharge of spray material.
  • Flammable Liquids: The sprayer is not designed for flammable or boiling liquids. Using flammables can lead to ignition or explosion, causing serious injury or property damage. Users are warned not to spray in enclosed spaces, near open flames (BBQ grills, water heaters), electric motors, open switches, or any heat source, and not to smoke while spraying.
  • Incompatible Chemicals: Caustics or acids can damage or weaken the sprayer, leading to injury or damage.
  • Child and Pet Safety: Keep out of reach of children and pets.
  • Protective Clothing: Always read and follow directions on spray material containers, including requirements for protective clothing.
  • Pre-Use Inspection: Before each use, thoroughly inspect the sprayer (inside and out) for damage, discoloration, brittleness, excessive softness, or looseness of parts. Do not pressurize if any damage is observed.
  • No Mechanical Pressurization: Never pressurize the sprayer with a mechanical device like an air compressor, as this can create dangerous pressure and cause parts to burst.
  • Prop 65 Warning: The product may expose users to chemicals, including lead, known to cause cancer, birth defects, or other reproductive harm. Users are advised to wash hands after handling and directed to www.p65warnings.ca.gov for more information.

These detailed instructions and warnings underscore the manufacturer's commitment to user safety and the longevity of the product, providing a comprehensive guide for effective and responsible use of the Flo-Master sprayer.

Flo-Master 24101 Specifications

General IconGeneral
TypeAirless Paint Sprayer
Hose Length25 ft
Power SourceElectric
MaterialMetal and Plastic
Spray PatternAdjustable
Spray Tip Size0.015 inches
Nozzle Size0.015 inches

Related product manuals