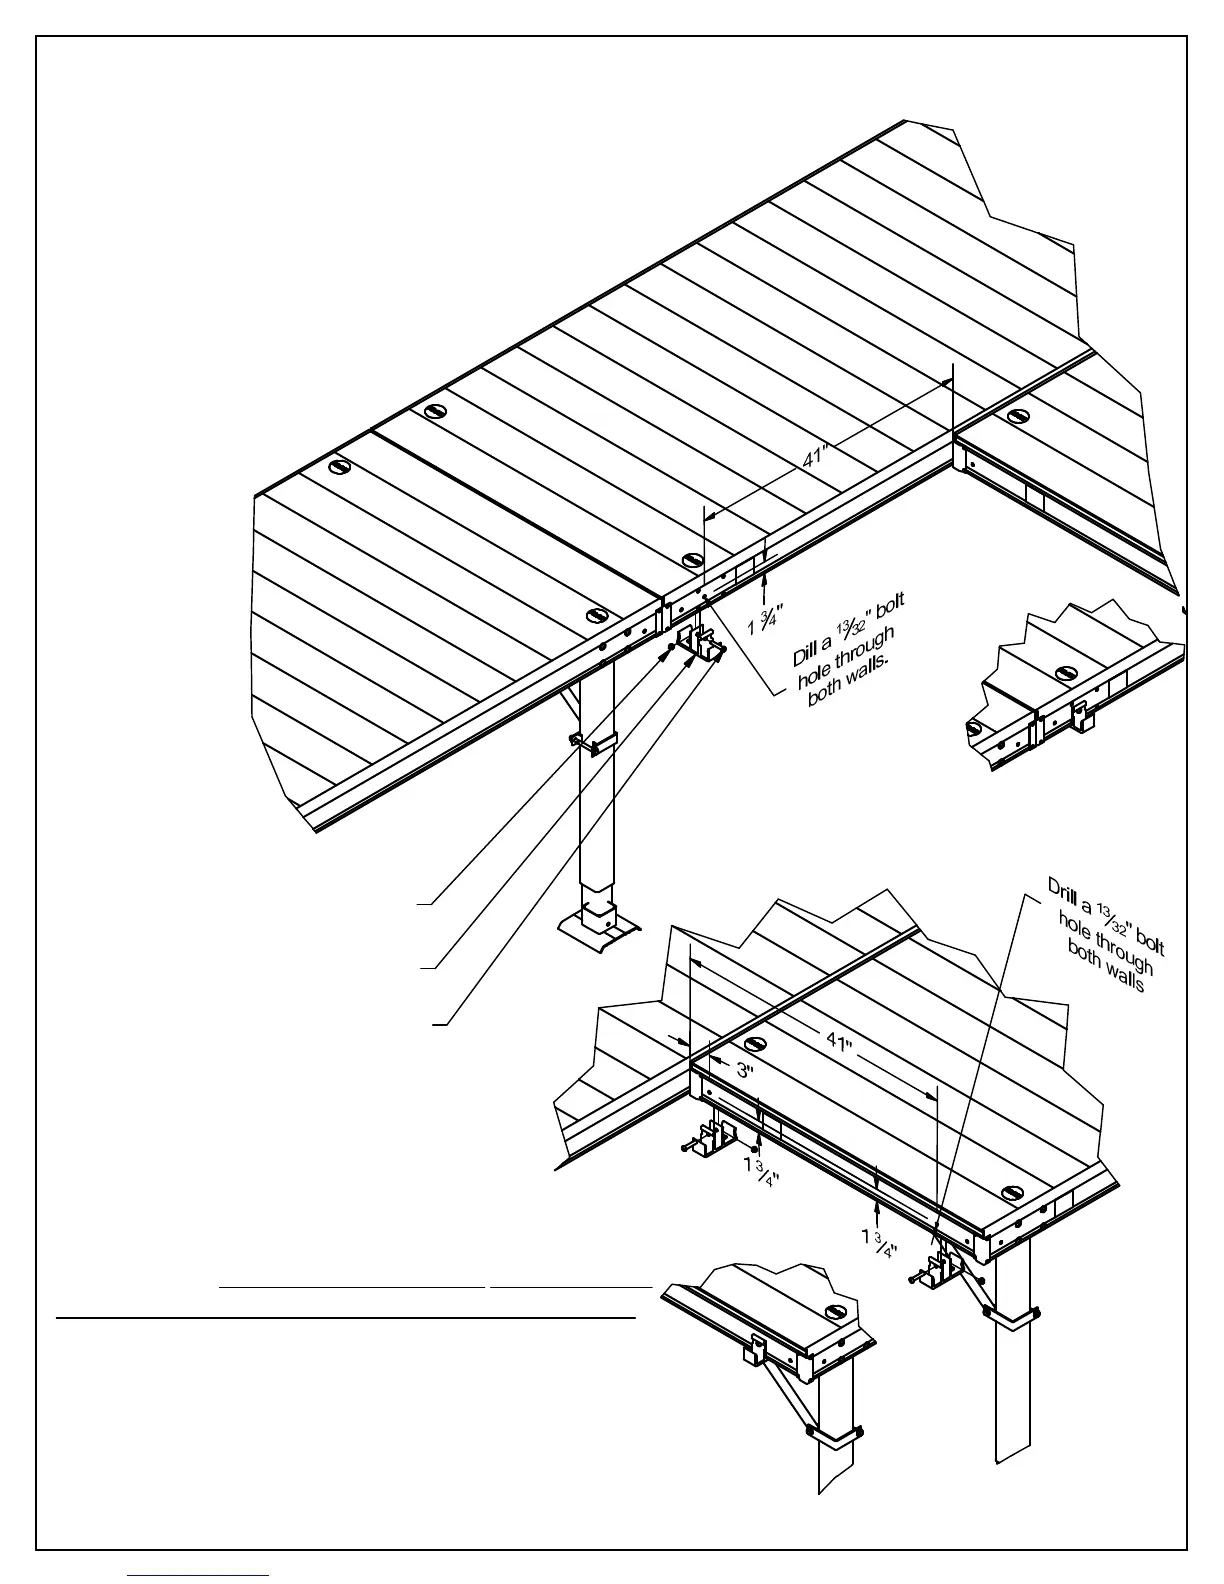
STEP 1
- Attach a Quick Connect to the dock frame. Start by measuring 41"
from the face of the trim on the opposing dock and up 1-3/4" from the
bottom and mark. Drill a 13/32" bolt hole on that mark. The Quick
Connect can be used as a drill guide. Refer to figure 1A for details on
the dimensions. Attach the Quick Connect to the dock frame beam as
shown in figure 1B and attach using a 3/8 x 2" button head bolt and
aluminum nut. Torque to 20 ft/lbs.
SHEET 3 OF 4
FIG.
1A
STEP 2
- Attach the second and third Quick Connects to the dock frame. Start
by measuring 3" from the face of the trim and up 1-3/4" from the
bottom and mark. NOTE: THE EXISTING QUICK
CONNECT BOLT
HOLE WILL BE AVALIBLE TO USE IN SOME CONFIGURATIONS.
Measure 41" from the face of the dock trim and up 1 3/4" and mark.
Drill the two 13/32" bolt holes on those marks. The Quick Connect can
be used as a drill guide. Refer to figure 2A for details on dimensions.
Attach the Quick Connect on the dock frame beam as shown in figure
2B using a 3/8 x 2" button head bolt and aluminum nut. Torque to 20
ft/lbs.
FIG.
2A
FIG.
1B
FIG.
2B
3/8 Aluminum Nut
Quick Connect
3/8 x 2" Button Head Bolt
 Loading...