- 5 -
● To re-install, fit the blade supplied onto the motor shaft .
● Fit the outer flange and spindle bolt.
● Tighten the spindle bolt by gripping outside flange with box wrench, place socket wrench on
spindle bolt and turn socket wrench counter clockwise. Do not over-tighten!
Trigger Button (On-Off)
The tool can only be put into service if both the Lock Off button and the trigger are depressed.
Depressing the trigger turns the tool “on”. Releasing the trigger turns the tool “off”. The Lock Off
button will automatically lock in the “OFF” position when the trigger is released, preventing any
unintentional operation.
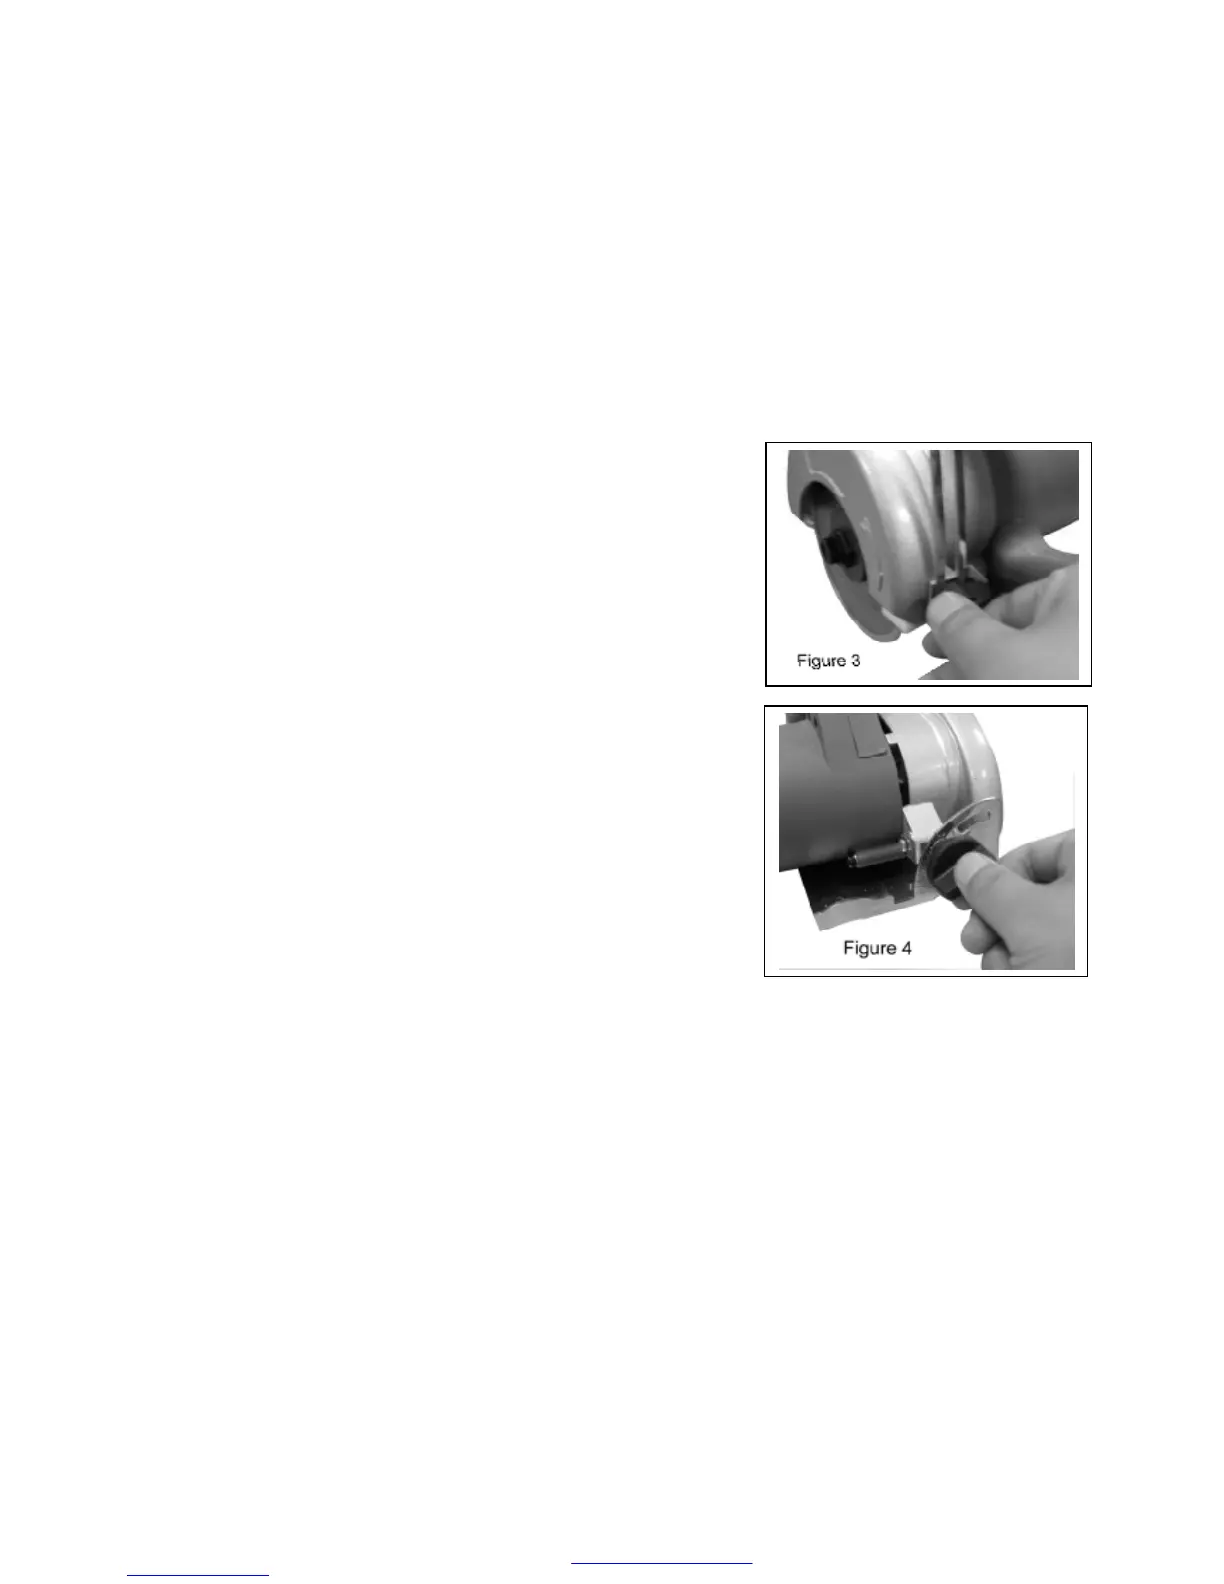
Depth of Cut
● Loosen Adjustable Cutting Depth Wing Nut on Base Plate
(Figure 3)
● Hold the base plate flat against the edge of the tile and lift the
body of tool until the blade is at right depth.
● Secure the base by tightening Adjustable Cutting Depth Wing
Nut.
0-45
0
Miter Cut
● Loosen 0-45 Locking Knob (for bevel cuts) ( Figure 4)
● Tilt the body of saw until the required angle is reached
● Tighten the Locking Knob to secure the base plate
Changing the Blade
When the blade is worn out, it should be changed as described
in the procedure in “Diamond Blade Installation and Removal”.
Water Valve Adjustment
● Regulate the water volume by turning the water control to the left or right.
● When turning the valve to the right (toward the opening of the water hose), the water outlet will be
fully opened and when turning it back to the left, it will be fully closed.
● Amount of water flow is adjusted by turning the water control valve rather than at the source of the
water.
Cutting the Tile
● Mark the desired cutting line on tile surface, ensure the tile material is securely clamped or
stationary and horizontal.
● Put the base plate on the tile without touching the blade.
 Loading...