16 17
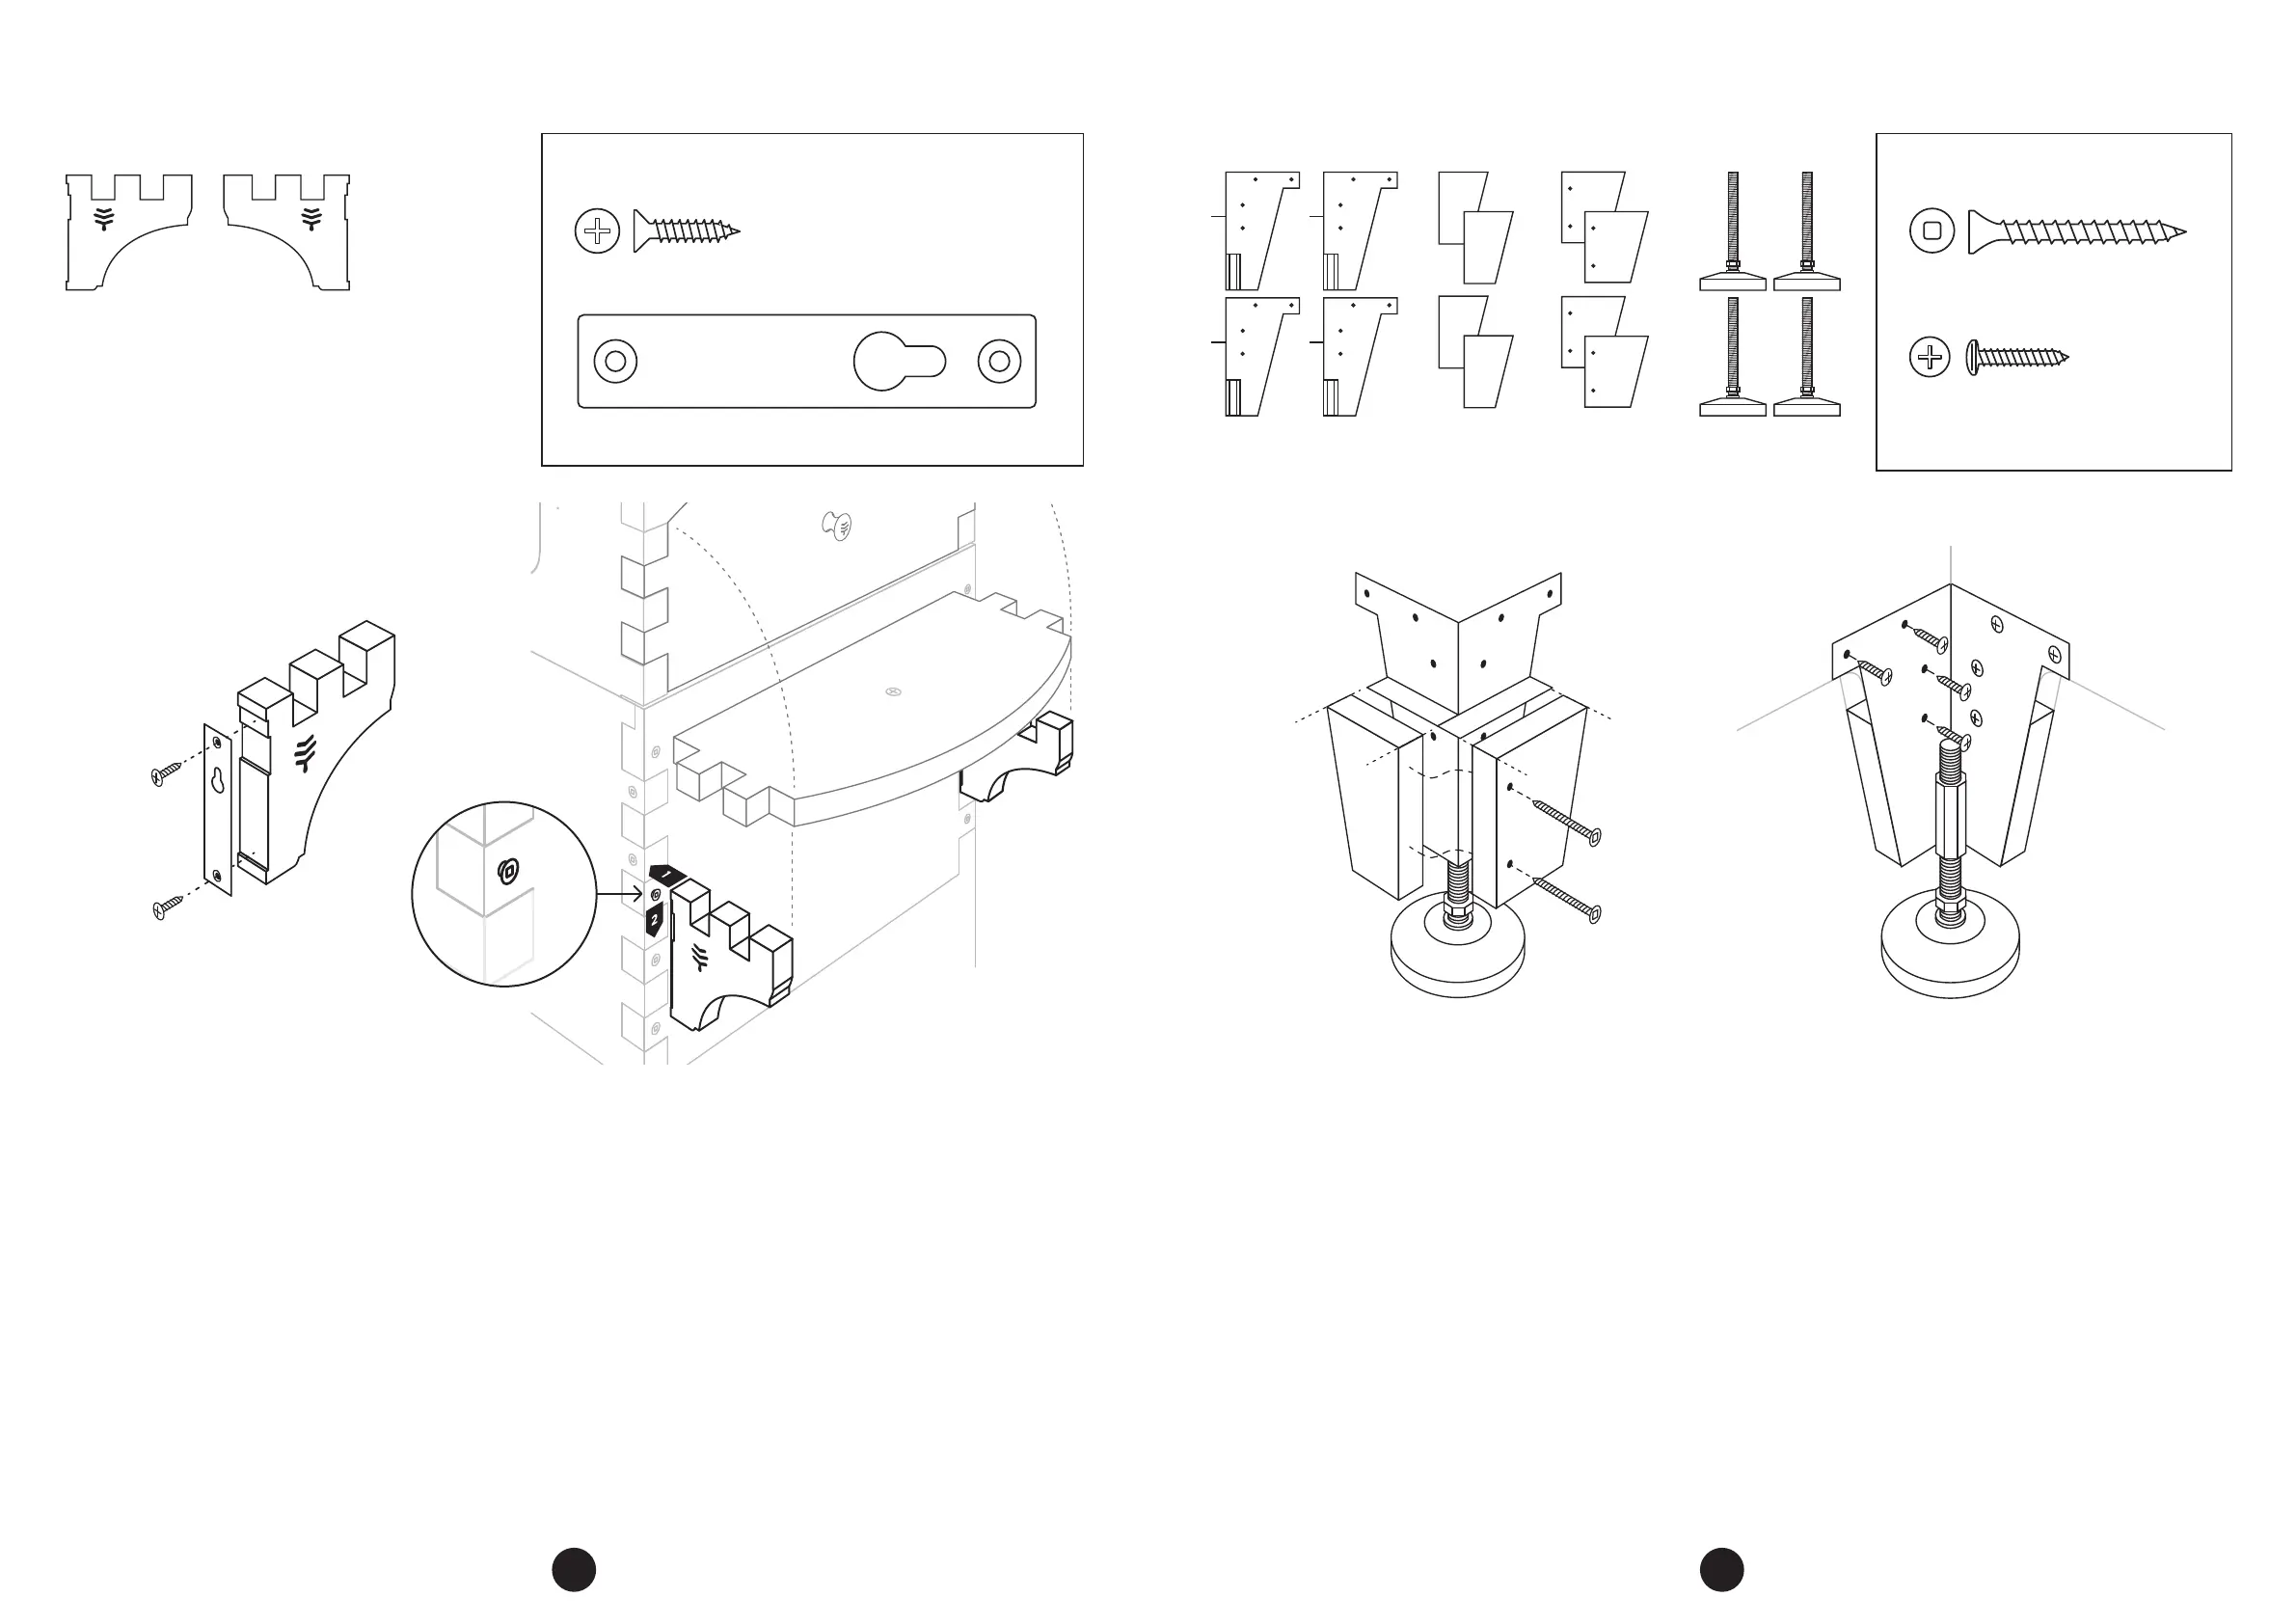
1. Dry fit one narrow and one wide timber leg bracket
cover to the metal leg corner bracket as shown.
2. Line up the two pilot holes in the bracket covers with
the corresponding two holes in the metal bracket
and attach (Phillips head drive bit and Phillips head
screws).
3. Attach the bracket covers together using the two
pilots holes on the wide cover (square drive bit and
square drive screws).
4. Turn the base on its side to access the bottom four
corners.
5. Align the metal brackets with the 6 pilot holes on the
inside of the base corner and attach (Phillips head
drive bit and Phillips head screws) like shown.
6. Turn the base upside down and screw the feet into
each leg bracket.
• You can adjust the height to create the optimal
slope for harvesting, using the inbuilt spirit levels on
both the side and rear of the base. If you are on flat
ground the front two legs should be longer than the
rear to create the 3° slope required for harvesting.
ASSEMBLY
outside view inside view
LEG KIT ASSEMBLY (OPTIONAL EXTRA)
4 x metal leg corner
bracket
2 x harvesting shelf brackets
4 x timber leg
bracket cover –
narrow
4 x timber leg
bracket cover –
wide
4 x adjustable foot
PARTS
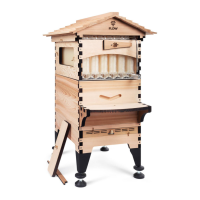
1. To fix keyhole mount to bracket: place the keyhole
mount with countersink facing outward, against the
shelf bracket and attach to the vertical edge as shown
(Phillips head screws and Phillips head driver bit).
2. Make sure the large hole on the bracket mount goes
at the bottom.
Using your harvesting shelf
1. You can attach your shelf in multiple locations at
your prefered height. Choose any two corresponding
square head screws on the brood box front (using the
assembly tool and square drive bit) and wind out the
screw approximately 1 ½ turns (you may need to adjust
slightly to get the perfect fit) see diagram.
• For large jars you can even use the screws on the
rear of the base for a lower shelf, but be careful
not to overload.
• Adjust the screws so that they make a nice tight
fit. If the screws are wound out too far, the brackets
will not be as structurally secure.
2. Fit the harvesting shelf bracket over the exposed
screwhead and push down until it clicks into place.
3. When you are ready to harvest you can fit the Flow
Super rear window cover to these two brackets to
create a handy shelf which will make harvesting
honey even easier.
• These brackets are designed for easy removal.
Store inside for longevity.
PARTS
ASSEMBLY
HARVESTING SHELF ASSEMBLY
HARVESTING SHELF HARDWARE PACK – ACTUAL SIZE
4 x Phillips head screws
2 x harvesting shelf bracket keyhole mounts
LEG KIT SCREW PACK – ACTUAL SIZE
8 x square drive screws
33 x phillips head screws
Wind out the screw
approximately
1 ½ turns
wide
cover
narrow
cover
 Loading...