Installation | Installation
INSTALLATION
Installation
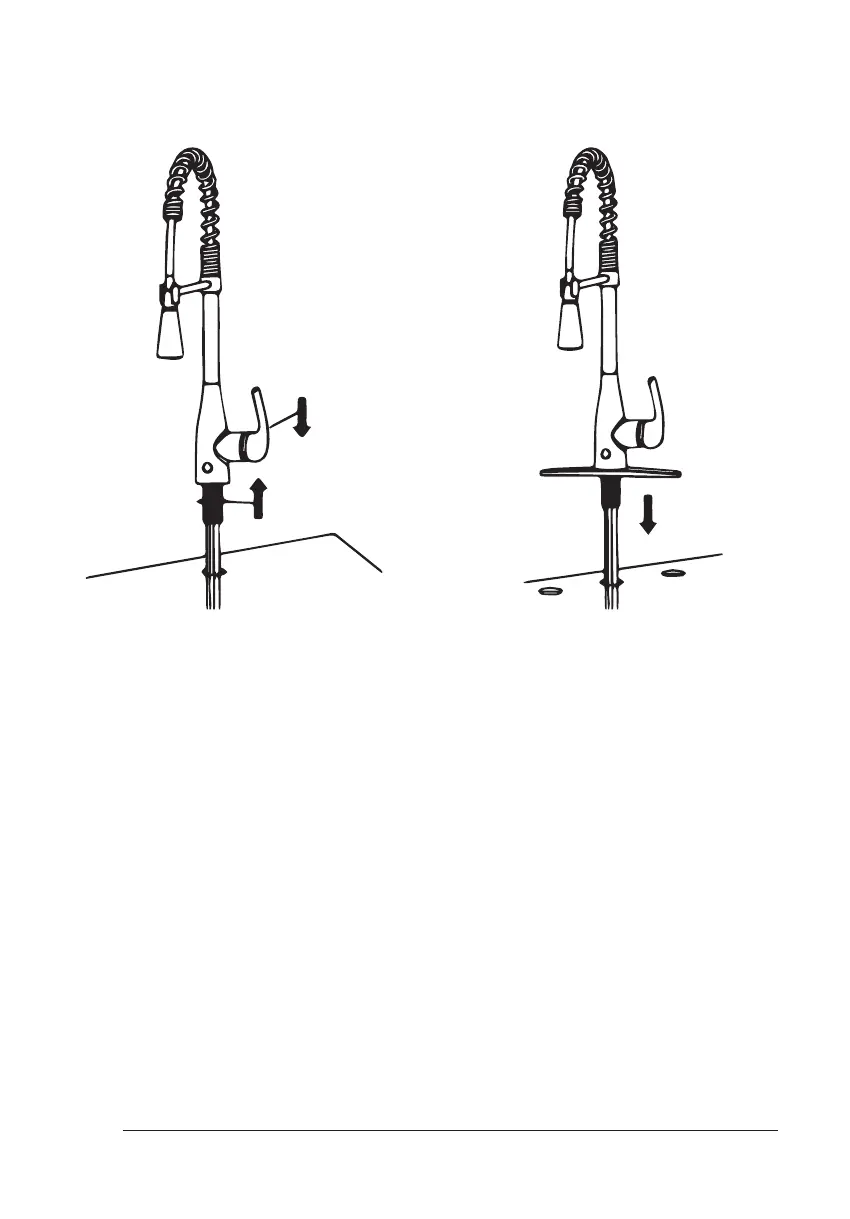
Step 1 for 1-hole sink
Insert the O-ring over the hoses,
cable, and stem which are located
at the bottom of the faucet. Then
mount the faucet onto the sink.
Step 1 for 3-hole sink
Insert the deck plate over the
cable and hoses in the mounting
stem. Align the grooves in the deck
plate with the arches on the faucet
bottom. Then mount the faucet on
the sink.
Étape 1 pour un évier 1 trou
Insérez le joint torique sur les
tuyaux, le câble et la tige qui
se trouvent au bas du robinet.
Ensuite, montez le robinet
sur l’évier.
Étape 1 pour un évier à 3 trous
Insérez la plaque de pont sur le
câble et les tuyaux dans la tige de
montage. Alignez les rainures de la
plaque de pont avec les arches sur
le fond du robinet. Ensuite, montez
le robinet sur l’évier.
NOTE: Flush water lines before installation to release built up impurities of water supply.
REMARQUE: Rincez les conduites d’eau avant l’installation pour libérer les impuretés
accumulées dans l’alimentation en eau.