9
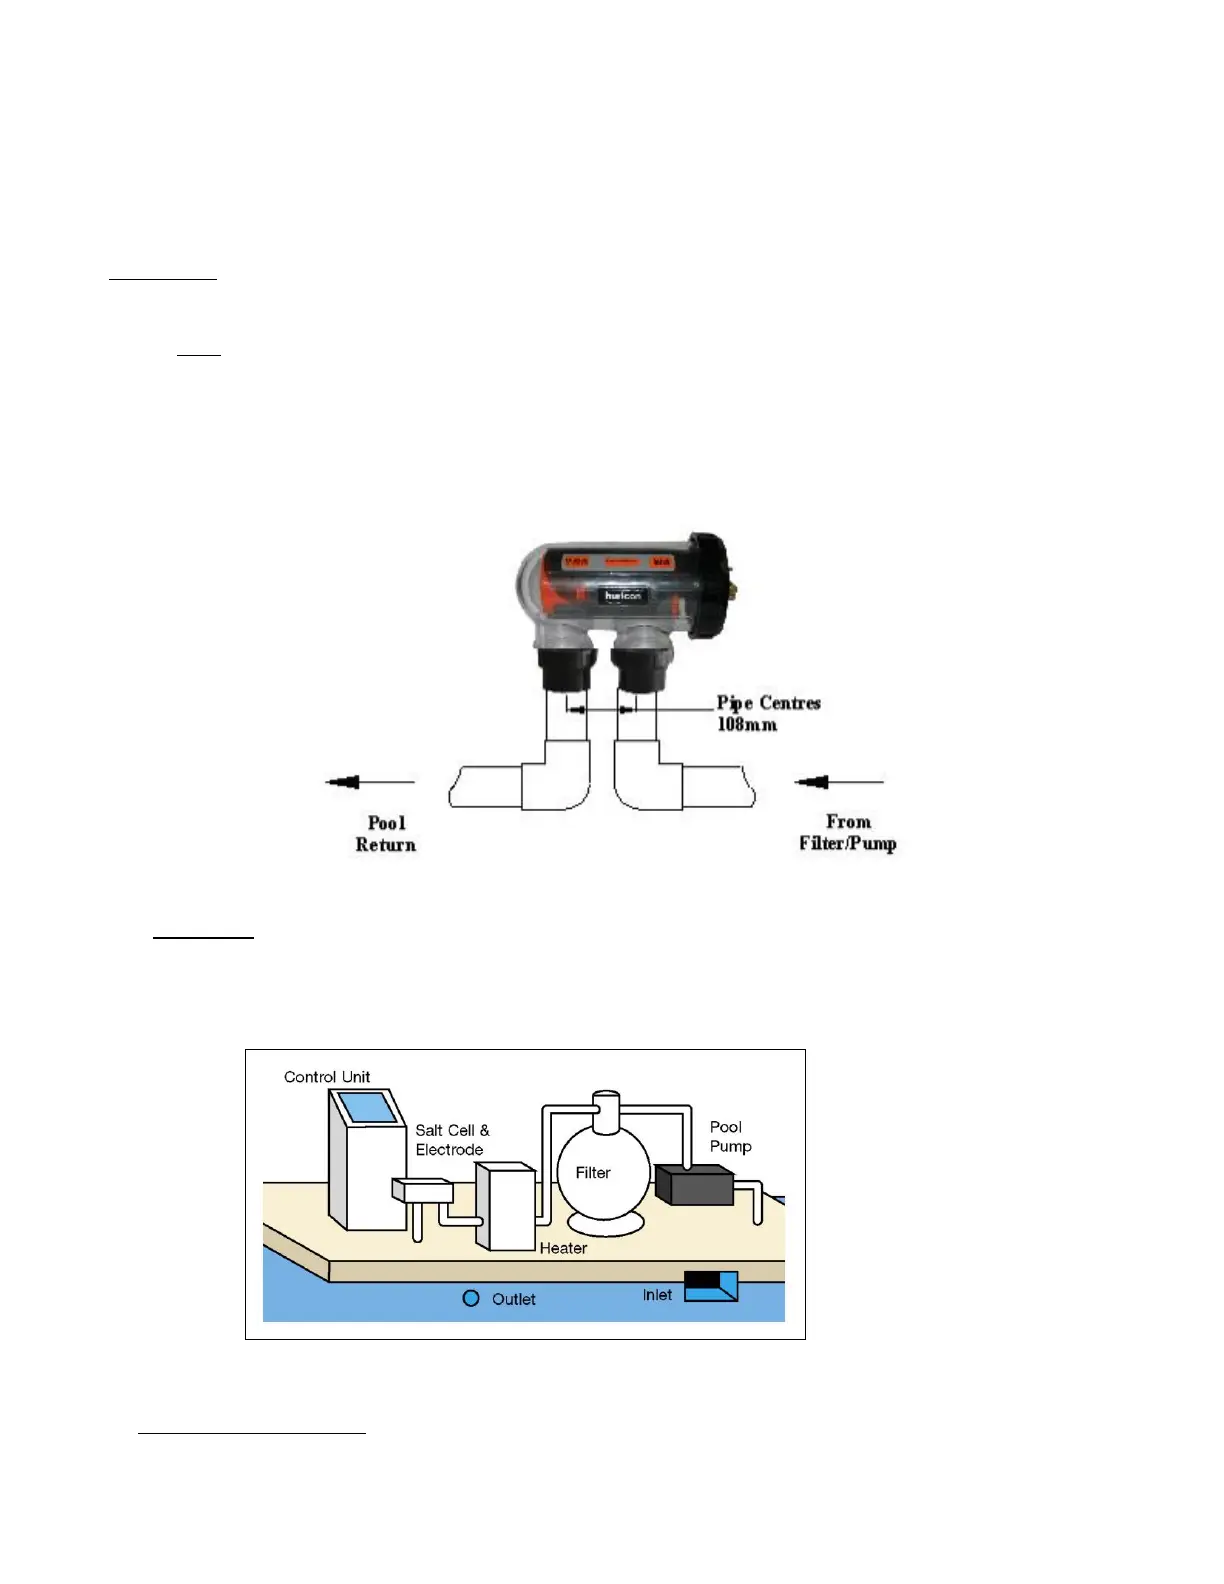
The chlorinator cell must be located last in the pipe work just prior to the return to the pool. If valves are installed between the
chlorinator control unit and the pool outlet, it is essential that they cannot deadhead the pump. If the pressure in the cell exceeds
150kPa (22 psi) and/or the water temperature exceeds 40°C (104°F), the cell may fail.
WARNING: Never install the cell before the pump or heater
The cell must be installed with the barrel unions underneath and the cell should be horizontal. 50 mm (2 in) fittings have been
provided. Make sure that the O-rings are correctly fitted and the unions are done up tightly.
Direction of flow through the cell is critical – unit must be plumbed with the water entering the cell at the end closest to the
terminal connections (as indicated by flow direction label mounted on cell).
WARNING: It is essential that pipe work and equipment do not allow gases generated from the cell to build-up in
the cell.
CELL (HOOK-UP) WIRING
Once the cell is installed , connect the black multi-core cable from the chlorinator control unit to the cell. The blue wire must be
connected to the blue terminal. The (multi-core) 4–wire cable wires are color coded to match their corresponding connection points