ASSEMBLY
www.x.bike
12
F5 Trail|OwnersManual
13www.x.bike
F5 Trail |OwnersManual
Overview
ThefollowingsectioncoverstheassemblydirectionsfortheF5Trail.Proper
assemblyisanessentialstepinensuringyoursafetyandtheproperoperationofthe
bike.If at any point you do not feel comfortable assembling the bicycle your-
self, please seek professional assistance or reach out to our support team.
YoucanalsondadetailedassemblyvideoontheFLXYouTubechannel:
www.x.bike/f5assembly
If you do not feel that you have the ability or skill to assemble the bike
yourself, please take it into a local bike shop for professional assistance.
Failure to properly assemble your eBike can result in serious injury or
death.
ToolsIncluded:
Please read through the entire assembly instructions section before you
begin. Proper assembly is important in order to ensure your safety and
satisfaction while operating your eBike.
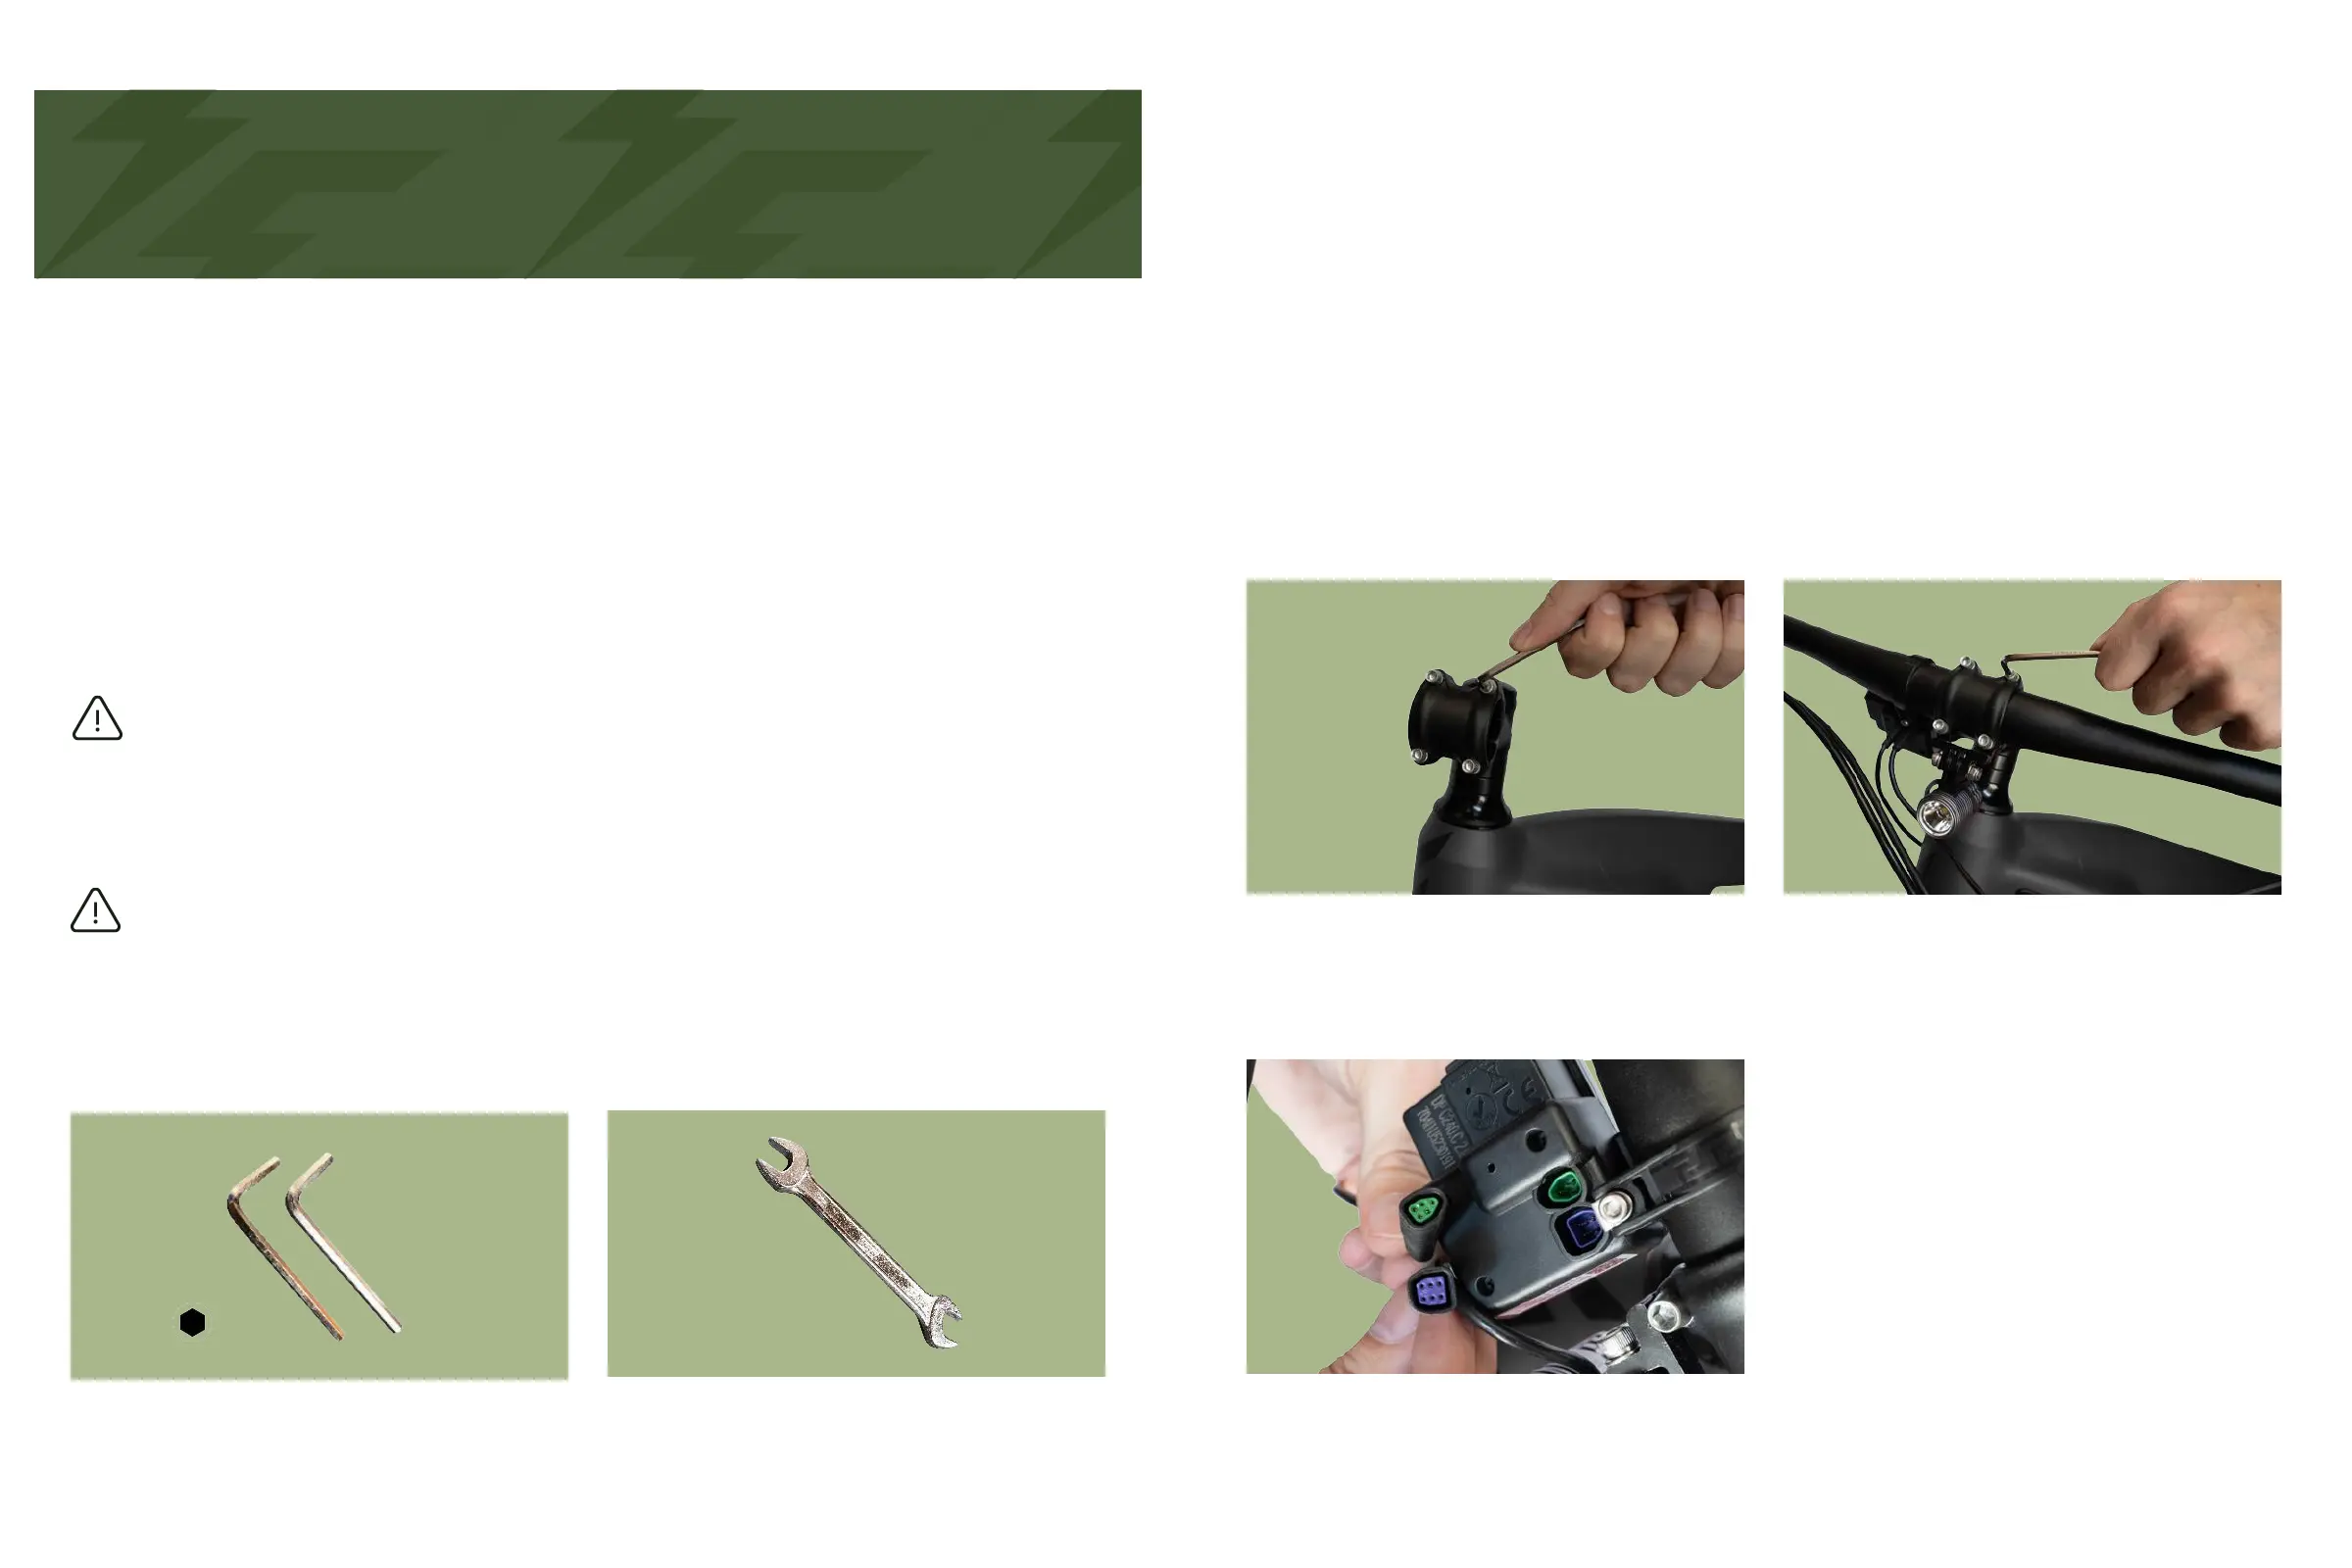
STEP 1: Install the Handlebars
1.Usingthe4mmAllenwrench,unscrewthe4boltsandremovethestemplate.
2.Placeyourhandlebarsintothegrooveandreplacethestemplateoverthetop.
Tightentheboltsabout3/4thsoftheway.
3.Makethenaladjustmentsonyourhandlebarspositioning,ensuringthattheyare
centeredandatacomfortableanglebeforetighteningtheboltstherestoftheway.
Note: DO NOT depress the brake levers before installing the front wheel.
Figure1.StemPlateBoltRemoval Figure2.TighteningStemPlateBolts
Figure3.ConnectingtheLCDcables
STEP 2: Connect LCD Display
4mm&2.5mmAllenKeys 15mmWrench
1.LoosentheboltonthebackoftheLCD
usingthe2.5mmallenkey.
2.TwistaroundtheLCDscreenandplug
thecorrespondingconnectortoitsmatch-
ingport(greentogreen,purpletopurple).
3.RotatetheLCDbacktoyourpreferred
position,andre-tightenthebolt.