Mounting
A power supply kit dedicated to this product cabling will shortly be available at your supply.
• Unplug the “+” from the battery
• Make sure you follow the car manufacturer instructions (airbag, alarm system, computer, immobiliser ...).
• Always use battery lead connections.
Cable routing
The 12V supply cables should be passed down one side of the vehicle and the signal cables down the other.
These cables must be suitably protected to avoid any damage to the insulation, especially when feeding the
cable through from the engine compartment to the passenger cabin.
Installation
We have taken time to design a product that will work exceptionally well. To add to this we have included a
fixing kit to ensure the subwoofer remains securely mounted. Please follow the below mentioned steps to ensure
the subwoofer is mounted correctly.
1 - Rear seats must be positioned in their normal fixed position.
2 - Decide the best location possible that suits your automobile and space available. We recommend the
best location for optimum sound quality and most secure is to position behind the rear seats, in the trunk
of the automobile. It can be positioned in either left centre or right side locations. This will not change the
sound quality, as bass frequencies are not directional.
3 - Ensure the area for subwoofer location is clean and tidy. Any loose objects are removed, as they could knock
and damage the subwoofer, and this is not covered by the warranty.
4 - Once the location has been decided, carefully attach the fixing template with scotch tape (fig. 1).
5 - Now mark the screw hole positions for the fixing brackets. (Please verify with template).
6 - Drill two holes 2 mm for the 4 fixing brackets, at your defined locations. It is advisable that the drill
depth be reduced to a minimum length, so to prevent drilling to deep into the textile of the seat (fig. 2).
7 - Now carefully position the brackets and one screw per bracket into place (fig. 3).
8 - Now take the two fixing straps and thread through the aperture available on the fixing bracket (fig. 4)
and position the second screw on each bracket.
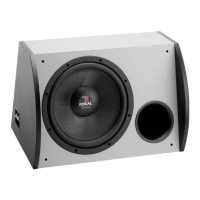
9 - Now place the subwoofer into position, lay the straps around the grille. These must be positioned at the
extremity of grille, as indicated on diagram, this ensures the straps do not interfere with the driver or port
tube. Ensure the straps are flat and untangled (fig. 5).
10 - Attach the straps and pull tight (fig. 6).
11 - Ensure the cabinet is securely fastened into position. Adjust straps if necessary to maintain a secure hold
to the rear seat.
12 - Your subwoofer is ready for wiring and setting.
ACCESS SOLUTION 25 A1
User Manual
5
notice solution 25 a1.indd 5notice solution 25 a1.indd 5 13/02/07 17:40:0513/02/07 17:40:05
 Loading...