ENGLISH
4
indicating that there is a signal level of +4dBu at the output.
Meters 5 to 8 have no function in this mode.
Mode 2. Digital (optional ADC card fitted).
Meters 1 to 8 indicate the signal level that exists in the
signal path after the Soft Limiter and just before the point of
conversion on the optional ADC card. 0dBfs (reached when
the red LED is lit) indicates the maximum signal level that
can be converted by the optional ADC card and should only
be lit for very short durations to ensure a good quality
recording with no digital overload. The meter signal is taken
from a point after the Soft Limiter, so if the Soft Limiter has
been selected to protect the ADC from overload, the effect
of the Soft Limiter on the peak signal levels will be indicated
by a reduction in peak levels on the LED meter.
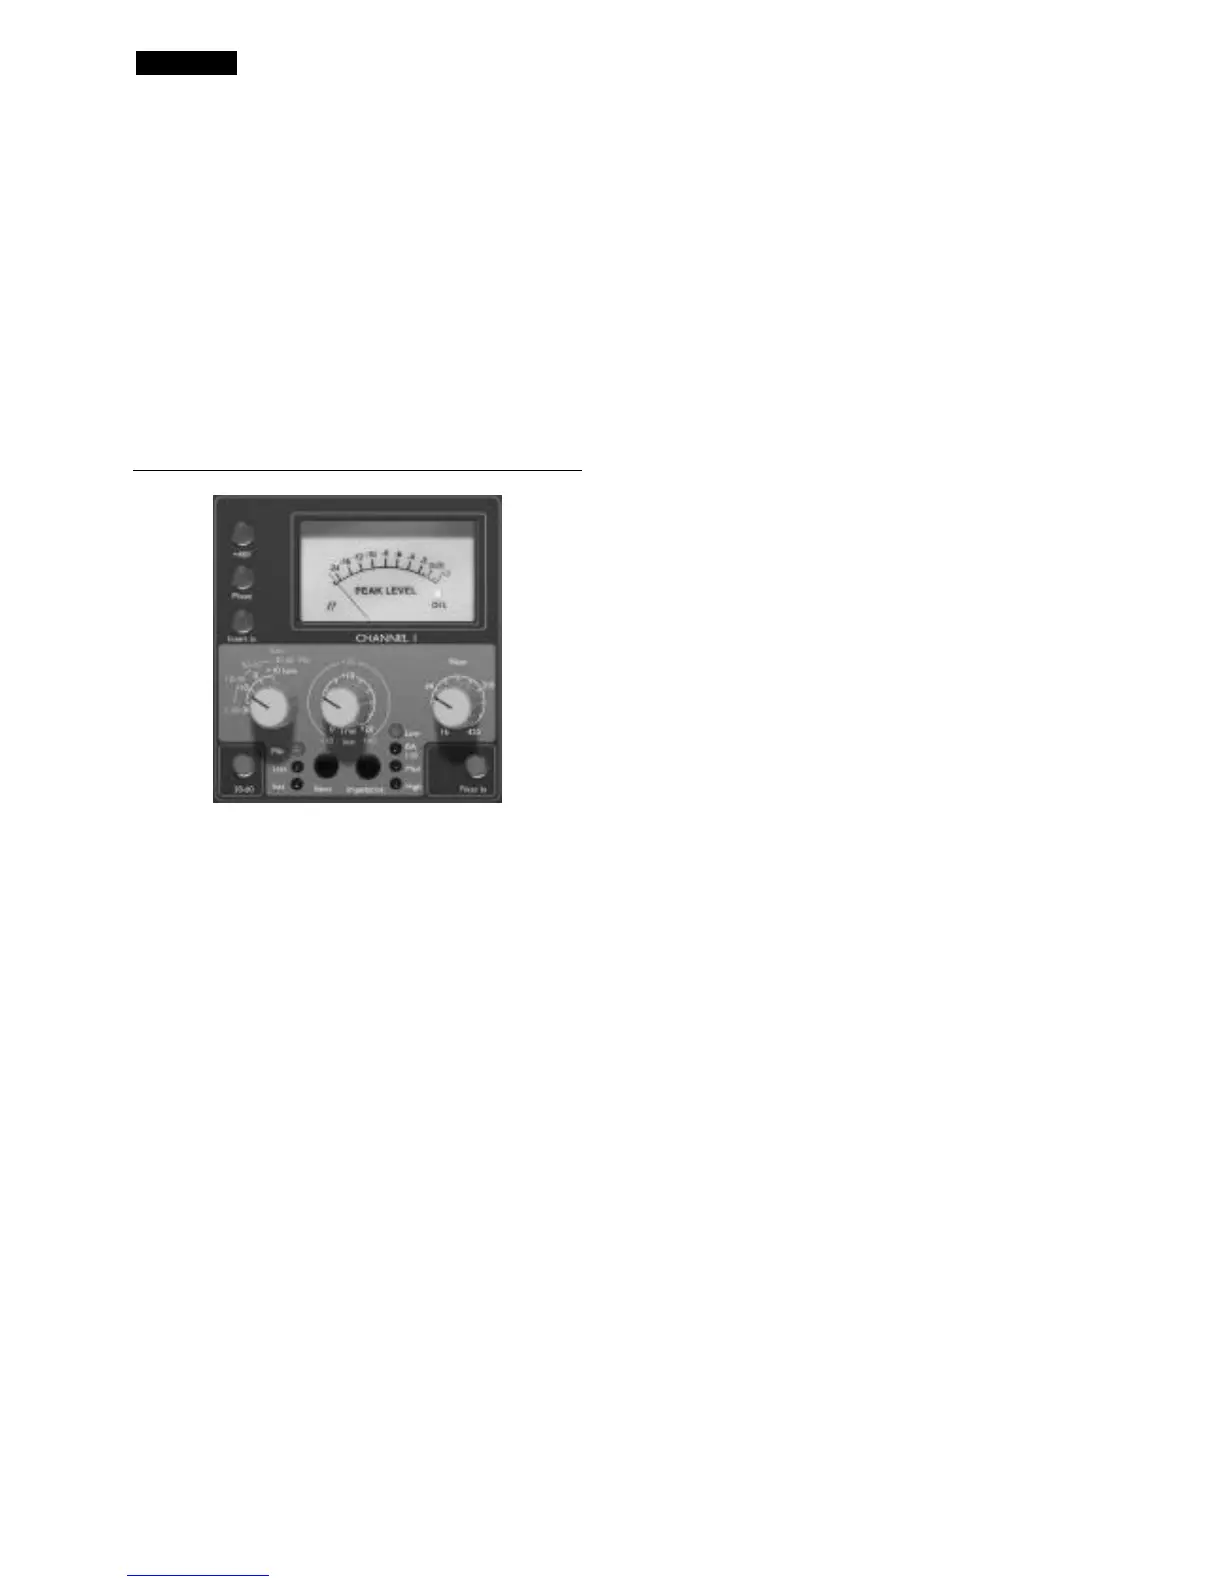
Input Stage
Three input options are provided to give compatibility with
microphone, line or instrument level sources.
Input
Pressing INPUT steps through each of the three inputs, as
indicated by the corresponding LEDs. When the Mic LED is
lit, the microphone input is active etc. Hence a mixture of
microphone, line and instrument inputs may be selected
across the four channels simultaneously.
Mic Input Gain
With the Mic input selected, the user has access to the full
gain range in 10dB steps from 0dB to +60dB (yellow
legend). The gain range is split between two gain modes
depending upon the status of the 30-60 switch.
Mode 1 Mic Gain Range 0-30
With the 30-60 switch off, the rotary gain knob operates
over a gain range of 0dB to +30dB, the level of gain chosen
being indicated on the front panel by the outer arc of yellow
numbers around the gain knob.
Mode 2 Mic Gain Range 30-60
With the 30-60 switch on (illuminated), the rotary gain
knob operates over a gain range of 30dB to 60dB, the level
of gain chosen being indicated on the front panel by the
outer arc of yellow numbers around the gain knob.
An additional 20dB of gain can be applied to the signal after
the Mic/line gain knob using the Trim knob. See ‘Trim’
control text below for full explanation.
Line Input Gain
With the line input selected, the user has access to gain
settings ranging from –20dB to +10dB, indicated on the
front panel by the arc of white numbers around the gain
knob. The 30-60 switch is inactive when the line input is
selected, as the gain range for Line level inputs is restricted
to –20dB to +10dB in 10dB steps.
An additional 20dB of gain can be applied to the signal after
the Mic/line gain knob using the Trim knob. See ‘Trim’
control text below for full explanation.
Instrument Input Gain
With the instrument input selected, gain is applied to the
input signal by using the trim control only, which allows
+10dB to +40dB of gain range. The level of gain chosen is
indicated on the front panel by the outer arc of yellow
numbers around the gain knob. This input is suitable for
high impedance sources such as guitar or bass pickups
(which may be connected directly without the need for an
external DI box) or vintage synthesizers with high
impedance outputs.
Trim
The Trim control provides additional variable gain of 0dB to
+20dB when Mic or line inputs are selected. The level of
gain chosen is indicated on the front panel by the inner arc
of white numbers around the gain knob.
The additional 20dB of gain that can be applied to the Mic
or Line signal is very useful for two reasons:
When high gain is required
The trim used in conjunction with the Mic gain of 60dB will
give a total of up to 80dB of pre-amp gain, making it very
useful for getting good digital recording levels from very low
output dynamic and ribbon microphones.
Gain adjustment during recording
When small amounts of gain adjustment are needed to
correct for performance level variations during recording,
use the trim knob rather than the stepped Mic/Line gain
knob, as switching the 10dB gain steps would be much too
intrusive. It is therefore good practice to apply some Trim
gain before using the 10dB stepped gain knob to find the
optimum recording level so that the Trim control can be
used to gently add or take away gain later, if so required.
+48V
Pressing the +48V switch provides +48V phantom power,
suitable for condenser microphones, to the rear panel XLR
microphone connector. This switch does not affect the
other inputs. If you are unsure whether your microphone
requires phantom power, refer to its handbook, as it is
possible to damage some microphones (most notably
Ribbon Microphones) by providing phantom power.
 Loading...