The Side
Printed with
Logo
The Side
Where
Control
Button Is
Filter Assembly
Bracket
Protruding
Point
Upwards
Float Plate
Stopper
Floater
Guide Pin
Humidifier Base
Float Plate
Axial Slot
Revolving Sha
Protruding Point Upwards
Remarks:
Need to force the sha
of the lever float into the slot.
Remarks:
Schematic diagram
of installation in place.
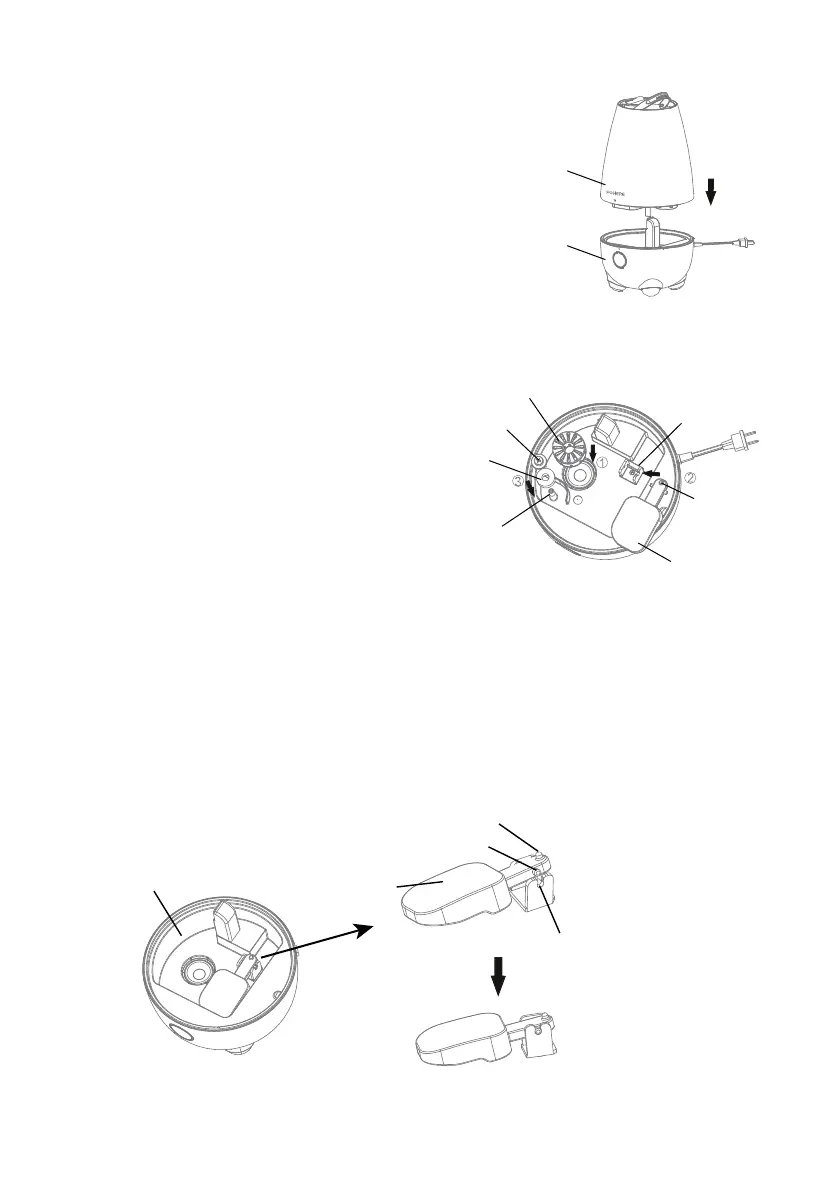
3.WATER TANK PLACEMENT
When you are trying to fasten the water
tank back to its seat, remember to align
the side printed logo with the side where
the control button is.
4.FILTER ELEMENT ASSEMBLY
1) The filter element assembly shall rest
above the atomizer plate in the water
groove.
2) Put the pivots of the lever float into the
holes of the bracket and then push the
lever float to get it fastened. Remember
to leave the protruding point of the float
upward.
3) Put the float onto the guide pin of
floater along its hole and then press the
floater stopper onto the guide pin so as
to ensure the floater will not run o the
guide pin.
5.LEVER FLOAT ASSEMBLY
1) When using the humidifier, please check whether the float plate is installed in place.
2) If the float plate is not installed in place, may cause the sink to leak.
09