CHARGING
NOTE: When launching
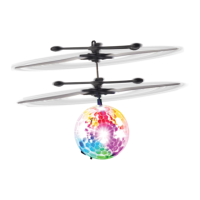
the Orbiter hold it as
pictured, keeping fingers
away from the spinning
blades. Always hold
it upright, not at an
angle as it will fly in the
direction it’s tilted.
1. To start the Orbiter, flip the small black ON/OFF switch, located on the bottom of the Orbiter,
to the “ON” position.
- When the lights come ON, hold the Orbiter in a straight up position.
- CAUTION: The blades spin fast and start automatically within 2-3 seconds of powering on the
Orbiter. Keep fingers, face and hair away from the blades at all times!
- Release the Orbiter from your hand and let it fly up.
2. To stop the Orbiter, aim the remote directly at the orbiter and press the
“ON/OFF” button on the remote.
The Orbiter will stop flying but the switch is still “ON.”
NOTE: When the Orbiter is flying and there are no objects directly beneath it,
press the “ON/OFF” button on the remote, then the Orbiter will return to the ground.
3. To play again just press the “ON/OFF” button on the remote once more.
When you have finished playing, press the “ON/OFF” button again.
Note: The remote control does not control the flight direction.
It only powers the Orbiter ON/OFF.
4. Flip the switch on the bottom of the Orbiter to “OFF” after each use and to charge it.
5. Do not over charge the Obiter. Remove from the charger once fully charged
and do not leave the Orbiter charging unattended.
1. Turn the power switch located on the bottom of the orbiter to “OFF.”
2. Connect the USB cable to the Orbiter and plug into a USB port.
3. The red light will turn off once the Orbiter is charged.
4. Charging time is approximately 20 minutes. Flying time is approximately 5 minutes.
TO CONTROL THE ORBITER
CORRECT USE
NOTE: This toy is for ages 8+. Adult supervision is required at all times when children are playing with this toy.
Force1 RC cannot be held liable for injury or property damage of any kind. Upon use of this product,
the end user assumes responsibility.
 Loading...