------------PART 1 - ENGINE SYSTEMS------------
WARNING:
Due to the weight of the
cast iron oil pan, exercise care on removal
to avoid personal injury.
INSPECTION AND REPAIR
1. Scrape all gasket material from the gasket surface
then wash the oil pan in a suitable solvent and dry
with a clean lint free cloth or compressed air.
2. Inspect the pan for cracks, damaged drain plug
threads or distorted gasket surface.
INSTALLATION
Installation of the oil pan follows the removal procedure
in reverse. On installation observe the following
requirements.
• Be sure the gasket surfaces on the oil pan and
block are clean.
• Install a new gasket and apply a thin film of sealer
to the gasket, front cover and oil pan.
• Position the oil pan and install a bolt finger tight
at each corner.
• Install the remaining bolts, tighten the rear bolts
first, then tighten from the middle outward in each
direction to the specified torque, see "Specifica-
tions," Chapter 3.
• Fill the engine with the correct grade and quanti-
ty
of oil, see "Specifications," Chapter 3.
• Operate the engine and check for oil leaks.
OIL PUMP
REMOVAL
1. Remove the oil pan as previously described in this
Chapter.
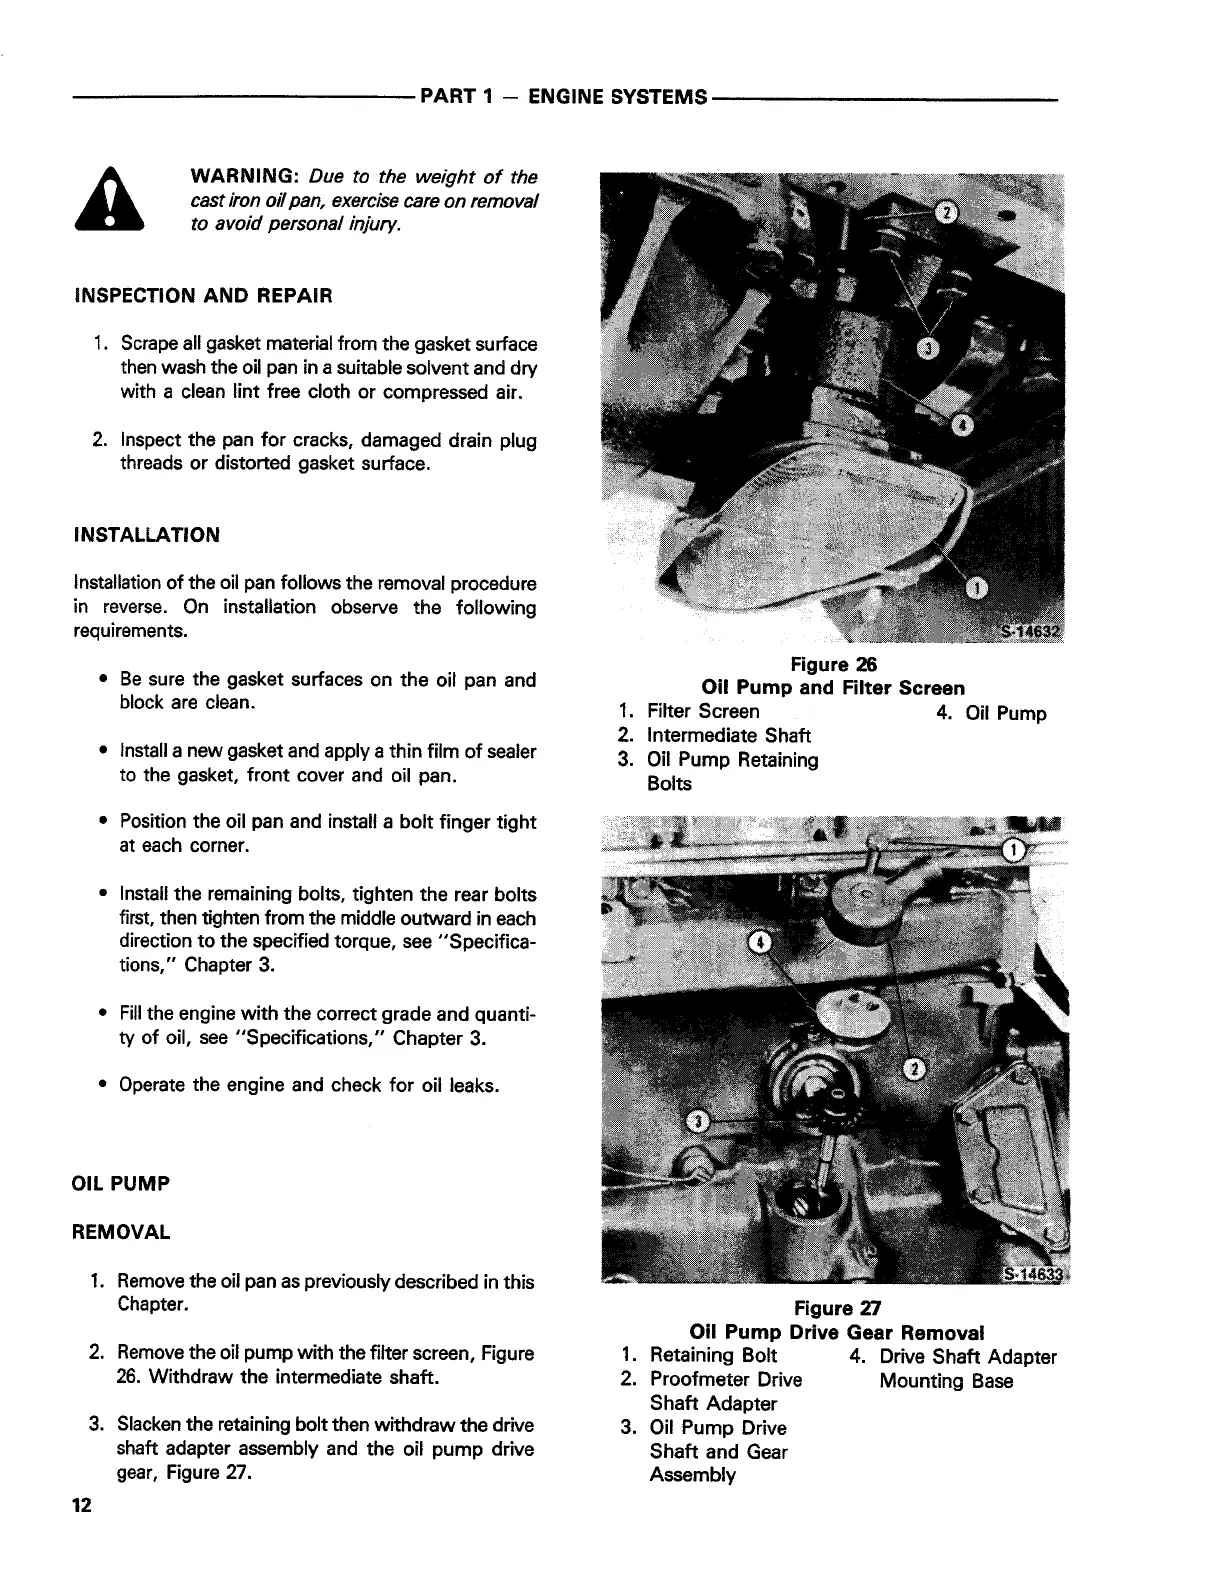
2. Remove the oil pump with the filter screen, Figure
26. Withdraw the intermediate shaft.
3. Slacken the retaining bolt then withdraw the drive
shaft adapter assembly and the oil pump drive
gear, Figure 27.
12
Figure 26
Oil Pump and Filter Screen
1. Filter Screen 4. Oil Pump
2. intermediate Shaft
3. Oil Pump Retaining
Bolts
Figure
Z1
Oil Pump Drive Gear Removal
1. Retaining Bolt 4. Drive Shaft Adapter
2. Proofmeter Drive Mounting Base
Shaft Adapter
3. Oil Pump Drive
Shaft and Gear
Assembly
 Loading...