----------------CHAPTER 1----------------
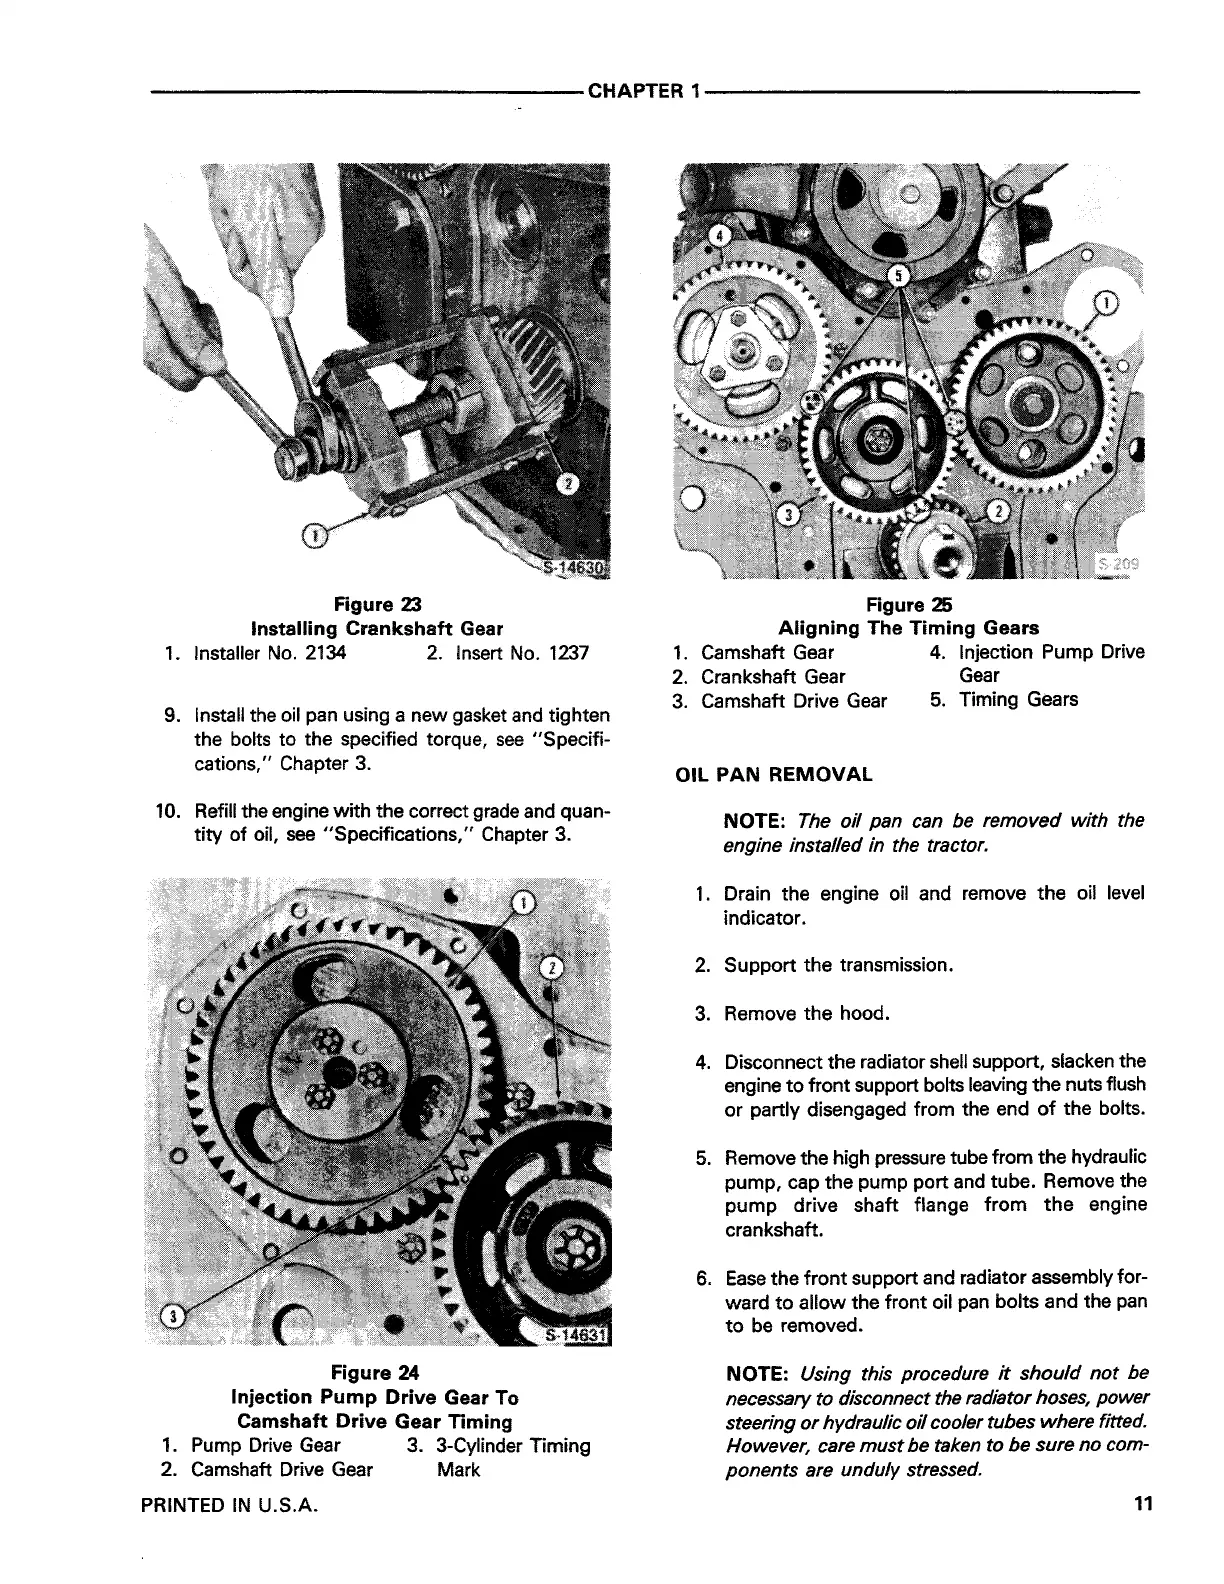
Figure 23
Installing Crankshaft Gear
1. Installer No. 2134 2. Insert No. 1237
9. Install the oil pan using a new gasket and tighten
the bolts to the specified torque, see "Specifi-
cations," Chapter 3.
10. Refill the engine with the correct grade and quan-
tity of oil, see "Specifications," Chapter 3.
Figure 24
Injection Pump Drive Gear To
Camshaft Drive Gear Timing
1. Pump Drive Gear 3. 3-Cylinder Timing
2. Camshaft Drive Gear Mark
PRINTED IN U.S.A.
Figure 25
Aligning The Timing Gears
1. Camshaft Gear 4. Injection Pump Drive
2. Crankshaft Gear Gear
3. Camshaft Drive Gear 5. Timing Gears
OIL PAN REMOVAL
NOTE:
The oil pan can be removed with the
engine installed in the tractor.
1. Drain the engine oil and remove the oil level
indicator.
2. Support the transmission.
3. Remove the hood.
4. Disconnect the radiator shell support, slacken the
engine to front support bolts leaving the nuts flush
or partly disengaged from the end of the bolts.
5. Remove the high pressure tube from the hydraulic
pump, cap the pump port and tube. Remove the
pump drive shaft flange from the engine
crankshaft.
6. Ease the front support and radiator assembly for-
ward to allow the front oil pan bolts and the pan
to be removed.
NOTE: Using this procedure it should not be
necessary to disconnect the radiator hoses, power
steering or hydraulic oil cooler tubes where fitted.
However, care must be taken to be sure no com-
ponents are unduly stressed.
11
 Loading...