Every 12 000 miles or 12 Months 1•19
1
6 An improved type of transmission fluid is
used in later models and before topping-up or
refilling it is necessary to identify the
transmission being worked on so that the
correct fluid may be obtained.
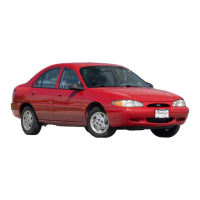
7 Locate the transmission identification
number which is stamped on a metal tag
attached to the top of the valve body cover
(see illustration). If, at the end of the second
line on the metal tag, the prefix E3RP-
appears, then the transmission is of the early
type. If the prefix is E6RP- then the unit is of
the later type. Later transmissions can also be
identified by having a black dipstick stating
the fluid specification and type. Having
determined whether the transmission is of the
early or later type, refer to “Lubricants and
fluids” for the fluid requirement. Under no
circumstances may the later type fluid be used
in the early type transmission, and vice versa.
8 If the fluid level was below the minimum
mark when checked or is in constant need of
topping-up, check around the transmission
for any signs of excessive fluid leaks, and if
present then they must be rectified without
delay.
9 If the colour of the fluid is dark brown or
black this denotes the sign of a worn brake
band or transmission clutches in which case
have your Ford dealer check the transmission
at the earliest opportunity.
Carry out a thorough road test, ensuring
that all gearchanges occur smoothly without
snatching, and without an increase in engine
speed between changes. Check that all gear
positions can be engaged with the
appropriate movement of the selector lever,
and with the vehicle at rest. Check the
operation of the parking pawl when “P” is
selected.
1 Carry out a thorough inspection of the
driveshafts and joints as follows.
2 Jack up the front of the car and support it
securely on axle stands (see “Jacking and
Vehicle Support”).
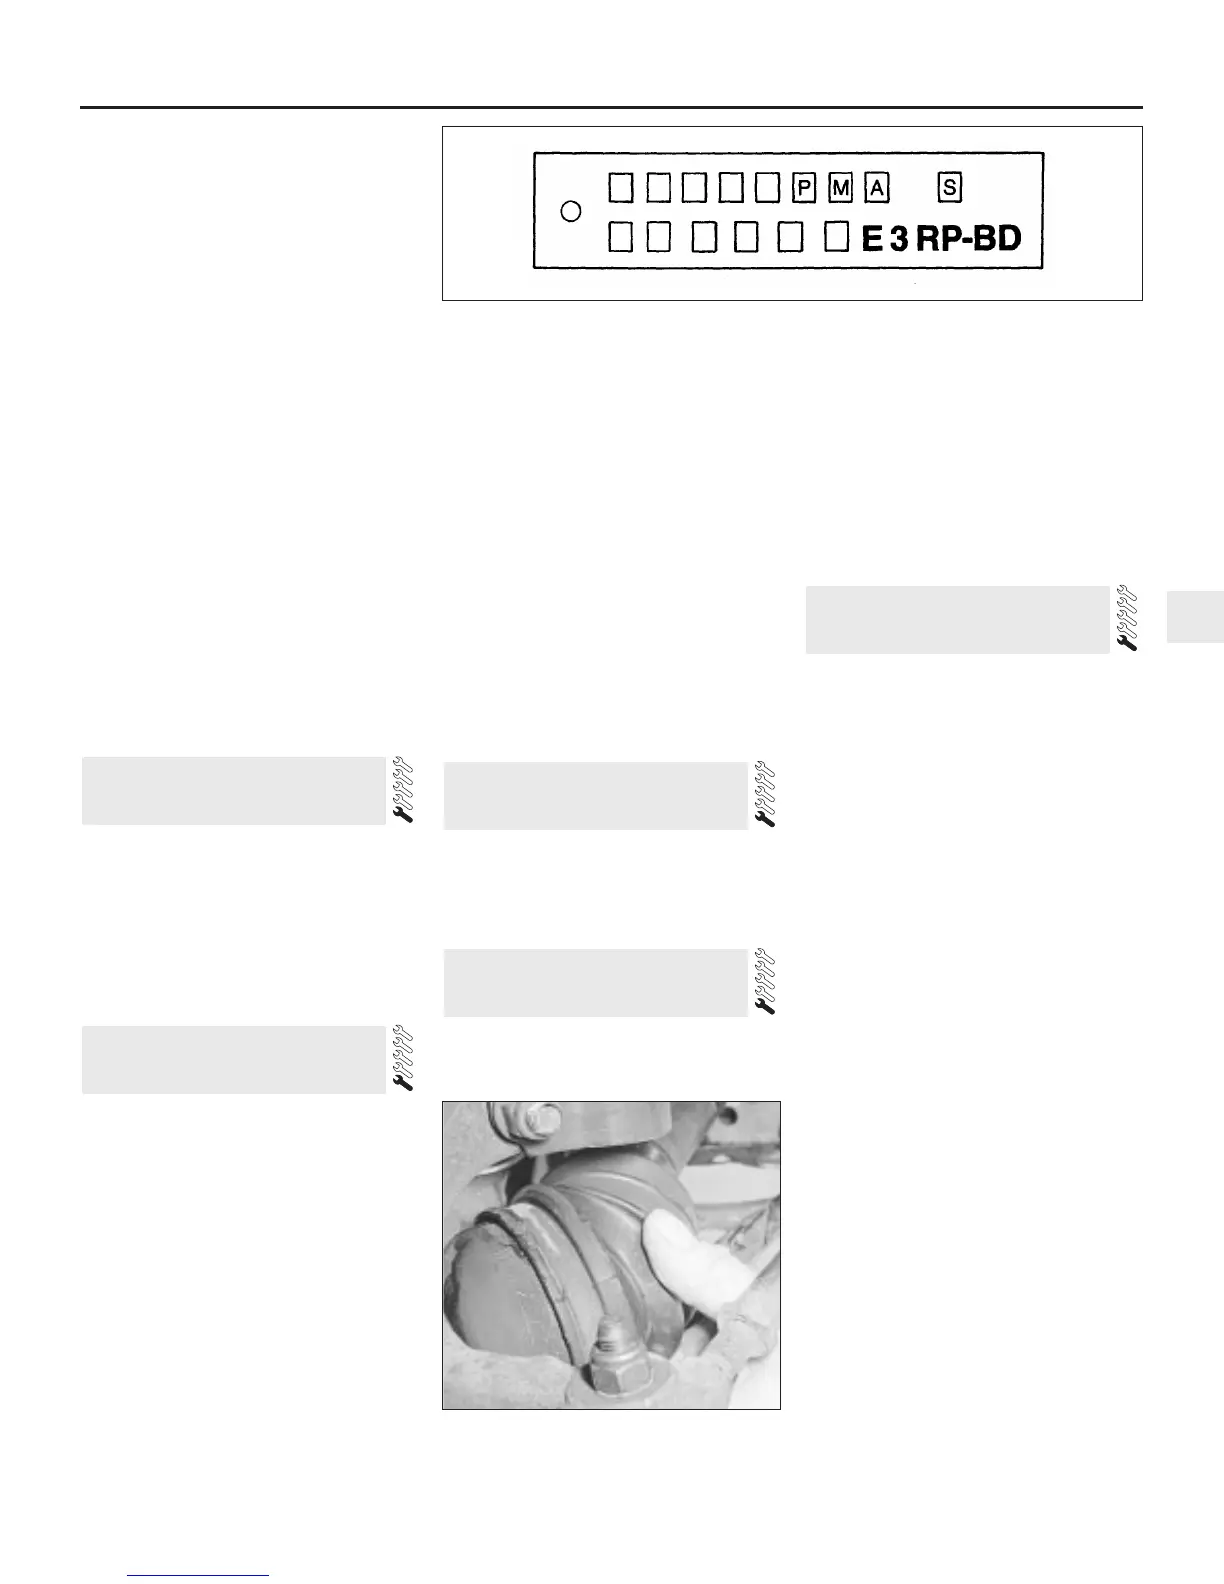
3 Slowly rotate the roadwheel and inspect the
condition of the outer joint rubber bellows.
Check for signs of cracking, splits or
deterioration of the rubber which may allow
the grease to escape and lead to water and
grit entry into the joint (see illustration). Also
check the security and condition of the
retaining clips. Repeat these checks on the
inner constant velocity joints. If any damage
or deterioration is found, the bellows should
be renewed as described in Chapter 8.
4 Continue rotating the roadwheel and check
for any distortion or damage to the driveshaft.
Check for any free play in the joints by first
holding the driveshaft and attempting to
rotate the wheel. Repeat this check by holding
the inner joint and attempting to rotate the
driveshaft. Any appreciable movement
indicates wear in the joints, wear in the
driveshaft splines or loose retaining nut.
5 Road test the car and listen for a metallic
clicking from the front as the car is driven
slowly in a circle with the steering on full lock.
If a clicking noise is heard this indicates wear
in the outer constant velocity joint caused by
excessive clearance between the balls in the
joint and the recesses in which they operate.
Remove and inspect the joint (Chapter 8).
6 If vibration, consistent with road speed, is
felt through the car when accelerating, there is
a possibility of wear in the inner constant
velocity joint. If so, renewal of the driveshaft
inner joint will be necessary.
Check the wheel rims for distortion,
damage and excessive run-out. Also make
sure that the balance weights are secure with
no obvious signs that any are missing.
Check the torque of the wheel bolts.
1 Work around the vehicle, and lubricate the
bonnet, door and tailgate hinges with a light
machine oil such as Duckhams Home Oil.
2 Lightly lubricate the bonnet release
mechanism and exposed sections of inner
cable with a smear of grease.
3 Check the security and operation of all
hinges, latches and locks, adjusting them
where required. Where applicable, check the
operation of the central locking system.
4 Check the condition and operation of the
tailgate struts, renewing them if either is
leaking or is no longer able to support the
tailgate securely when raised.
Instruments and electrical
equipment
1 Check the operation of all instruments and
electrical equipment.
2 Make sure that all instruments read
correctly, and switch on all electrical
equipment in turn to check that it functions
properly.
Steering and suspension
3 Check for any abnormalities in the steering,
suspension, handling or road “feel”.
4 Drive the vehicle, and check that there are
no unusual vibrations or noises.
5 Check that the steering feels positive, with
no excessive “sloppiness”, or roughness, and
check for any suspension noises when
cornering, or when driving over bumps.
Drivetrain
6 Check the performance of the engine,
clutch, transmission and driveshafts.
7 Listen for any unusual noises from the
engine, clutch and transmission.
8 Make sure that the engine runs smoothly
when idling, and that there is no hesitation
when accelerating.
9 Where applicable, check that the clutch
action is smooth and progressive, that the
drive is taken up smoothly, and that the pedal
travel is not excessive. Also listen for any
noises when the clutch pedal is depressed.
10 Check that all gears can be engaged
smoothly, without noise, and that the gear
lever action is not abnormally vague or
“notchy”.
11 Listen for a metallic clicking sound from
the front of the vehicle, as the vehicle is driven
slowly in a circle with the steering on full lock.
32 Road test
31 Hinge and lock check and
lubrication
30 Roadwheel check
29 Driveshaft check
28 Automatic transmission
selector mechanism check
29.3 Checking driveshaft outer joint
rubber bellows
27.7 Transmission identification number on valve body tag
 Loading...