80” [2032mm]
A
A - 16” [406mm]
B - 8” [204mm]
Door
Height
(H)
(H)
plus
1-
5
/8”
3
/8” [9.5mm] Gap
A
A
A
B B
2
1
4
2
2
4
4
4
4
2
2
2
4
4
4
5
5
5
Wrench/Socket Drill Bit Allen Wrench Driver Bit 2’-3’ Level Power Drill Tape Measure
1/2” (13mm)
9/16” (14mm)
11/16” (17mm)
3/32”
7/32”
1/4”
3/8”
7/16”
3mm #8 Phillips
12'
NOTE: This kit is best suited for doors up to 1-
3
/8” thick, up to 36” wide, and no more than
150 pounds.
Before installing the Rail, identify secure points to attach the Rail.
For most wall installations, it is necessary that the Lag Screws are secured to wall studs.
For Lag Screws that cannot be secured to a
wall stud, it will be necessary to use the
Wall Anchors to secure the Lag Screws
into the wall.
Home construction varies; holes may be
added to the Rail to allow Lag Screws
to attach to wall studs.
IMPORTANT:
If at least FOUR Lag Screws cannot
be secured to wall studs or other
structural points, DO NOT INSTALL
THIS RAIL KIT.
Barn Door Rail Kit
Parts Included
Recommended Tools
Planning
Installation Manual
4310485
W-KIT-1-BK-1PC
Iron Black
● READ ALL INSTRUCTIONS AND CHECK PARTS BEFORE STARTING INSTALLATION
● RETAIN ALL PACKING MATERIALS UNTIL INSTALLATION IS COMPLETE
Spacer
SS-10.1007
Door Guide
SS-10.1013
Door Stop Front
ss-10.1236
Door Stop Rear
ss-10.1239
Anti-Jump Pad
SS-10.1076
Waylon
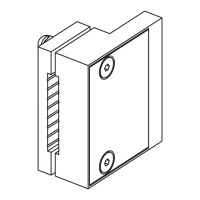
Trolley
SS-20.1059
Floor Anchor
SS-10.1011
1-1/4” Screw
SS-10.1012
Nut (M10-1.5)
SS-10.1010
Acorn Nut (M5)
ss-10.1244
Washer
SS-10.1009
Washer (M5)
ss-10.1243
3/4” Screw
SS-10.1075
Socket Head Bolt (M5-0.8 x 35)
ss-10.1242
Bolt (M10-1.5 x 50)
SS-10.1077
Lag Screw
SS-10.1006
Wall Anchor
SS-10.1002
 Loading...