Setup Instructions -
Once the studio monitors have been placed in their final location, it is time to proceed to connecting you
continued
p-5
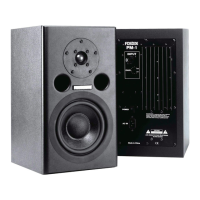
PM-2 studio monitors to the mixing console or digital workstation. Connection to the PM-2 can be made
using XLR or TRS connectors. The gain control on the back of the monitor allows continuously variable
adjustments to match most input types from -10dBV to +4dBu. Their input is electronically balanced and is
compatible with unbalanced sources, although this may require an adapter. The connection of the PM-2 to
the console/digital workstation should be done in the following order.
Step 1: Make sure that all equipment has been powered down.
Step 2: Confirm that all gain controls, on the monitor and the source, are set to the minimum setting.
Step 3: Connect the source to the PM-2 monitor.
Step 4: Power up the all source equipment and then turn on the PM-2 last.
Step 5: Set the gain of both monitors at medium setting and slowly bring up the gain of the console.
Step 6: Adjust the gain of both monitors for balance and for best signal to noise ratio.
Once the above steps have been completed, you are ready to use your PM-2 monitors. It is recommended
that you now play some familiar audio material and make any final adjustments, as far as placement or
level, to get the optimum performance in your monitoring environment.