3
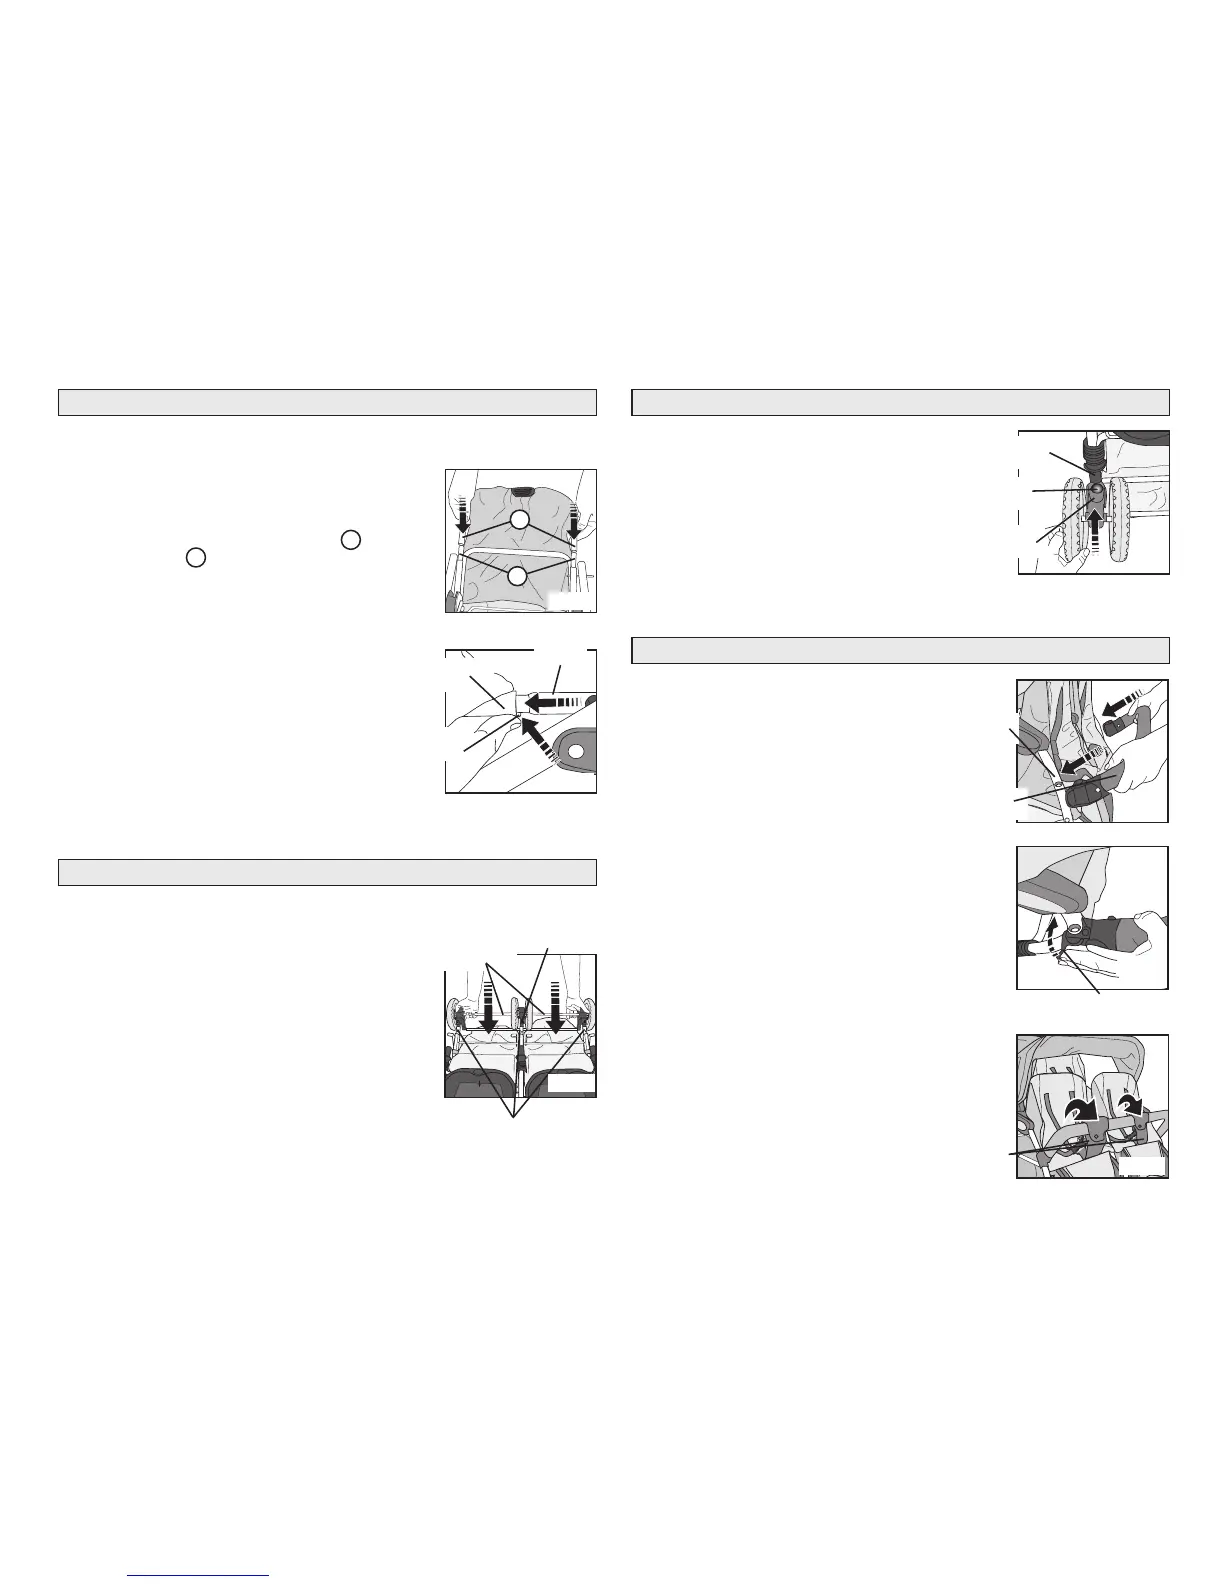
STEP 1 - Basket Assembly
1. Place folded stroller down on the floor with the footrests facing down.
2. From the back of the stroller, locate the rear basket tube
inside the stroller basket. Lift rear basket tube with the
basket fabric out of the basket.
3. Line up open ends of Rear Basket Tube with ends
of Basket Tube and slide onto Basket Tube
(Fig. 1).
4. Depress Metal Spring Buttons on both sides
of the Basket Tube and slide Rear Basket Tube
in until metal spring button snaps though the hole
on the Rear Basket Tube (Fig. 2).
5. Pull out on rear basket tube to check that
snaps are locked in place.
STEP 2 - Rear Wheel Assembly
1. Turn stroller over on its back so that the footrests are facing
up.
2. Align and slide center rear wheel assembly sleeve onto
center leg tube, then slide outside sleeves onto outside
tubes (Fig. 1).
3. After all (3) rear wheel assembly sleeves are started
onto the rear leg tubes, move parking brake lever
down into the locked position.
4. Slide all (3) rear wheel assembly sleeves up rear legs
until spring button snaps into hole in rear wheel assembly
sleeve.
Pull out on Rear Wheel Axle to be sure Rear Wheel
Assembly are securely snapped to each rear leg.
Rear Wheel
Assembly Sleeves
Fig. 1
Fig. 2
Fig. 1
Metal Spring
Button
Center Rear
Wheel Assembly
Sleeve
Rear Wheel
Assembly
1
2
1
2
Basket
Tube
Rear Basket
Tube
4
1. Unfold stroller (see Folding and Unfolding Stroller
section).
2. With Foundations
®
logo up, position Arm Bar
Assembly onto front leg tubes between arm
rest stop and stroller seat bottom and
snap onto front leg on both sides (Fig. 1).
3. Lock Arm Bar to stroller frame by pushing
Arm Bar Clamp in toward stroller to (Fig. 2).
4. Repeat step 3 for opposite end of Arm Bar.
5. Place Passive Crotch Strap in center of both
seats over Arm Bar and secure snaps (Fig. 3).
STEP 3 - Front Wheel Assembly
1. Position front wheel assembly with larger opening
and swivel lock toward the front leg sleeve.
2. Slide Front Wheel Assembly onto one of the
front leg sleeves (Fig. 1).
Pull out on Front Wheel Assembly to be sure
it is securely snapped to the front leg.
3. Repeat for other Front Wheel Assemblies.
STEP 4 - Arm Bar Assembly
Front Wheel
Assembly
Arm Bar
Assembly
Arm Bar
Clamp
Fig. 1
Fig. 1
Fig. 2
Front Leg
Sleeve
Larger
Opening
Arm Bar
Stop
Passive
Crotch
Strap
Fig. 3