Do you have a question about the Four Seasons Courtyard SRFP2822 and is the answer not in the manual?
Key warnings for safe operation, including outdoor use, fuel types, and keeping children away.
Cautionary advice regarding assembly surface and potential hot components.
Disclosure of potential chemical exposure and associated health risks as per California law.
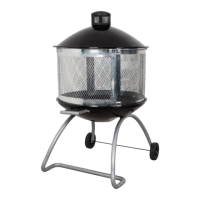
Detailed list of all components included with the firepit, identified by letters.
List of tools that are necessary for assembly but not included with the product.
Comprehensive list of all hardware, including bolts, nuts, washers, and pins.
Instructions for connecting the U tube to the left and right leg tubes using bolts and nuts.
Guide for attaching the wheels to the axle using pin bushes and stop nuts.
Connecting the bottom bowl to the leg assembly with fixing plates and hardware.
Securing the handle to the bottom bowl using bolts, washers, and nuts.
Instructions for placing the charcoal grid into the bottom bowl.
Assembling the screen sections using a vertical bracket, bolts, and nuts.
Connecting the doorframe and screen with a bracket and attaching the slide rail.
Finalizing the screen assembly by connecting it to the doorframe and slide rail.
Placing the assembled screen unit into the main bottom bowl.
Attaching the sliding door onto the designated slide rail.
Securing the chimney cap onto the top bowl using washers and nuts.
Placing the top bowl assembly onto the screen assembly and clipping it into place.
Guidance on regular inspection of components for safety, damage, or rust.
Methods for cleaning the firepit exterior, recommended cleaning agents, and removal of creosote.
Recommendations for safely storing the firepit when not in use, focusing on cooling and location.
Overview of the product's one-year limited warranty against defects in material and workmanship.
Information on how to contact customer service via phone or email for assistance.
| Brand | Four Seasons Courtyard |
|---|---|
| Model | SRFP2822 |
| Category | Outdoor Fireplace |
| Language | English |