Do you have a question about the Franke HT-200 and is the answer not in the manual?
Explains safety alert symbol, DANGER, and WARNING meanings for hazard identification.
Details electrical supply, grounding, outlet type, and proximity requirements for safe operation.
Covers cold water supply, pressure limits, plumbing codes, and fitting compound usage.
Ensures temperature control is off and tank is filled before electrical connection.
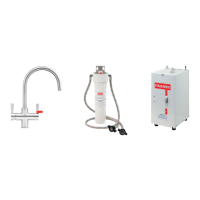
Instruction to install the shut-off valve following kit guidelines.
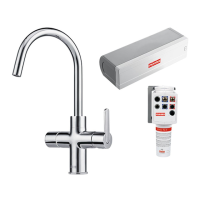
Instruction to install the dispensing head per its specific manual.
Details on positioning, marking, and attaching the mounting bracket for the tank.
Connects the 18" fill tubing to the rear top of the tank using a quick-connect fitting.
Connects the dispensing head supply hose to the center outlet of the tank.
Connects the main water supply line to the shut-off valve.
Turn temp control to 'Off', fill tank, then plug into grounded outlet.
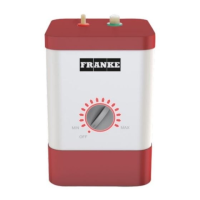
Set temperature control, wait for water to heat, and adjust as needed.
Steps to drain the tank to prevent damage from freezing temperatures.
Replace O-ring and screw to reseal the drain after winterizing.
Provides toll-free number and required information for assistance.
Outlines replacement, length, misuse, and consequential damage limitations.
| Brand | Franke |
|---|---|
| Model | HT-200 |
| Category | Water Heater |
| Language | English |