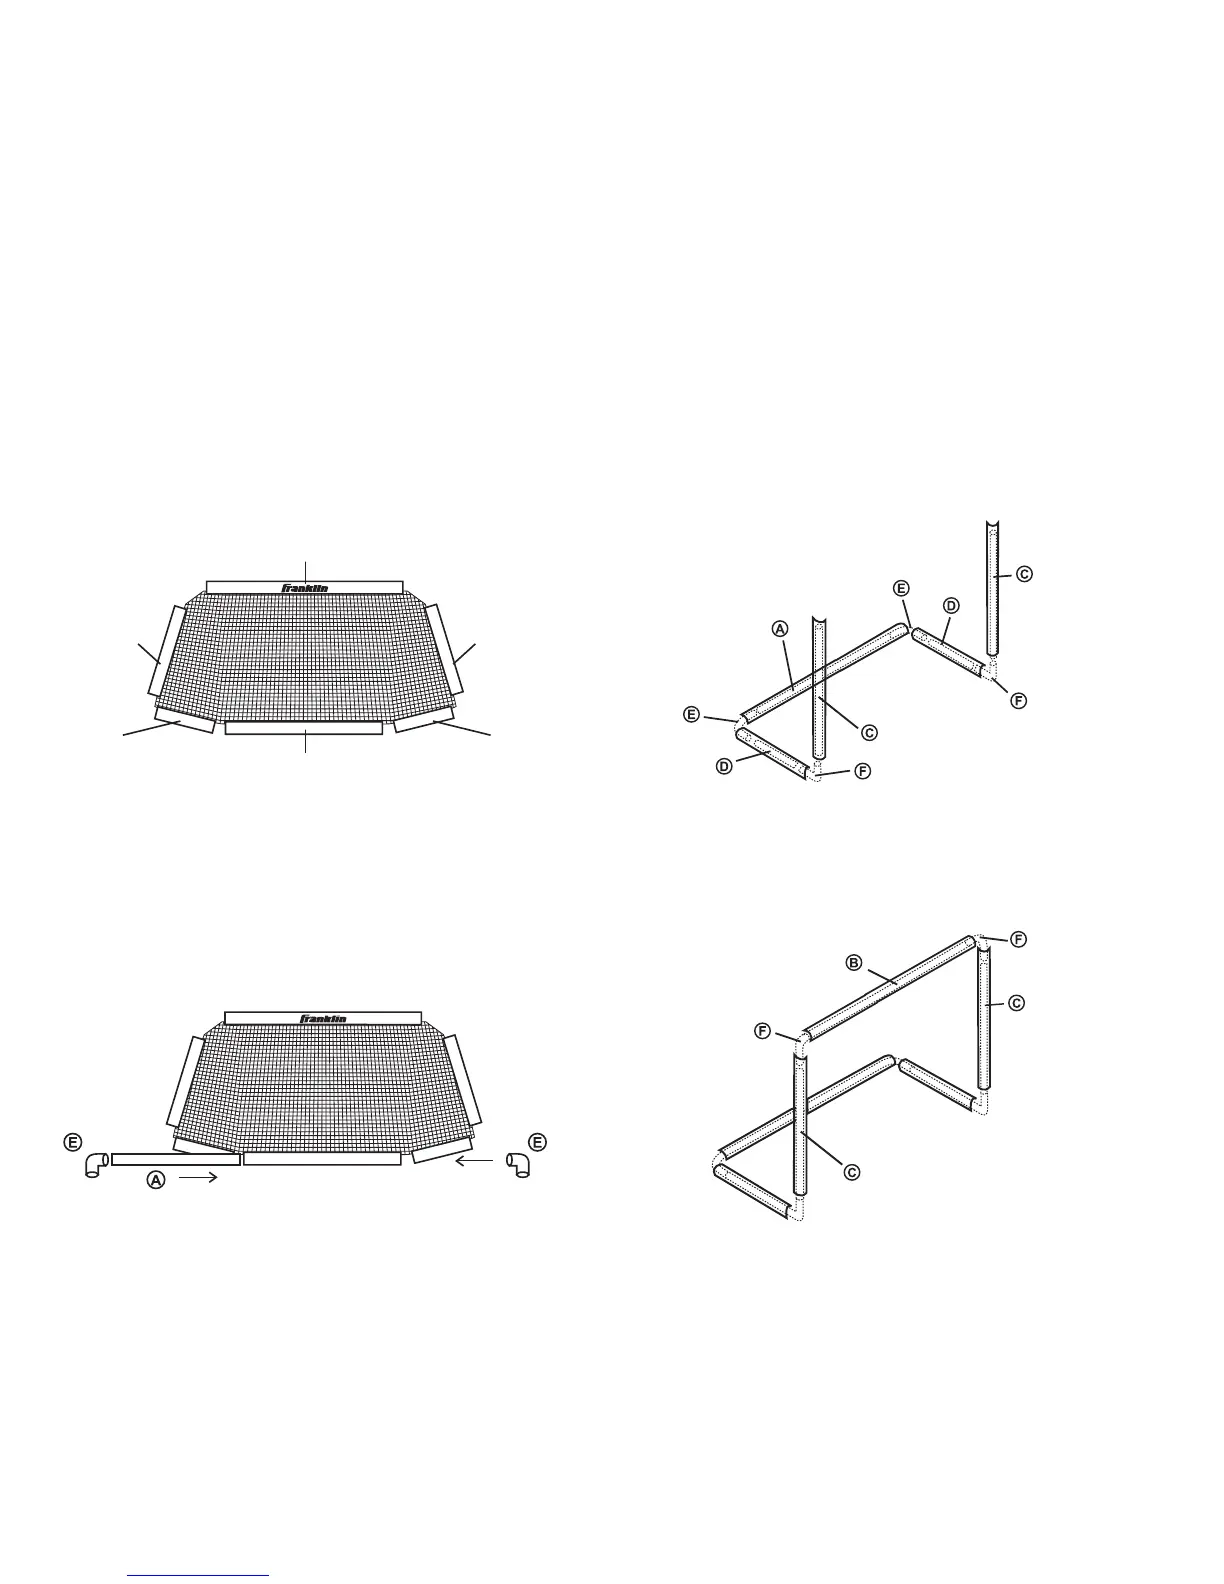
STEP 1 (Diagram 1): Familiarize yourself with the net as follows:
• Lay out net and find the red nylon sleeve section with Franklin printed in white
(The Franklin logo should face upward as shown). This is the top of the net.
• Nylon sleeves are attached to all front and bottom edges of the net. A piece of
tube will slip into each sleeve.
TOP / FRONT SLEEVE
SIDE / FRONT
SLEEVE
BOTTOM / SIDE
SLEEVE
SIDE / FRONT
SLEEVE
BOTTOM / SIDE
SLEEVE
BOTTOM / BACK SLEEVE
STEP 2 (Diagram 2):
• Starting from the bottom of the goal and working up, begin with a (A) tube and
slide it into the bottom/back sleeve.
• Place a (E) elbow on both ends of the (A) tube.
STEP 3 (Diagram 3):
• Insert a (D) tube into the bottom/side sleeve and connect to the (E) elbow which
is attached to the (A) tube. Repeat step with other bottom/ side sleeve.
• Place a (F) elbow onto the other ends of the (D) tubes.
• Insert the (C) tube through the top of the side/front sleeve then connect it to the
(F) elbow. Repeat this step on other side / front of the goal.
STEP 4 (Diagram 4):
• Place a (F) elbow connector on the top ends of the two upright (C) tubes.
• Insert the (B) tube into top of net sleeve (with Franklin logo) then attach the
ends of tube to the (F) elbow connector on the top of the (C) upright tubes
 Loading...